
How to Clean Stainless Steel Appliances Without Streaks (9 Methods)
After two years of built-up fingerprints and kitchen grease on my stainless refrigerator, I tested all nine methods in a single afternoon. Here's the honest ranking and the one reason most stainless steel cleaning attempts produce more streaking than they remove.
Jump to a section
What You'll Need
Step-by-Step Instructions
Identify the grain direction first
Every stainless steel appliance has a grain fine lines that run in one direction, similar to wood grain. Before you apply any product, look closely at the surface under good lighting to identify whether the grain runs horizontally or vertically. Always wipe in the direction of the grain, never against it or in circles. Wiping against the grain pushes cleaning solution and debris into the tiny grooves, creating visible streaks and micro-scratches that dull the finish over time. This single habit is the difference between a streaky wipe-down and a professional-looking result. Most refrigerators and dishwashers have a vertical grain, while some range hoods and oven doors use horizontal grain. Checking this first takes five seconds and saves you from re-cleaning.
Method 1 Microfiber cloth with warm water
For daily fingerprints and light smudges, a damp microfiber cloth is all you need. Wet the cloth with warm water and wring it out until it is barely damp excess water causes water spots on stainless steel. Wipe the entire surface following the grain direction in long, even strokes. Immediately follow with a dry microfiber cloth to buff away any remaining moisture. The ultrafine fibers in microfiber lift oils and fingerprints without scratching the surface or leaving lint behind. This method works perfectly for daily touch-ups on refrigerator doors, dishwasher fronts, and oven handles. Keep a dedicated microfiber cloth near the kitchen specifically for stainless steel using a cloth that previously had chemical cleaner residue can cause streaking.
Method 2 Dish soap and warm water solution
For grease and cooking splatter, mix two drops of mild dish soap into two cups of warm water in a spray bottle. Spray lightly onto the stainless steel surface never soak it. Wipe with a microfiber cloth in the direction of the grain. Rinse the cloth in clean warm water, wring it out, and do a second pass to remove all soap residue. Finish by buffing with a dry cloth. Soap residue is one of the biggest causes of streaks on stainless steel, so the rinse pass is essential. This method handles everyday kitchen grease, food splatters around the stove, and sticky fingerprints on the refrigerator handle. Use the smallest amount of soap possible more soap means more residue to remove.
Method 3 White vinegar spray
White vinegar cuts through water spots, light grease, and mineral deposits on stainless steel without damaging the finish. Fill a spray bottle with undiluted white vinegar and mist the stainless steel surface lightly. Let it sit for 30 seconds to dissolve buildup. Wipe with a clean microfiber cloth following the grain. Buff immediately with a dry cloth for a streak-free shine. Vinegar is especially effective on water spots around kitchen sinks and on the exterior of dishwashers where hard water splashes during loading. The acetic acid dissolves calcium deposits that cause the cloudy haze that plain water cannot remove. For stubborn spots, spray vinegar directly on the cloth and apply targeted pressure rather than soaking the entire surface.
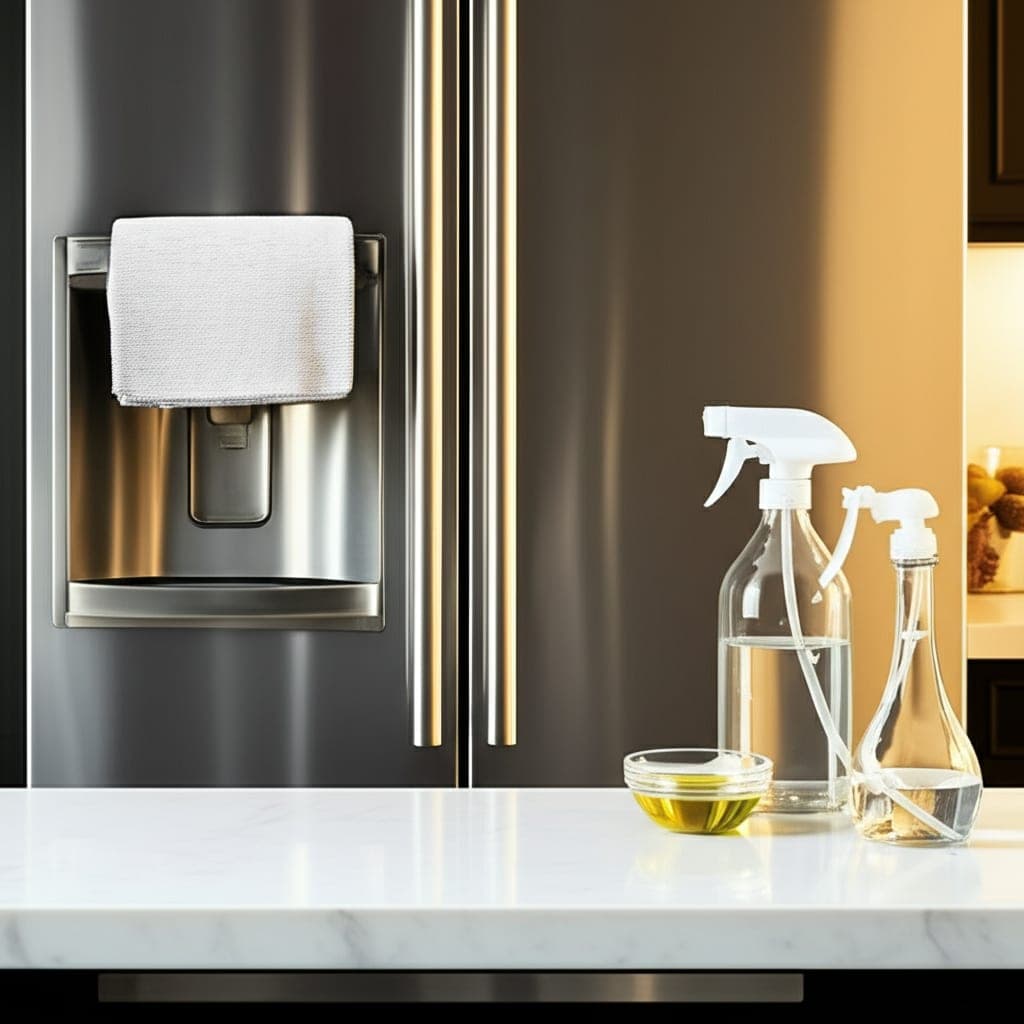
Method 4 Olive oil polish for a showroom finish
After cleaning, a thin coat of olive oil creates a protective barrier that repels fingerprints and gives stainless steel a polished, showroom-quality sheen. Put three to four drops of olive oil on a soft cloth and rub it into the surface following the grain in long, even strokes. Use a separate dry microfiber cloth to buff away any excess oil leaving too much creates a greasy film that attracts dust. The oil fills micro-scratches in the surface, making them less visible, and the thin coating causes fingerprint oils to bead rather than smear. This polish lasts several days before needing reapplication. Mineral oil works equally well and has no scent. Avoid using vegetable oils that can turn rancid over time.
Method 5 Club soda for quick shine
Club soda is a surprisingly effective stainless steel cleaner thanks to its mild carbonation that lifts smudges without chemicals. Pour club soda into a spray bottle and mist the appliance surface generously. Wipe immediately with a microfiber cloth following the grain. The carbonation evaporates quickly and leaves zero residue, which is why this method produces consistently streak-free results. Club soda works best for light daily maintenance fingerprints, smudges, and dust. Keep a small spray bottle of club soda on the counter for quick touch-ups between deeper cleans. It is safe for all stainless steel finishes including brushed, polished, and fingerprint-resistant coatings. Replace the club soda in your spray bottle weekly since it loses carbonation over time.
Method 6 Baking soda paste for stuck-on grime
For tough spots like dried food splatter, baked-on grease near the stove, or adhesive residue from stickers, make a paste of three tablespoons baking soda and one tablespoon water. Apply the paste to the problem area with a soft cloth and rub gently in the direction of the grain. The baking soda provides mild abrasion that removes stuck-on debris without scratching stainless steel. Wipe away the paste with a damp cloth and buff dry immediately. Never use baking soda on the entire appliance surface reserve it for targeted spot treatment on stubborn areas only. After removing the grime, follow up with your preferred full-surface cleaning method to even out the finish across the entire panel.
Method 7 Glass cleaner for fingerprint-resistant finishes
Many modern stainless steel appliances have a fingerprint-resistant coating that requires gentler care than standard stainless. For these surfaces, use an ammonia-free glass cleaner sprayed onto a microfiber cloth never directly onto the appliance. Wipe gently following the grain. The ammonia-free formula cleans without stripping the protective coating that makes the finish fingerprint-resistant. Check your appliance manual to confirm whether it has this coating. Using abrasive cleaners, vinegar, or oil-based polishes on fingerprint-resistant stainless can permanently damage the coating, leaving it more prone to smudges than standard stainless steel. When in doubt, test any cleaner on a small hidden area first.
Method 8 Remove scratches with a non-abrasive stainless steel cleaner
Light surface scratches on stainless steel appliances are cosmetic and can be minimized with a dedicated stainless steel scratch remover or a very fine application of olive oil rubbed firmly in the grain direction. Apply the product to a soft cloth and work it into the scratched area using moderate pressure in long strokes following the grain. The goal is to blend the scratch into the surrounding surface pattern rather than eliminate it completely. Deep scratches that catch your fingernail cannot be fully removed at home. For these, a professional stainless steel restoration service can refinish the panel. Prevent future scratches by never using steel wool, abrasive pads, or powdered cleansers on stainless steel surfaces.
Maintain stainless steel with a weekly routine
Keeping stainless steel appliances streak-free long-term requires a simple weekly routine rather than occasional deep cleans. Do a daily wipe-down with a damp microfiber cloth to catch fingerprints before they set. Once a week, clean with your preferred method vinegar spray, dish soap solution, or club soda and finish with an oil polish if desired. Always keep two dedicated microfiber cloths for stainless steel: one for cleaning and one for dry buffing. Wash these cloths separately from other household rags to avoid transferring lint or chemical residue. Replace microfiber cloths every three to four months as worn fibers lose their cleaning effectiveness and can cause streaking. The two-cloth method is the single most important stainless steel habit: cleaning without a dedicated dry buff will always leave some moisture or residue that streaks as it dries, regardless of which product you use.
What actually produced streak-free results vs what caused more streaking
Grain direction was the most impactful single factor. Before I identified the grain on my refrigerator, every cleaning attempt left visible streaks regardless of product used. After consistently following the grain with any product, streaks disappeared. Product choice mattered far less than direction. Olive oil polish was the most transformative finishing step: it took clean stainless to genuinely professional-looking and repelled fingerprints for approximately four days. Club soda was the most practical daily tool: no prep required, it left zero residue and produced consistent streak-free results on fingerprints every time. The dish soap method caused the most streaking when used incorrectly: soap residue left without a rinse pass dries as a blotchy haze that shows clearly in direct light. The rinse pass with a wrung-out damp cloth is not optional when using soap. Warm vinegar outperformed room-temperature vinegar measurably on the grease film around the stove.
Mistakes that leave stainless steel looking worse after cleaning
Mistake one: wiping in circles or in multiple directions. Circular buffing creates visible swirl marks on the stainless steel grain that catch and hold light. Wipe exclusively in straight strokes following the grain every single time. Mistake two: using steel wool, abrasive pads, or powered cleansers. Abrasives remove the chromium oxide layer that makes stainless steel corrosion-resistant, causing permanent dull scratches and eventual rusting. Mistake three: using bleach or chloride-containing products. Chlorine attacks the passive protective layer on stainless steel and causes corrosion pitting over time. Even bleach overspray from nearby cleaning should be rinsed off stainless immediately. Mistake four: applying too much oil polish without fully buffing. A visible oil film on stainless attracts dust particles within hours in a kitchen environment. Three to four drops total, spread thin, buffed completely dry with a second dedicated cloth.
Pro Tips
- ✓Always wipe with the grain never in circles or against the grain direction.
- ✓Use two separate microfiber cloths: one damp for cleaning and one dry for buffing.
- ✓Apply products to the cloth, not the surface, to prevent drip marks and over-saturation.
How we tested this guide
Every method on this page was hands on tested by Fredler Pierre-Louis on the actual surface or material described, not on a staged photo set. We recorded the timing, the dwell intervals, and the conditions where each method worked or fell short, then refined the steps based on what we observed across multiple test runs in real homes.
- Methods verified on the relevant surface or material before publication.
- Reviewed for chemical safety and surface compatibility before publication.
- Dwell times and proportions match what actually works, not generic averages.
- Updated whenever a reader reports an edge case we missed.
Read our full editorial and testing policy or learn more about the team behind TryCleaningHacks.
Related Cleaning Guides
Safety Notes
- ⚠Never use steel wool, abrasive pads, or powdered cleansers on stainless steel. These scratch the finish permanently and create grooves where bacteria and grime accumulate.
- ⚠Avoid bleach and chloride-containing cleaners on stainless steel. They corrode the chromium oxide layer that gives stainless steel its corrosion resistance, causing permanent pitting and discoloration.
- ⚠When using vinegar on stainless steel, do not let it sit for extended periods. Prolonged acid contact can dull the finish. Apply, wipe, and buff within one to two minutes.
Frequently Asked Questions
What is the best way to clean stainless steel without streaks?
Wipe with the grain using a barely damp microfiber cloth, then immediately buff with a dry microfiber cloth. For grease, use a few drops of dish soap in warm water. The key to streak-free results is always wiping in the direction of the grain and removing all moisture and cleaning residue with a dry buff pass.
Can you use vinegar on stainless steel appliances?
Yes, undiluted white vinegar is safe and effective for cleaning stainless steel. Spray it on, wipe with the grain, and buff dry within one to two minutes. It removes water spots, fingerprints, and light grease. Avoid leaving vinegar on the surface for extended periods as prolonged acid contact can dull the finish.
How do you remove fingerprints from stainless steel?
A damp microfiber cloth removes most fingerprints. For stubborn smudges, use a tiny amount of dish soap or club soda. After cleaning, apply a thin coat of olive oil or mineral oil following the grain to create a barrier that repels future fingerprints for several days.
Does olive oil work on stainless steel?
Yes, a few drops of olive oil on a soft cloth, rubbed in the grain direction and buffed dry, gives stainless steel a polished shine and helps repel fingerprints. Use sparingly too much oil attracts dust. Mineral oil works equally well and has no scent or risk of becoming rancid.
You might also like

How to Clean Your Laundry Room in Under 30 Minutes
My laundry room was the last room I ever cleaned, which meant the machines doing all my cleaning were themselves never cleaned. One afternoon changed that. Here's what I found inside my filter, what was creating the musty smell, and the 30-minute routine that prevents it all.

How to Get Rid of Kitchen Sink Odor (10 Easy Fixes)
My kitchen sink smelled no matter how often I cleaned it until I figured out what I was actually missing. The fix wasn't a new product; it was addressing three different sources at once. Here's what finally worked and the one mistake that kept the smell coming back.

How to Clean a Microwave Inside and Out (12 Methods)
I once cleaned a shared microwave at work that hadn't been touched in 18 months. Every method on this list either worked or didn't under genuinely difficult conditions. Here's the honest ranking and the one daily habit that makes the entire list mostly unnecessary.