

How to Clean a Microwave Inside and Out (12 Methods)
Almost nobody needs to scrub a microwave. Dried food is mostly water that has left, and steam puts enough of it back that the mess wipes away with a cloth, which is why the order of operations matters more than the product. There is also a part of the inside you should never scrub, a filter on over the range models that most owners have never removed, and a ceiling that looks fine until you point a flashlight at it. Here are twelve methods for the inside, the outside and the smell, with what each one is actually for and where it falls short.
Jump to a section
- What you'll need
- Step-by-step
- Why steam does the work and scrubbing does not
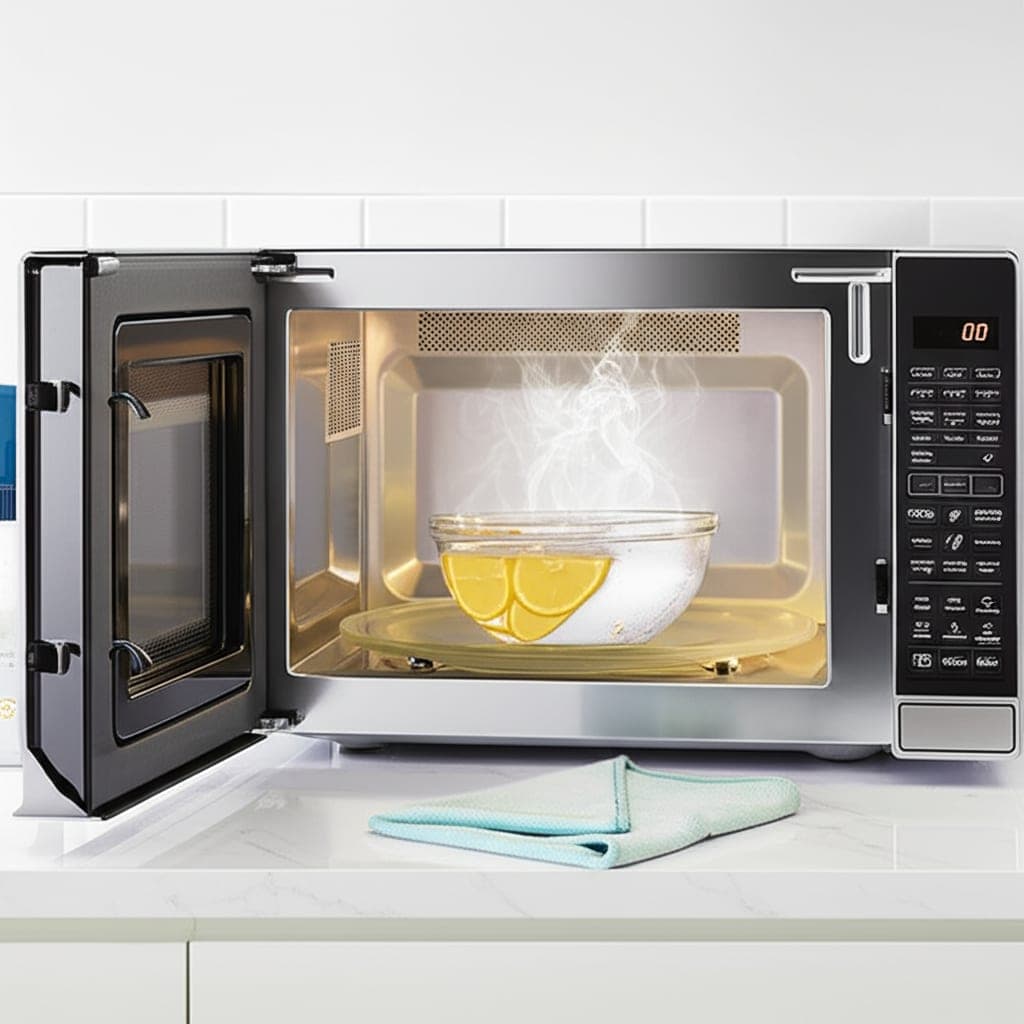
- Method 1: lemon and water steam, the one to start with
- Method 2: vinegar steam for grease and smells
- Method 3: wet cloth or paper towel on whatever survived the steam
- Method 4: the turntable and the ring underneath it
- Method 5: the door seal, the hinge side and the window
- Pro tips
- FAQ
What You'll Need
Step-by-Step Instructions
Why steam does the work and scrubbing does not
Dried food in a microwave is mostly what is left after the water has evaporated, which is why it sets like a hard varnish and why attacking it dry is slow and risks damaging the interior. Put moisture back and the whole job changes. Heating a bowl of water fills the cavity with steam, that steam condenses on every cold interior surface including the ceiling and the corners you cannot reach comfortably, and the dried food rehydrates and loses its grip. After that, a cloth removes it with almost no pressure. This is why the order of operations matters more than which product you use. Steam first, wipe second, and only then consider anything targeted for whatever is left. Doing it the other way around, scrubbing first and steaming later, means working hard on the parts that would have released on their own, and it is the single reason most people find cleaning a microwave unpleasant. It also protects the appliance, since the interior is painted or enameled metal and abrasives take that surface off.
Method 1: lemon and water steam, the one to start with
Cut a lemon in half, squeeze both halves into a microwave safe bowl with about a cup of water, and drop the spent halves in too. Heat on full power for four to five minutes until it is boiling and the window has fogged. Then leave the door closed for another five minutes, which is the part people skip and the part that does most of the work, because the steam needs time to condense and soak in. Open it, lift the bowl out with a cloth since it will be very hot, and wipe the ceiling first, then the walls, then the floor, so nothing drips onto a surface you have already done. The citric acid helps a little with grease and the smell is genuinely pleasant, which matters more than it sounds, because the version of this job you will actually repeat is the one that does not smell of vinegar. Use a glass bowl rather than plastic, and never a mug that is narrow enough to superheat.
Method 2: vinegar steam for grease and smells
Same technique, stronger solution. Mix about half a cup of white vinegar with half a cup of water and run it for four to five minutes, then let it stand with the door shut for five more. Vinegar is the better choice when the problem is greasy film rather than dried spatter, or when the cavity smells, because the acid cuts through the oily residue that plain water slides off and it neutralizes rather than masks odors. The downside is obvious the moment you open the door. If the smell bothers you, run a lemon steam afterward, or wipe out with a cloth rinsed in plain water at the end. Do not mix vinegar with bleach or with any bleach based cleaner, in the bowl or in sequence. And do not leave the vinegar solution sitting in the cavity to soak for hours, since prolonged acid contact is not doing anything useful and the interior coating does not benefit from it.
Method 3: wet cloth or paper towel on whatever survived the steam
A few spots usually remain after steaming, typically where something sugary boiled over and carbonized. Lay a wet cloth or a folded wet paper towel directly over the spot and leave it five to ten minutes. It is the same principle as the steam, applied locally and for longer. Then push at the edge of the residue with a wooden or plastic scraper, or the edge of a plastic spatula, working at a shallow angle rather than digging at it. If it does not move, wet it again and wait rather than increasing force. What matters here is what you do not reach for: no metal scraper, no steel wool, no scouring pad, no melamine sponge on the interior. All of them take off the paint or enamel, and a scratched interior can eventually rust or arc, which is a repair rather than a cleaning problem. Patience genuinely is the technique on this step.
Method 4: the turntable and the ring underneath it
The glass plate is the easy part and most are dishwasher safe on the top rack, though checking the manual is worth ten seconds because a few are not. If you wash it by hand, let it come to room temperature first, since dropping a hot glass plate into cold water can crack it. The part that gets forgotten is underneath. Lift the plate out and the roller ring below it usually has a ring of trapped crumbs and grease, and the recess it sits in collects the drips that ran off the plate. Wash the roller ring in warm soapy water, checking that the wheels still turn freely, and wipe the recess and the central spindle. A turntable that has started juddering or squeaking is almost always a dirty roller ring rather than a failing motor. Dry both properly before reassembling, and make sure the plate seats fully onto the spindle, because a plate sitting slightly off will grind and eventually chip.
Method 5: the door seal, the hinge side and the window
The seal around the door and the frame it closes against collect a film of grease and food that is easy to miss because it is on a vertical surface at the edge of your attention. Wipe all the way around the frame and the inside face of the door with a cloth dampened in warm soapy water, then use a cotton bud along the seam and into the corners where the seal meets the frame. The hinge side collects the most because it moves least. Do this properly rather than casually, since a door that does not close cleanly against a clean surface is the one part of a microwave where debris has a safety dimension. The inside of the window usually has a haze of condensed grease that comes off with a little vinegar on a cloth. If your door has vent slots along the edge, run a dry cotton bud through them rather than pushing anything wet inside.
Method 6: leave the waveguide cover alone
This is the method that consists of not doing something, and it belongs in any honest microwave cleaning article. Look at the interior wall or ceiling and you will usually find a thin rectangular panel, often light brown or grey, that looks like a piece of card or a stain someone failed to remove. That is the waveguide cover, made of mica, and it is a component rather than dirt. Its job is to protect the opening where the microwaves enter the cavity. Wipe it gently with a barely damp cloth if it has spatter on it, and stop there. Do not scrub it, do not scrape it, do not soak it, and do not peel it off, because it is porous and it will disintegrate. If yours is charred, holed, or coming apart, that is worth attention: running the appliance with a badly damaged waveguide cover can cause arcing, and replacement covers are inexpensive and are a straightforward part to fit. Knowing what this panel is prevents the most common expensive mistake in this whole job.
Method 7: dish soap spray for greasy interiors
When the interior is greasy rather than crusted, which is common in a microwave used mostly for reheating oily leftovers, steam alone will loosen it but not carry it away, because grease needs a surfactant. Mix a few drops of plain dish soap into a spray bottle of warm water, mist the interior lightly, and wipe with a cloth. Then, and this part is not optional, go over everything again with a cloth rinsed in plain water, because soap residue left in a cavity that gets heated repeatedly will smell and will attract the next round of spatter. Use it sparingly and keep the spray away from the vent slots, the waveguide cover and the door latch. Never spray anything directly into the interior openings. For a genuinely greasy cavity, the sequence that works is steam, soap, then a plain water wipe, in that order.
Method 8: baking soda for a smell that will not leave
There are two versions of this and they do different jobs. For a lingering smell, put a couple of tablespoons of baking soda in an open shallow dish, leave it in the closed microwave overnight, and it will absorb a fair amount of what is in the air. For a stain or a patch of scorched residue, make a paste of baking soda and a little water, spread it on, leave it five minutes, then wipe away with a damp cloth. Baking soda is mildly abrasive, so on the interior use it as a paste that you wipe rather than a powder that you scrub, and keep it off the waveguide cover entirely. Persistent smells usually have a physical source rather than being ambient: burnt popcorn residue in the corners, something spilled under the turntable, or a grease loaded vent filter. Deal with the source and the smell goes with it, which is why deodorizing is the last step in a clean rather than a substitute for one.
Method 9: a light vinegar wipe to finish the interior
Once the cavity is physically clean, a final pass with a cloth dampened in a half and half mix of white vinegar and water leaves the surfaces free of soap film and knocks back the bacteria that live on a warm food splashed surface. Wipe, then follow with a plain damp cloth and then a dry one, since a microwave interior should be left dry rather than damp. Keep this to the walls, floor, ceiling and door, and stay off the waveguide cover and out of the vents. Bleach has no place here, both because of the fumes in a small enclosed cavity you will later heat food in and because it can damage the interior finish. This is also the right moment to leave the door open for ten minutes, which is the simplest and least glamorous deodorizing step available and one almost nobody does.
Method 10: the exterior, the handle and the control panel
The outside is mostly about restraint. Spray the cloth rather than the appliance, because liquid running into a control panel, a vent or a door seam is one of the more effective ways to kill a microwave. Membrane style control panels, the flat plastic ones with printed buttons, scratch easily and lift at the edges, so use a barely damp cloth and no abrasive of any kind. On a stainless exterior, wipe along the visible grain and follow immediately with a dry cloth, since water left on steel dries as spots and cross grain wiping leaves a haze. The handle and the door edge need the most attention, because they take greasy hands more than any other part of the appliance. On an over the range unit, the underside is usually the greasiest surface in the kitchen and the one nobody sees, so it is worth a dedicated degreasing wipe.
Method 11: the grease filter on an over the range model
If your microwave sits above the cooker, it has a filter or two underneath that most owners have never removed. There are usually metal mesh grease filters that slide or clip out from the underside, and on units that recirculate rather than vent outside there is also a charcoal filter behind the grille at the top front. The difference matters. Metal grease filters are washable: soak them in hot water with dish soap and a spoonful of baking soda for fifteen minutes, brush them gently, rinse and dry fully before refitting. Many are dishwasher safe. Charcoal filters are not washable and must be replaced, typically every six to twelve months depending on how much you cook. A clogged grease filter is the usual reason an over the range microwave stops clearing steam from the hob and starts smelling. Unplug the unit or switch off the breaker before working underneath it, and check the manual for the release, since forcing a filter bends the frame.
Method 12: prevent it, which beats every method above
A cover over food stops spatter reaching the walls and ceiling in the first place, and preventing mess is far less work than removing it. A vented microwave lid, an upturned plate, or a sheet of damp kitchen paper all work, and the vented lid is the best of the three because it lets steam escape rather than trapping it and boiling the food dry. The other half of prevention is a ten second wipe while the cavity is still warm, immediately after something splashes, because warm residue lifts with a dry cloth and the same residue tomorrow needs steam. Keep a cloth within reach of the microwave and that habit survives. Both of these are unremarkable, and between them they turn a monthly job into an occasional one. If you use a microwave mainly for reheating sauces, pasta and soups, which are the biggest spatter offenders, the cover is worth buying today.
What each method is genuinely for
Since twelve methods invites the question of which to use, here is the short version. Steam, either lemon or vinegar, does most of the work on almost every microwave and should always come first. Vinegar steam is the choice for grease and smells, lemon for everyday cleaning where you would rather not smell vinegar afterward. A wet cloth left in place handles the two or three stubborn spots that survive. Dish soap is for genuinely greasy cavities and needs a plain water pass afterward. Baking soda is for smells and for the occasional scorched patch as a paste. A vinegar wipe finishes the surfaces. The turntable, the roller ring, the door seal and the vent filter are separate components rather than methods, and each one is a place where problems hide rather than an alternative approach. If a microwave still smells after all of that, the source is almost always the vent filter or something under the turntable rather than the cavity itself.
A microwave that has been neglected for months
The methods above assume a few weeks of ordinary use. A cavity that has gone half a year without attention, or a shared one at work that nobody owns, needs the same approach with more patience rather than a different approach with more force. Plan on three rounds of steam rather than one, with a wipe between each, because each round softens another layer and there is no way to shortcut that with pressure. Use vinegar rather than lemon, since neglected cavities are greasy as well as crusted. Between rounds, lay wet cloths over the worst patches and leave them while the next bowl heats, so the stubborn spots get a long soak rather than repeated scraping. Take the turntable and roller ring out at the start and leave them in hot soapy water for the whole session instead of trying to clean them in place. Expect the ceiling to be the worst surface and the door seal to be worse than it looks. If there is a burnt smell that survives all of it, check for popcorn residue in the corners and, on an over the range unit, pull the grease filter, which on a neglected appliance is usually saturated. Two things are worth saying plainly about the worst cases. A cavity with rust showing through the interior finish, or a waveguide cover that is charred or holed, has moved past cleaning into repair or replacement, and no amount of scrubbing improves either. And if the appliance has been arcing, sparking, or running loud, stop cleaning and stop using it.
How often this actually needs doing
There is no need for a schedule if the ten second habit is in place, because a cavity that gets wiped when something splashes never builds up enough to require a session. For most households, the realistic version is a steam and wipe once a month, the turntable and roller ring at the same time, and the door seal whenever you happen to notice it. The parts that genuinely benefit from a calendar are the ones out of sight: the grease filter on an over the range model roughly monthly with frequent cooking, and the charcoal filter every six to twelve months, since that one is a replacement rather than a wash. Reheating oily food, cooking bacon, or anything that boils and spits moves everything up a gear. Popcorn deserves its own mention, because burnt popcorn is the single most persistent smell a microwave can acquire and the residue hides in the corners rather than sitting in the open. If your microwave is used by several people, a cover kept on top of it does more for the state of the interior than any instruction taped to the door.
The mistakes that make this harder or unsafe
Scrubbing before steaming, which is working hard on residue that would have released by itself. Any abrasive on the interior: steel wool, scouring pads, melamine sponges, or baking soda used dry as a scouring powder, all of which damage the painted or enameled surface and can lead to rust or arcing. Scrubbing or peeling the waveguide cover, which is a component and not a stain. Spraying cleaner directly at the control panel, the vents or the door latch. Using bleach inside a cavity that heats food. Running the appliance empty, which puts the energy nowhere and can damage the magnetron. Putting a metal scraper or any metal object in the cavity and forgetting to remove it. Superheating water in a smooth narrow container, which can erupt when moved, so use a wide glass bowl and add the lemon halves, which give bubbles somewhere to form. And ignoring the grease filter for years on an over the range unit, which is the commonest cause of a microwave that smells no matter how often the inside gets wiped.
Pro Tips
- The five minutes with the door shut after the steam cycle matters more than the cycle itself. That is when the steam condenses and the dried food rehydrates, and skipping it is why people conclude steaming does not work.
- Wipe the ceiling first, then walls, then floor. Point a flashlight at the ceiling before you start, since it is the surface everyone forgets and usually the worst one.
- Keep a cloth within arm's reach of the microwave. A ten second wipe while a splash is still warm removes what would otherwise need a full steam next month.
- Add the squeezed lemon halves to the bowl rather than just the juice. Besides the smell, they give bubbles a place to form, which reduces the risk of the water superheating and erupting when you lift it out.
Frequently Asked Questions
What is the fastest way to clean a microwave?
Heat a bowl of water with lemon or vinegar in it for four to five minutes, then leave the door closed for another five. The steam condenses on every interior surface and rehydrates the dried food, so it wipes off with a cloth and almost no pressure. Wipe the ceiling first, then the walls, then the floor. Total hands on time is a couple of minutes, and the waiting is what makes it work, which is why the version people rate as slow is usually the version where they opened the door immediately.
What is the brown panel inside my microwave, and how do I clean it?
That is the waveguide cover, a piece of mica that protects the opening where the microwaves enter the cavity. It is a component rather than a stain, which is why scrubbing it never seems to help. Wipe it gently with a barely damp cloth and nothing more: no scrubbing, no scraping, no soaking, and do not peel it off. If it is charred, holed or flaking, replace it rather than removing it, since running the appliance with a badly damaged cover can cause arcing. Replacement covers are cheap and are a common part to fit.
Why does my microwave still smell after I clean it?
Because the smell usually has a physical source that a cavity wipe does not reach. The three usual culprits are the grease filter underneath an over the range model, which most owners have never removed, something spilled under the turntable in the recess and roller ring, and burnt residue in the corners from popcorn or something that boiled over. Deal with the source, then deodorize: baking soda in an open dish overnight, or simply leaving the door open for a while, which is the step nobody bothers with.
Can I use bleach or a scouring pad inside a microwave?
Neither. Bleach fumes concentrate in a small enclosed cavity that you will later heat food in, and it can damage the interior finish. Scouring pads, steel wool, melamine sponges and dry baking soda used as a scouring powder all abrade the painted or enameled interior, and a scratched interior can eventually rust or arc, which turns a cleaning job into a repair. For anything stubborn, put a wet cloth over it for ten minutes and then push at the edge with a wooden or plastic scraper.
How often should I clean the microwave filter?
On an over the range unit, wash the metal mesh grease filters roughly monthly if you cook often, or every couple of months for lighter use. They come out from the underside, soak in hot water with dish soap and a spoonful of baking soda, and many are dishwasher safe. The charcoal filter, on models that recirculate air rather than venting outside, is not washable and needs replacing every six to twelve months. Switch off the power before working underneath, and check the manual for the release catch rather than forcing it.
How this guide was made
This Laundry & Kitchen guide was researched, written, edited, and published by Fredler Pierre-Louis. The 17 steps below are built around White vinegar, One lemon and Baking soda, and the quantities and dwell times come from published cleaning-chemistry and manufacturer guidance for those materials, not from a controlled trial we ran ourselves. Where a popular version of this hack does not work, or is risky on a particular surface, this 15 min guide says so.
- Checked against manufacturer and materials guidance for the surfaces named.
- Reviewed by a person for chemical safety and surface compatibility before publication.
- Written to explain why a method works, not just to list steps.
- Corrected whenever a reader reports an error or an edge case we missed.
Read our full editorial policy or learn more about the team behind TryCleaningHacks.
Related Cleaning Guides
Safety Notes
- Water in a smooth narrow container can superheat past boiling without visibly bubbling, then erupt when moved. Use a wide glass bowl and put something in it, such as the lemon halves.
- The bowl and the interior will be very hot after steaming. Lift the bowl with a cloth and let the steam clear before putting your face near the cavity.
- Never run a microwave empty, and never leave a metal scraper or utensil inside.
- Do not use bleach inside the cavity. The fumes concentrate in a small enclosed space that you will later heat food in, and it can damage the interior finish.
- Do not scrub, scrape or peel the waveguide cover, the thin mica panel on the wall or ceiling. A badly damaged one can cause arcing and should be replaced rather than removed.
- Unplug the unit or switch off the breaker before removing filters or working underneath an over the range model.
You might also like
How to Get Rid of Kitchen Sink Odor (10 Easy Fixes)
My kitchen sink smelled no matter how often I cleaned it until I figured out what I was actually missing. The fix wasn't a new product; it was addressing three different sources at once. Here's what finally worked and the one mistake that kept the smell coming back.
How to Clean Stainless Steel Appliances Without Streaks (9 Methods)
Stainless steel appliances streak for one reason that almost every cleaning attempt gets wrong, and it has nothing to do with which product you buy. Stainless has a directional grain, and wiping across it drags residue into the grooves instead of out of them. Here are nine methods ranked for built-up fingerprints and kitchen grease, and the technique that decides whether any of them work.
How to Clean and Deodorize a Garbage Disposal (10 Easy Methods)
A garbage disposal that smells despite regular rinsing is almost never smelling from the grinding chamber, which is why citrus peels and vinegar never fix it. The odor comes from the underside of the rubber splash guard, a surface most people have never lifted or looked at, where a food film builds up out of reach of the water. Here is how to clean it properly and the routine that keeps it odor-neutral.