
How to Clean Your Closet From Top to Bottom Without Hating the Whole Day
I used to dread cleaning the closet because every attempt ended with clothes piled on the bed, a sore back, and a closet that looked almost exactly the same when I gave up at midnight. The fix was breaking the job into the right order, dusting and wiping before sorting and reorganizing rather than the other way around. Here is the exact top to bottom method that left my closet genuinely clean and easier to use, plus the weekly five minute habit that keeps it that way without ever needing another full reset.
What You'll Need
Step-by-Step Instructions
Empty the closet completely so you can actually clean every surface
Pull every item out of the closet before you wipe a single shelf or vacuum the floor: every hanging garment, every folded stack, every shoe, every box on the top shelf, every bag hung on the back of the door. Lay it all out on the bed or on the floor of the bedroom so you can see what you own and so the closet itself is genuinely empty. Cleaning around the clothes is what makes most closet cleans fail, because you cannot reach the back of the shelves, the corners of the floor, or the top of the rod, and dust and lint keep falling back onto the clothes from above as you work below. An empty closet is also the only way to honestly assess what you keep, because items you cannot see do not get worn, and a wardrobe sorted while still half hidden behind other clothes is sorted on bad information. This step takes longer than you think, plan thirty to forty minutes just for the empty out, but it is the move that makes every other step in this guide actually work. Cleaning the closet with the clothes still inside is the cleaning equivalent of mopping the floor with your shoes on.
Dust from the top of the closet downward so you only clean each surface once
With the closet empty, work top to bottom in one direction so falling dust always lands on a surface you have not yet cleaned. Start with the ceiling of the closet and the top of the door frame, where most people never look and where a soft gray layer of dust has almost certainly built up over years; a microfiber duster on an extendable handle or a clean dry microfiber wrapped around a broom head reaches it without a wobble. Next dust the top shelf and the closet rod itself, including the hooks or brackets that hold the rod in place, because lint and fabric fibers collect along the top of the rod in a fuzzy line that ends up on the shoulders of every shirt you hang there. Then move down to the next shelf, then the lower shelves, then the walls, then finally the floor. The reason this order matters is that if you vacuum or wipe the floor first and dust the top shelves last, every shelf you dust drops debris onto the freshly cleaned floor and you do the same work twice. Top to bottom in one pass is faster and cleaner.
Wipe down the shelves, rod, and walls with a damp microfiber
Once the dry dust is off, go back over every horizontal surface with a microfiber lightly dampened with an all-purpose cleaner or a homemade spray of one part white vinegar to four parts water, which is gentle enough for almost any closet finish and cuts the slightly greasy film that hands and shoes leave on shelves and door frames over time. Wipe the rod with the damp cloth as well, paying attention to the underside where the hangers rub and a smudge band develops, and clean the inside of the door, the door handle, and the door jamb, all of which collect more grime than people expect. Use a fresh corner of the cloth for each section so you are not just moving the dirt around. If your closet has shelving made of wire racks, wipe those too, the top edge of every wire collects a surprising line of dust that drops onto whatever sits below. Wiping after dusting is what takes the closet from looking clean from a distance to being clean up close.
Vacuum the floor, the corners, and along the baseboards with a crevice tool
The closet floor is one of the dustiest spots in any home because hair, lint, dryer-sheet fluff, and dust mites accumulate where shoes drop debris and air does not circulate. Vacuum it thoroughly with a brush attachment for the open floor, then switch to the crevice tool for the corners and along the baseboards, where dust packs into a dense gray line that a regular vacuum head cannot reach. If your closet is carpeted, run the vacuum slowly enough to actually pull dust up out of the fibers rather than just skimming the surface, and pay extra attention to the area directly under where shoes sat, which carries crushed dirt that has been ground into the carpet for months. Spot clean any visible stains with a small amount of carpet cleaner. For hard floors, mop or wipe with a damp cloth after vacuuming to pick up the last fine dust the vacuum stirs up. A clean closet floor changes how clean the closet feels even before you put anything back in it. The same dust principles apply to dust around the rest of the home; the 10 vacuum cleaning tips most people miss post covers attachment use and slow-pass technique in more depth.
Sort everything into keep, donate, and trash before it goes back in
With the closet itself clean and empty, this is the moment to actually sort what you own rather than putting everything back the way it was. Go through the pile one item at a time and put each into one of three groups: items you have worn in the past year and will wear again, items you have not worn in a year and are ready to donate, and items that are damaged, stained, or worn out enough to throw away or recycle as rags. The single most useful question is, would I buy this today if I saw it in a store; if the honest answer is no, it does not earn a return spot in your closet. Be especially honest about the things you have been keeping out of guilt, the expensive item you never liked, the gift you have never worn, the size you used to wear; none of these become useful by staying in the closet, and all of them are crowding out the things you actually wear. Aim for a meaningful donation pile, not a single token shirt, because closets that get reorganized without losing significant volume always end up looking just as crowded a month later.
Group like with like before you hang or fold anything back
When you start putting clothes back, do not return them to the spots they came from; instead, sort them into categories first and put each category back together. All long sleeve shirts together, all short sleeve shirts together, all dresses together, all pants together, all sweaters together, and so on. Within each category, sub-sort by color, lightest to darkest or the gradient that works visually for you, because a color-sorted closet shows you at a glance what you own in each shade and stops you from buying yet another black sweater because you forgot you already had three. Group like with like is the principle that does almost all of the visual transformation in a closet reorganization; the same clothes look completely different when they are sorted into clean categories versus mixed randomly. Folded items get the same treatment, all the t-shirts in one stack, all the jeans in another, all the workout clothes in another, with each stack tall enough to be obvious but short enough that the items at the bottom are still pullable without collapsing the whole stack.
Use matching hangers so the rod looks instantly uniform
If you have ever wondered why professionally organized closets look so much calmer than home ones even with the same amount of clothing, the single biggest reason is matching hangers. Mismatched plastic, wire, and wood hangers in different shapes and colors create visual noise that makes the same number of clothes look chaotic. Replacing them all with one consistent type, slim velvet non-slip hangers are inexpensive and the most space efficient, transforms the closet visually more than any other single change and also lets you fit noticeably more clothes on the same length of rod because the hangers themselves are thinner than the bulky wire or plastic ones they replace. The non-slip surface also stops the constant frustration of finding shirts on the floor after they slid off a smooth plastic hanger overnight. The cost of a full set of matching hangers is genuinely small and the payoff is the calmest visual change you can make to a closet.
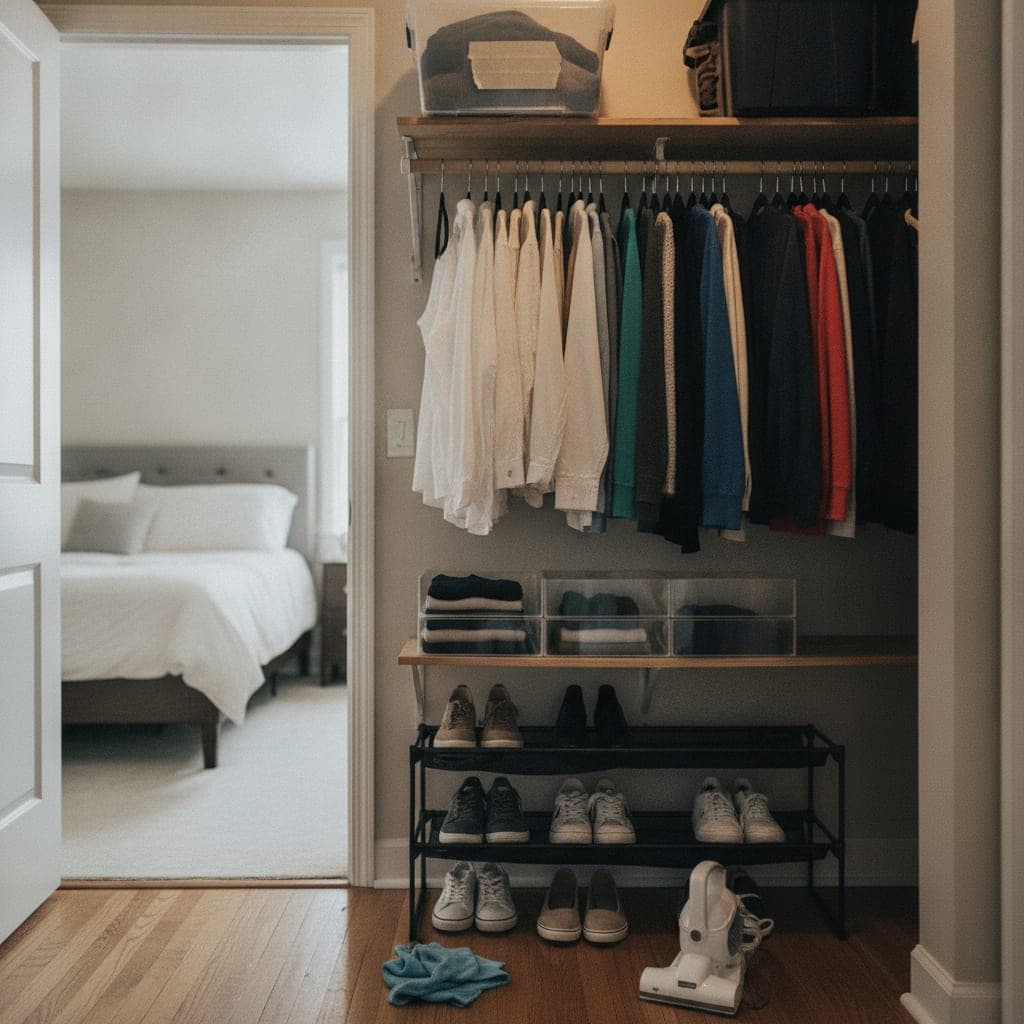
Set up the lower zones with the right storage for shoes, bags, and folded items
Once the hanging area is sorted, give the lower part of the closet the same treatment by deciding what each zone is for and using storage that fits the items going into it. Shoes go on a low shoe rack rather than scattered loose on the floor, because a rack lifts them out of the dust zone, keeps pairs together, and dramatically increases how many fit in the same space. Folded items go in shallow drawers, fabric bins on a shelf, or on shelves with shelf dividers that stop stacks from toppling sideways into each other. Bags and purses hang from hooks on the inside of the closet door or stand upright in cube shelves, because piling them on the top shelf is what destroys their shape. Use clear bins for off season items so you can see what is in them without pulling each bin down, and label every opaque bin with a marker on a piece of tape so you never lose track. The principle is the same as on a desk, every item has one defined home, and the storage you choose is what makes that home obvious and easy to put things back into.
Add cedar or sachets and check for moths or moisture while everything is out
An empty closet is the rare chance to look at the walls, corners, and ceiling for any signs of moisture, mildew, or pest damage that you would never see while clothes are in the way. Look for water staining on the ceiling or walls, especially if the closet shares a wall with a bathroom, and look for the small holes in wool sweaters or the tiny clusters of casing that indicate clothing moths, particularly in dark corners behind stored items. If you find moisture, address the leak source before putting anything back, because a closet that traps humidity ruins clothes silently. Adding a few cedar blocks or lavender sachets to the closet helps repel moths and freshens the space; cedar needs to be lightly sanded every six months to release its scent again, which a kitchen sponge does in seconds. If musty smell is the real issue, the how to make laundry smell good after washing routine catches musty smell at the wash stage so it never reaches the closet in the first place.
Do a weekly five minute closet check so the deep clean lasts
A closet stays clean long term not because of a perfect deep clean but because of a small weekly habit that catches drift before it becomes chaos. Set a recurring five minute slot once a week, while putting away laundry is the natural time, to do the same four small actions: rehang anything that has slipped off the rod, fold and restack anything that has tipped out of its pile, put any shoes you kicked off back onto the shoe rack, and remove anything that has accumulated on the floor that does not belong in the closet. This takes well under five minutes when done weekly, but the same drift left for three months becomes the half day reset you were trying to avoid. A closet that has its five minute check every week never reaches the state that needs a full deep clean again, which means the long version of this guide is something you do once and then never again, replaced by a tiny rhythm that keeps it from ever degrading.
What actually transformed the closet and what kept it that way
Three changes did most of the visible work and one habit kept the result alive long term. First, emptying the closet completely rather than cleaning around the clothes is what made every other step actually work, because every surface that had been hidden for years finally got dusted and wiped, and the sort had real information to work with. Second, replacing the mismatched hangers with a single consistent slim velvet type changed the visual feel of the rod more than any other accessory and freed up noticeable extra space. Third, group like with like and sub-sorting by color converted the same wardrobe from looking chaotic to looking deliberate, with no items added or removed. The single most important sort decision was being honest about items kept out of guilt rather than use, because the donation pile from those alone freed up more space than every other organizing trick combined. The habit that made the deep clean last was the weekly five minute check while putting laundry away; without it, even a perfectly reset closet drifts back to chaos within months, with it, the closet stays in roughly the state I left it in indefinitely. If you do only one thing, replace your hangers and group like with like; the visual transformation is immediate and free.
Mistakes that undo a closet clean within weeks
Mistake one: cleaning around the clothes instead of emptying first. The hidden surfaces never get clean and the dust keeps cycling down onto your clothes; an in-place clean does not last because it was never actually a deep clean. Mistake two: working bottom to top. Dust and debris fall down, so vacuuming or wiping the floor first means you re-dirty it as soon as you dust the shelves above it. Always work top to bottom in one pass. Mistake three: keeping items because they were expensive or were gifts. Cost paid in the past and guilt about a giver do not make a closet useful; the things you do not wear take up space and visibility from the things you do, and the donation pile is where they actually become useful again. Mistake four: not deciding what each zone of the closet is for before putting things back. A closet without defined zones gradually fills back up randomly, while a closet where every category has a defined area resists drift because each item has an obvious home to return to. Mistake five: skipping the weekly five minute check. The deep clean is only sustainable when paired with the small weekly upkeep; without the upkeep, even the most perfect reset slowly loses to entropy and you are back here in six months.
Pro Tips
- ✓Empty the closet completely before you wipe a single shelf. Cleaning around the clothes is what makes most closet cleans fail.
- ✓Replace mismatched hangers with one consistent slim velvet type. It transforms the look of the rod more than any other single change and frees up real space.
- ✓Group like with like and sub-sort by color when you put clothes back. The same wardrobe looks completely different and you stop buying duplicates of what you already own.
How we tested this guide
Every method on this page was hands on tested by Fredler Pierre-Louis on the actual surface or material described, not on a staged photo set. We recorded the timing, the dwell intervals, and the conditions where each method worked or fell short, then refined the steps based on what we observed across multiple test runs in real homes.
- Methods verified on the relevant surface or material before publication.
- Reviewed for chemical safety and surface compatibility before publication.
- Dwell times and proportions match what actually works, not generic averages.
- Updated whenever a reader reports an edge case we missed.
Read our full editorial and testing policy or learn more about the team behind TryCleaningHacks.
Related Cleaning Guides
Safety Notes
- ⚠Use a sturdy step stool to reach high shelves rather than standing on a chair or a wobbly stack of bins. Closet falls are a common household injury.
- ⚠If you find black or green growth on the closet walls, treat it as mold and follow proper mold-removal precautions with gloves and ventilation rather than trying to wipe it off bare handed.
- ⚠Avoid mixing cleaning sprays in the closet. Vinegar-and-water and all-purpose cleaners are safe alone, but combining them with bleach or ammonia products produces toxic fumes in a small enclosed space.
Frequently Asked Questions
How often should I clean my closet?
Do a full deep clean of the closet once or twice a year, ideally with a seasonal wardrobe swap so you are already handling the clothes. In between, do a five minute check once a week, while putting laundry away is the natural time, to rehang slipped clothes, restack toppled folds, put shoes back on the rack, and remove anything that does not belong. The deep clean restores the closet to a clean baseline, and the weekly check keeps it from ever degrading enough to need another full reset. Closets that only get cleaned when they reach a breaking point always need the breaking-point clean again within months.
What is the right order for deep cleaning a closet?
Empty the closet completely first, then work top to bottom in one direction: ceiling and top of the door frame, top shelf, closet rod, lower shelves, walls, and finally the floor. Dust first with a dry microfiber, then wipe each horizontal surface with a damp cloth, then vacuum the floor with a crevice tool along the baseboards. Only after the closet itself is clean should you sort what you own and put things back, because cleaning around the clothes leaves the hidden surfaces dirty and sorting with everything still half hidden gives you bad information about what you actually wear.
How do I decide what to keep and what to donate?
Ask one question of every item: have I worn this in the past year, and would I buy it again today if I saw it in a store. If you have not worn it in a year and would not buy it today, it goes in the donation pile. Be especially honest about items kept out of guilt, the expensive piece you never liked, the gift you never wore, the size you used to wear, because keeping them in the closet does not make them useful, it just hides the things you actually wear behind them. A meaningful donation pile is what makes a reorganization last; a closet that loses no volume looks crowded again within weeks.
How do I make my closet look organized without buying a lot of storage?
The single highest-impact change is replacing mismatched hangers with one consistent slim velvet non-slip type, which transforms the visual feel of the rod and lets you fit more clothes on the same length. The second is group like with like, all long sleeves together, all pants together, all sweaters together, and sub-sort each category by color. These two changes cost almost nothing, take an afternoon, and visually transform the closet more than any expensive container system. Add shelf dividers, a low shoe rack, and a few clear bins for off-season items only after the sort and the hangers are done, because storage you buy before sorting rarely fits what you actually own.
You might also like

7 Deep Cleaning Tricks That Save Hours Every Week
After timing the same bathroom clean twice once with my old routine and once using these tricks the second run took 22 minutes to the first run's 45. Here's what made the biggest difference and the one mistake I see in almost every cleaning routine.
How to Deep Clean a Shower (10 Proven Methods)
I deep cleaned the same shower twice in one week once with my old routine and once with these ten methods applied in the right sequence. The difference wasn't even close. Here's what changed and the daily habit that eliminated most of my scrubbing for good.

30 Cleaning Myths You Need to Stop Believing
I've been on the wrong side of most of these myths. Bleach-over-grease, newspaper on mirrors, vinegar on marble all things I did before understanding why they don't work or actively cause damage. Here's what actually changed how I clean and the two safety myths that matter most.