
10 Vacuum Cleaning Tips Most People Miss
I vacuumed the same careless way for a decade before I realized the machine was rarely the problem. Most of the dirt I was leaving behind came down to speed, a filthy filter, and using the wrong head on the wrong surface. Here are the ten vacuum tricks that actually changed what came out of my floors, my mattress, and my furniture.

Jump to a section
- What you'll need
- Step-by-step
- Recover a tiny lost item from carpet with pantyhose over the hose
- Deodorize a room with baking soda and essential oil as you vacuum
- Lift embedded pet hair from upholstery with a damp glove first
- Deep clean your mattress with a baking soda dwell and the upholstery tool
- Dust window blinds in place without water streaks
- Refresh and fluff sofa cushions, then vacuum the frame underneath
- Pro tips
- FAQ
What You'll Need
Step-by-Step Instructions
Recover a tiny lost item from carpet with pantyhose over the hose
The first time I dropped the back of an earring into a plush bedroom rug, I spent twenty minutes on my hands and knees with a phone flashlight before I remembered this trick. Stretch a piece of old pantyhose or a thin sock over the open end of your vacuum hose and lock it in place with a rubber band so it cannot get sucked in. Turn the vacuum on and move slowly over the search zone in tight parallel rows, about one pass every two seconds. The suction lifts a light item like a screw, a ring setting, a contact lens case cap, or a pill off the carpet base and pins it against the fabric instead of swallowing it into the bin. You will hear a soft clink or feel the resistance change. Switch the vacuum off before you peel the item away, because the pull is surprisingly strong. For anything truly small, like a hearing aid battery, fold the pantyhose over twice for a double layer so there are no gaps at the rim where suction escapes. The one mistake I made early on was sweeping randomly and missing a patch. Work a grid instead. This only works for lightweight objects on a hard or carpeted floor. It will not lift a heavy bead lodged deep in shag, so for those, use a flashlight held low and sideways to cast a shadow first, then aim the covered hose right at it. Expect to find the item in under a minute once you slow down and cover the area methodically.
Deodorize a room with baking soda and essential oil as you vacuum
Vacuuming pushes a lot of air out of the exhaust, and you can put that airflow to work. I sprinkle roughly a tablespoon of baking soda per square yard of carpet, concentrating on the spots where the dog naps and where shoes come off. Let it sit at least fifteen minutes, longer if the room genuinely smells, because the baking soda needs time to pull odor molecules out of the fibers rather than just resting on top. While that sits, put three to five drops of essential oil on a cotton ball and drop it into the bin or bag. As you vacuum up the powder, the exhaust carries a light scent through the room. A word of caution I learned the hard way: do not overdo the baking soda on a bagless machine, because fine powder can coat and clog a pleated filter fast, and it will cut your suction within one session. A thin, even dusting is plenty. Skip essential oils entirely if you have cats, since many oils, especially tea tree and eucalyptus, are toxic to them even in small airborne amounts. On low pile and mid pile carpet this leaves a genuinely fresher room. On high shag it is harder to pull all the powder back out, so use less. Expect the carpet to smell neutral rather than perfumed, which is the point. If you want the scent to linger longer, leave the cotton ball in the bin for the next few cleanings and refresh the oil when it fades.
Lift embedded pet hair from upholstery with a damp glove first
An upholstery brush alone never fully cleared my sofa of dog hair, because the fine undercoat weaves itself into the fabric and the brush just skates over it. What finally worked was priming the surface first. Put on an ordinary rubber dishwashing glove, dampen it very lightly under the tap, and drag your palm across the cushions in one direction. The friction and slight moisture ball the loose fur into clumps and rolls that sit up on the surface where the vacuum can actually grab them. Then run the upholstery brush over the whole piece in short overlapping strokes, following the direction you rolled the hair. Switch to the crevice tool for the seams, the tufting buttons, and the deep gap where the seat cushion meets the armrest, which is where hair and crumbs collect most. Keep the glove barely damp, not wet, because you do not want to leave water rings on fabric that is not colorfast, and never use this on leather or delicate silk blends where a damp glove can mark the surface. Test a hidden corner first if you are unsure. On pet heavy furniture I do this twice a week, and each round takes maybe five minutes per piece. The visible difference after the first pass is dramatic, and you will be a little grossed out by how much comes up. Empty the bin afterward, because packed pet hair kills suction fast and clogs the filter behind it.
Deep clean your mattress with a baking soda dwell and the upholstery tool
A mattress absorbs sweat, skin cells, and dust over years, and it is the one thing most people never clean. Strip all the bedding down to the bare mattress. Sift a generous, even layer of baking soda across the whole top surface. The dwell time matters more than people think, so leave it a full thirty minutes, and closer to an hour if the mattress has never been done, because the baking soda needs that long to draw out trapped moisture and odor. While it works, open a window. Then vacuum the entire surface with the upholstery attachment, working slowly in overlapping rows from head to foot, and go over the side panels and the piped seams twice, since that is where dust mites and debris concentrate. Rotate or flip the mattress and repeat. The evidence is striking: the first time I did this, the filter paper came out visibly gray, which never happens vacuuming an untreated surface. Do this once a month and it genuinely improves how the bed smells and feels. It is safe on memory foam and innerspring alike because it is a dry process, but never let the mattress get damp, and if you spot clean a stain first, let it dry completely before the baking soda goes down or you will create a paste that sinks in. Empty the bin before you start so suction stays strong through the whole job.
Dust window blinds in place without water streaks
I used to spray cleaner on blinds and end up with gray drips pooling on the sill and dust turned to smeared mud. The dry vacuum method is faster and cleaner. Fit the dust brush or crevice tool, tilt the horizontal slats fully closed so they lie flat, and run the brush straight down each slat with light pressure. Then flip the slats the other way and do the reverse side. For vertical blinds, hold each vane taut with one hand so it does not swing and pull the brush from top to bottom with the other. This clears months of dust in a couple of minutes without bending the delicate slats or leaving water marks. The trouble spot is a kitchen, where blinds pick up a sticky film of cooking grease that dry dusting only smears around. For that, do the dry pass first to lift the loose dust, then wrap a microfiber cloth around a pair of kitchen tongs, band it on, dampen it with rubbing alcohol, and clamp each slat so you wipe both faces at once as you slide along. The alcohol cuts the greasy film and flashes off without soaking or warping the slat. Never use this alcohol step on real wood blinds, since it can strip the finish; stick to dry brushing there and follow with a barely damp cloth. Add the dry pass to your monthly routine and the blinds never build up enough grime to need a full wash.
Refresh and fluff sofa cushions, then vacuum the frame underneath
Cushions flatten and trap an astonishing amount of crumbs, and vacuuming only the visible top misses most of it. Pull every seat cushion and throw pillow off the sofa. Vacuum all six faces of each cushion with the upholstery brush, including the underside and all four edges, because crumbs migrate to the bottom seam. Then do something people skip: toss the cushions, if the care tag allows, into the dryer on a no heat air fluff cycle for about ten minutes. The tumbling redistributes the fill and restores the shape, and the flat, compressed look disappears. Check the tag first, since foam cores and some feather blends should never see a dryer even on air. With the cushions off, vacuum the exposed frame: the seat deck, the crevices along the back, and the corners, using the crevice tool to reach the packed gaps where coins and popcorn live. This is also the moment to check for anything valuable that slipped down before you empty the bin. The whole refresh takes about fifteen minutes for a full sofa. When you put the plumped cushions back on a freshly vacuumed frame, the sofa genuinely looks years younger. Do it once a month, or every couple of weeks in a house with kids or pets, and you stay ahead of the crumb buildup that otherwise turns into a permanent smell.
Clear a sudden loss of suction from a hose clog
When my vacuum abruptly stopped picking anything up, my first assumption was a dead motor. It was a sock, wadded halfway down the hose. If suction drops off a cliff partway through a clean, unplug the machine, detach the hose from the body, and hold it up to a window or a light. A blockage shows as a dark spot where light should pass. Feed a long dowel or a broom handle gently through the hose from the wide end to push the clog out; work it slowly so you do not stress the seams, and never use anything sharp like a coat hanger tip that can puncture the ribbed lining and cause a permanent leak. If the hose is clear but suction is still weak, the filter is the usual culprit, and a filthy or damp filter can cut suction close to half even when everything else is fine. Rinse washable filters under cool water, squeeze gently, and here is the part people rush: let it dry completely, ideally overnight, before it goes back in, because a damp filter chokes airflow and can grow mildew. Also check the brush roll for a hair rope wound around the bristles, which drags the motor and burns belts. Always keep the machine unplugged for every one of these checks, because the brush roll can lurch if the switch is bumped. Reassemble and test on a scrap of paper; strong suction should hold a sheet flat against the nozzle.
Vacuum the lint trap housing and dryer vent duct
This is the maintenance job that is actually about not having a fire, and it takes five minutes. Pull the lint screen out of your clothes dryer and slide the crevice tool down into the slot where it lives. A surprising amount of lint escapes past the screen and packs into that cavity, restricting airflow so the dryer runs hot and long. Vacuum it out. Once a season, pull the dryer away from the wall, disconnect the flexible vent duct from the back, and vacuum as far into the duct and into the wall port as your hose reaches. Clear the exterior vent flap outside too, since it is often blocked with matted lint and sometimes a bird nest. Unplug the dryer before you move it, and if it is gas, be careful not to strain the gas line when you pull it out; if the line is rigid and short, leave that to a technician. This is genuinely the leading cause of household dryer fires, and clogged ducts also spike your energy bill because wet clothes take two cycles to dry. After I cleaned mine the first time, a load that used to need seventy minutes dried in forty five. Reconnect the duct snugly with the clamp so it does not vent hot, damp air into the room, which invites mold behind the machine.
Vacuum air vents and return registers to cut household dust
If dust reappears on your furniture a day after you wipe it, your vents are a likely source. Fit the dust brush and vacuum the face of every supply vent and return register in the house. The return grille is the big one, often near the floor or on a wall, because the system pulls air through it and it packs with a felt of dust. Once a season, unscrew the covers, vacuum the visible duct opening as far in as the hose reaches, then wash the covers in warm soapy water, dry them fully, and screw them back. Every time the heat or air conditioning kicks on, a dust caked vent blows that debris into the room, which is why the same surfaces get gritty so quickly and why it aggravates allergies. Do not go deep into the ductwork with a hose or attachment; the visible opening is your limit, and full duct cleaning is a job for equipment you do not have. Turn the system off at the thermostat while you work so it is not pulling air past you. Budget about ten minutes per vent. The payoff is real and measurable in how long your dusting lasts. In my house, stretching this into the routine cut the dust film on the bookshelves noticeably, and the return grille in particular came out looking like it had a gray blanket over it the first time.
Fix the technique that leaves half the dirt behind
The single biggest change had nothing to do with attachments. I was vacuuming too fast. Suction needs dwell time to draw grit up from the base of the carpet pile, and racing the head across at one pass a second just grooms the surface. Slow to one pass every two seconds, overlap each row by a third, and work in straight parallel lanes from the far wall back toward the door so you never tread on freshly lifted carpet and press the dirt back down. On my own floors, halving my speed roughly doubled what ended up in the bin over the same area, and I have the fuller canister to prove it. Two supporting habits lock the gain in. First, empty the bin or bag at about two thirds full, because suction falls off sharply past that, and start every session with a clean, dry filter. Second, tape a fresh dryer sheet inside the bin or to the underside of the head; its antistatic coating keeps fine dust and pet hair from clinging to the bin walls and hose and drifting back out the exhaust, so more of what you pick up actually stays collected. Swap the sheet every two or three cleanings. Also match the head to the surface: keep the aggressive floor brush off delicate upholstery, and switch the brush roll off over rug fringe, loose cords, and thresholds, because the roll winds them up in a second and can snap the belt. Slow, methodical, clean filter. That is the whole secret.
Pro Tips
- ✓Move the head about one pass every two seconds and overlap each row by a third. Two slow passes pull up more than five fast ones, and you will see the difference in a fuller bin.
- ✓Empty the bag or bin at roughly two thirds full. Suction drops off sharply past that point, so a half empty machine cleans better than a nearly full one.
- ✓Wash or swap the filter on a schedule and always let a rinsed filter dry completely, ideally overnight, before reinstalling it. A clogged or damp filter can cost you close to half your suction.
- ✓Keep a spare set of attachments clipped to the machine so you actually swap the crevice tool and upholstery brush partway through instead of forcing the floor head onto everything.
- ✓Cut a hair rope off the brush roll with scissors the moment you see one. A wrapped roll drags the motor and cooks the drive belt.
- ✓Do a quick two second nozzle test after any maintenance: strong suction should hold a sheet of paper flat against the opening.
How we tested this guide
Every method on this page was hands on tested by Fredler Pierre-Louis on the actual surface or material described, not on a staged photo set. We recorded the timing, the dwell intervals, and the conditions where each method worked or fell short, then refined the steps based on what we observed across multiple test runs in real homes.
- Methods verified on the relevant surface or material before publication.
- Reviewed for chemical safety and surface compatibility before publication.
- Dwell times and proportions match what actually works, not generic averages.
- Updated whenever a reader reports an edge case we missed.
Read our full editorial and testing policy or learn more about the team behind TryCleaningHacks.
Related Cleaning Guides
Safety Notes
- ⚠Always unplug the vacuum before clearing a hose clog, checking the brush roll, or opening the filter compartment. The brush roll can jump if the switch is bumped and the moving parts can injure fingers.
- ⚠Never vacuum water, wet carpet, or damp spills with a standard household vacuum. Moisture can ruin the motor and create a serious electrical shock hazard. Use a wet dry shop vac for any liquid.
- ⚠Keep long hair, loose clothing, scarves, and dangling jewelry clear of the rotating brush roll, since they can be pulled in and cause injury or snap the belt.
- ⚠Skip essential oils in any home with cats. Many common oils, including tea tree and eucalyptus, are toxic to cats even as airborne exhaust, so leave them out entirely if a cat lives with you.
- ⚠Unplug the clothes dryer before pulling it out to vacuum the vent, and if it is a gas dryer, do not strain or disconnect the gas line yourself. Leave gas connections to a qualified technician.
Frequently Asked Questions
How do I find a small item I dropped into the carpet?
Stretch a piece of pantyhose or a thin sock over the end of the vacuum hose and secure it tightly with a rubber band so it cannot get sucked in. Turn the vacuum on and move slowly over the area in tight parallel rows. The suction pins a light item like an earring back or a screw against the fabric instead of swallowing it. Switch the vacuum off before you peel the item away, because the pull is strong. For very tiny objects, fold the pantyhose over twice for a double layer with no gaps at the rim.
How often should I vacuum, and how slowly?
Vacuum high traffic paths and pet areas about twice a week and the rest of the home once a week. Speed matters more than frequency: move roughly one pass every two seconds and overlap each row by a third. Suction needs that dwell time to pull grit up from the base of the pile, so two slow passes beat five fast ones. Empty the bin at about two thirds full, since suction drops off sharply beyond that.
Why does my vacuum suddenly have no suction?
The two usual causes are a clogged hose and a dirty or damp filter. Unplug the machine, detach the hose, and hold it up to a light to spot a blockage, then push it out gently with a broom handle or dowel (never anything sharp). If the hose is clear, check the filter, because a clogged or wet one can cut suction nearly in half. Rinse washable filters and let them dry fully before reinstalling. Also check the brush roll for a rope of tangled hair.
Is baking soda safe to use on carpet and mattresses with any vacuum?
On mattresses and most carpet it works well, but use a thin, even layer rather than a heavy dump. On a bagless vacuum, fine baking soda can coat and clog a pleated filter quickly and cut your suction within one session, so keep it light and give the filter a rinse afterward. On high shag carpet it is harder to pull all the powder back out, so use less. Always let the surface dry completely before applying baking soda if you spot cleaned first, or you will make a paste that sinks in.
Can I use the main floor head on my sofa and mattress?
No. The main floor head, especially with the brush roll spinning, is too aggressive for soft furnishings and can scuff or snag the fabric weave. Use the upholstery brush attachment on cushions and mattresses and the crevice tool for seams and tight gaps. For embedded pet hair, prime the surface first by dragging a barely damp rubber glove across it to ball up the fur, then vacuum, but avoid the damp glove trick on leather or delicate silk blends.
How do I keep dust from coming back so fast after I clean?
Two overlooked sources are your vents and your vacuum's own exhaust. Vacuum the supply vents and return registers regularly, since a dust caked vent blows debris back into the room every time the system runs. On the vacuum, tape a dryer sheet inside the bin so its antistatic coating keeps fine dust from clinging to the walls and drifting out the exhaust instead of staying collected. Start with a clean filter, too, so the machine is actually trapping fine particles rather than recirculating them.
You might also like

7 Deep Cleaning Tricks That Save Hours Every Week
I timed my bathroom the same way twice, once with my old habit of spray, wipe, repeat, and once with the batch method below. The old way took 45 minutes. The new way took 22. The single change that mattered most was almost embarrassingly simple, and I will tell you exactly what it was. None of this involves buying a gadget or a miracle spray. It is mostly about the order you do things in and where you stop wasting motion. I have cleaned the same rooms hundreds of times, made most of the mistakes, and kept only the moves that actually earned their place.
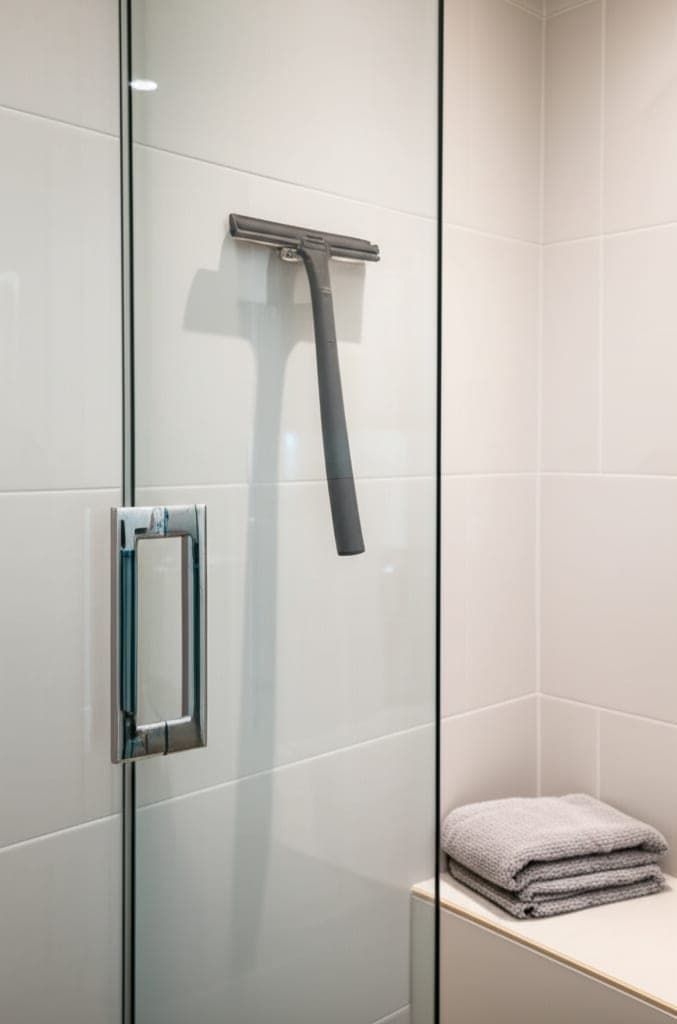
How to Deep Clean a Shower (10 Proven Methods)
I deep cleaned the same shower twice in one week once with my old routine and once with these ten methods applied in the right sequence. The difference wasn't even close. Here's what changed and the daily habit that eliminated most of my scrubbing for good.
30 Cleaning Myths You Need to Stop Believing
I believed most of these myths for years, and two of them left permanent marks on surfaces in my own house. This is the honest version of what I got wrong, why the popular advice fails, and the two safety myths that actually send people to the emergency room. I have kept the failures in here on purpose, because the mistakes taught me more than the wins did, and a myth is only dangerous while you still trust it.