
The Complete Declutter and Clean Checklist (20 Pairings)
I have decluttered my apartment at least four times, and three of those times the mess crept back within two weeks. The version that finally held was the one where I stopped treating decluttering and cleaning as two separate chores and paired them shelf by shelf. Instead of gutting the whole place and then cleaning what was left, I cleared a surface, wiped it while it was empty, and reloaded only the keepers, one small zone at a time. That single change turned a dreaded weekend marathon into a set of 30 minute sessions I could actually finish. Here is exactly what I did differently across ten pairings, the exact dwell times and quantities that worked, where each hack quietly underperforms, and the one habit that undoes almost everyone.

Jump to a section
- What you'll need
- Step-by-step
- Pick the one room that makes you tense, and finish it
- Sort every item into four boxes with no maybe pile
- Empty all four boxes the same day
- Strip each surface bare before you wipe it
- Clean each shelf the second it is empty, then reload it
- Run the backward hanger test in the closet
- Pro tips
- FAQ
What You'll Need
Step-by-Step Instructions
Pick the one room that makes you tense, and finish it
The first time I tried a whole apartment cleanout in one afternoon, I bounced between the bedroom, the kitchen, and the hall closet, and by evening every room was half torn apart and nothing was done. So now I pick the single space that makes my shoulders climb toward my ears when I walk past it. For me that is usually the kitchen counter. I close the door, snap a before photo on my phone, and set a timer for 30 minutes. Finishing one room completely does two things. It gives you a clean space to rest your eyes on, and it proves to your brain that this is doable. The photo matters more than it sounds. On the days I did not feel like continuing, scrolling back to that before shot was what got me moving again. A concrete tip on scope: if a full room feels like too much, shrink the target to a single zone you can genuinely finish inside the 30 minutes, like one countertop run or one nightstand, rather than the whole bedroom. The goal is one completely finished patch, not four started ones. If the timer goes off and you are not done, do not bail mid pile. Set it for one more 10 minute round and close that zone out, because a half sorted counter is worse than the one you started with. Expect the first session to feel slower than you want. The speed comes later, once your keep or toss instincts warm up. What you should have at the end is one space that is fully sorted, wiped, and reloaded, plus a before photo you can compare against.
Sort every item into four boxes with no maybe pile
Label four bins Keep, Donate, Trash, and Relocate. Painter's tape and a marker work fine. Pick up each item once and drop it into exactly one box. The rule that changed everything for me was banning the maybe pile. A maybe pile is just clutter wearing a disguise, and mine always migrated straight back onto the shelf. If you genuinely cannot decide on a few things, use one small closed box labeled with today's date, tuck it in a closet, and open it in 30 days. Whatever you never reached for gets donated without a second agonizing decision. When I first did this in my kitchen, the Donate box filled faster than I expected, mostly with duplicate gadgets I forgot I owned. A speed trick that keeps you honest: give yourself about five seconds per item. If a decision takes longer than that, it is almost always going into the dated box, not the Keep box, because a slow yes is usually a disguised no. Keep the four boxes physically close so you are dropping items, not walking them across the room, which is where momentum leaks away. Two honest limits worth naming. First, sentimental items break this system, so pull photos, letters, and heirlooms out into a separate small batch and handle them last when your decision muscle is warmed up, not first when every keepsake feels precious. Second, the four box method sorts, it does not decide your storage, so resist the urge to start arranging the Keep box now. You will place those items in the reload step. What you should have at the end of this step is four full or filling boxes and an empty surface, nothing lingering in your hands.
Empty all four boxes the same day
This is the step that decides whether the whole thing sticks, and it is the one I skipped every previous time. The moment sorting is done, the Trash box goes out to the bin, the Donate box goes into your car (not the hallway, the car), and you carry the Relocate box through the house putting each item where it actually lives. I once left a Relocate box in my hallway overnight, told myself I would deal with it in the morning, and it sat there for eleven days before I finally emptied it. Items that linger get quietly absorbed back into the room. If the boxes are empty by bedtime, the declutter holds. If they are not, you have just moved the clutter around. A practical fix for the Relocate box, which is the one that traps people: carry it room to room in one loop rather than making a separate trip per item, and if a relocated thing has no obvious home in its destination room, that is a signal it belongs in the Donate box, not a new pile. For donations, look up your local charity drop off hours before you start, because a Donate box that cannot be delivered until next Saturday is a box that will get raided for that one shirt by Wednesday. If you truly cannot drive the donations out that day, put the sealed box in the trunk anyway so the decision is physically done and the items are out of the living space. What you should have by bedtime is an empty Trash box back in its spot, donations in the car, and every relocated item in its real room. The floor and surfaces you cleared should still be clear, which is the proof the reset actually took.
Strip each surface bare before you wipe it
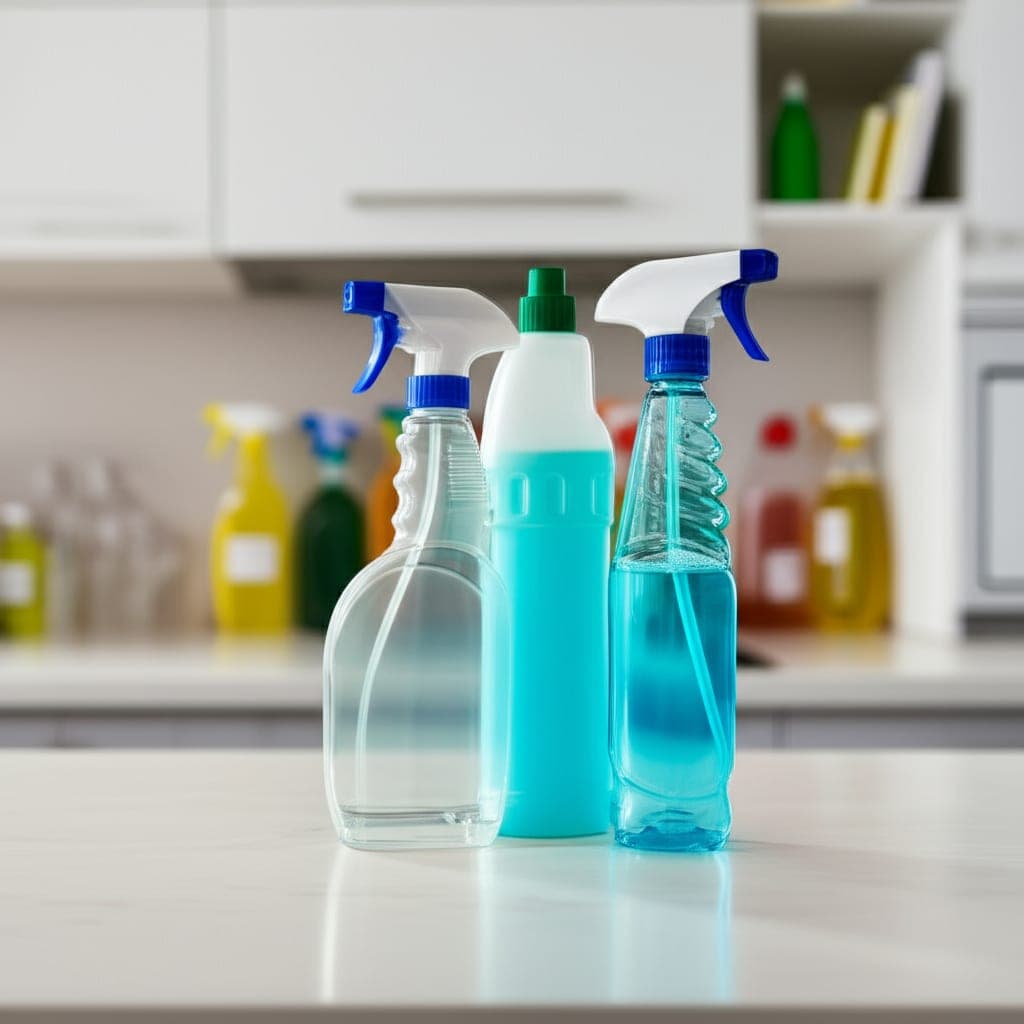
Take everything off the countertop, shelf, or tabletop and sort it into your boxes first. Now you can actually clean. When I cleared my kitchen counter completely, I found a sticky ring under the toaster and a line of grime along the backsplash I had been wiping around for months without noticing. Spray all purpose cleaner, let it sit about 30 seconds so it can loosen grease, then wipe with a dry microfiber cloth. On a heavier grease ring, give it closer to 60 seconds and let the cleaner do the work instead of scrubbing, which just smears it around. A genuinely clean bare surface looks better than the most beautifully arranged clutter, every time. Before you put things back, ask whether each item earns its spot. I aim for three items or fewer on any visible surface, which keeps future wiping to about ten seconds. A note on surfaces, because all purpose cleaner is not universal. On sealed stone like granite or quartz, skip anything acidic and stick to a pH neutral all purpose spray, because vinegar and citrus cleaners can etch and dull the sealer over time. On bare wood or butcher block, use a barely damp cloth and dry it immediately rather than letting cleaner sit, since standing moisture raises the grain and lifts the finish. For glass and mirrors, my diluted 1 to 1 white vinegar and water spray buffed dry with microfiber beats most blue sprays and leaves no film. Troubleshooting the haze people complain about: if a wiped surface dries streaky or cloudy, you almost always used too much product or a damp cloth on the final pass. Do a second pass with a clean, dry microfiber cloth and the haze lifts. What you should have here is a bare surface that squeaks clean and holds three items or fewer when you reload it.
Clean each shelf the second it is empty, then reload it
Instead of decluttering the whole room and cleaning afterward, I now wipe each shelf or drawer the instant it is empty and before anything goes back. Removing items from a shelf, wiping the shelf, and returning only the keepers takes one motion and prevents the small heartbreak of setting clean things down onto dust. There is a sneaky psychological bonus too. Once a shelf is genuinely clean, putting a useless item back onto it feels wrong, so you naturally keep less. On my bookshelf I added a strip of wipeable liner after cleaning, which now catches dust so future wipe downs take seconds. I plan to swap the liner once a year or whenever it looks tired. A dust specific tip that saves rework: wipe top down, highest shelf first, so the dust you knock loose falls onto shelves you have not cleaned yet instead of the ones you just finished. For a shelf that is more dusty than dirty, a barely damp microfiber cloth traps the dust rather than scattering it, whereas a dry cloth or a feather duster just launches it into the air to resettle in ten minutes. Let the shelf dry fully before you reload, maybe two to three minutes, because trapping any moisture under a stack of books invites that musty paper smell. Cut the liner slightly undersized so it sits flush and does not curl up at the front edge, which is the detail that makes cheap liner look cheap. One honest caveat: adhesive backed liner is a pain to remove later and can peel paint or veneer, so for anything you might sell or move, use the non adhesive kind. What you should end with is a dry, lined shelf holding only keepers, and noticeably faster future dusting.
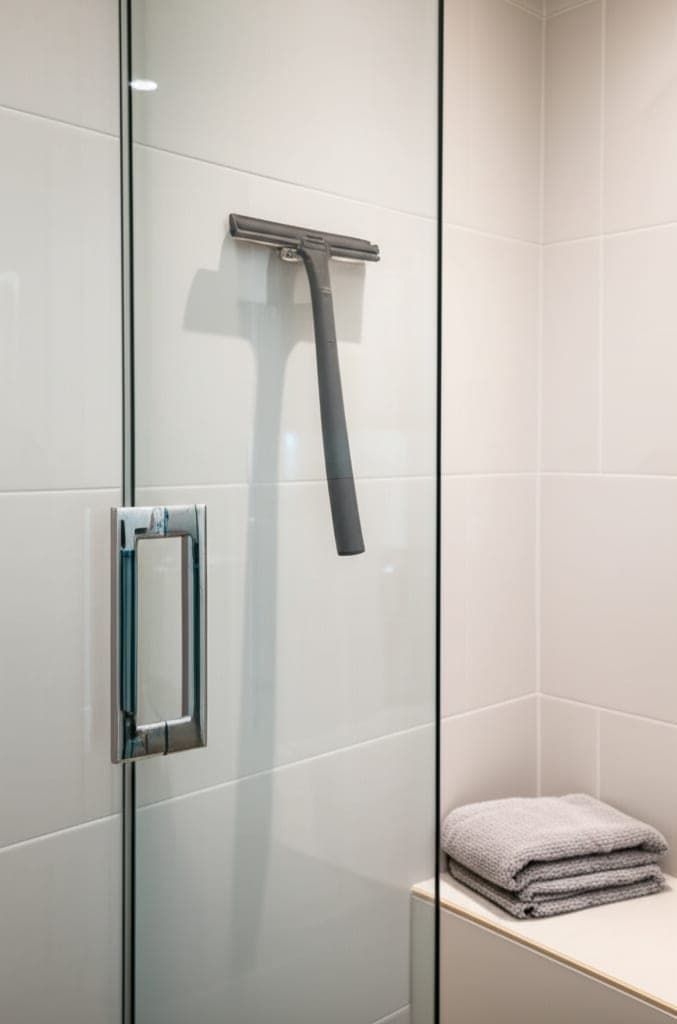
Run the backward hanger test in the closet
Turn every hanger in your closet so the hook faces you, the wrong way. For the next month, whenever you wear something and hang it back, turn that hanger the normal way. After 30 days, anything still facing backward has not been worn, and your actual habits, not your guilt, have made the decision for you. I did this last spring and was genuinely surprised. Nine shirts I was sure I loved never got touched, and seven of them went to donation. While the month runs, clean the closet itself. Wipe the top shelf, vacuum the floor, and wipe down any shoe rack. When you assess the backward hangers, be honest. If you can name a real upcoming occasion, keep it. If your reason is just in case, let it go. Two adjustments make the test fairer. First, account for the calendar, because a 30 day window in July tells you nothing about your winter coats, so either run the test long enough to cross a season or judge off season items on a separate, gentler standard. Second, exclude the obvious specialty pieces up front, like a suit, a formal dress, or funeral clothes, since those legitimately sit unworn for long stretches and do not belong in the numbers game. While the closet is emptier than usual, deal with the air quality too. Toss a fresh cedar block or a sachet on the top shelf rather than a heavy synthetic fragrance, and if you smell must, that is a moisture cue worth chasing before you reload. A realistic expectation: the first pass usually clears a modest handful, not half your wardrobe. The bigger payoff is the second time you run it, once you stop refilling the closet on autopilot. What you should have is a wiped, vacuumed closet and a short, honest donate stack.
Reset one kitchen drawer at a time
Do drawers one at a time so you never create an overwhelming pile. Pull everything out, toss the broken utensils, the duplicates, and the mystery gadgets you cannot identify, then wipe the empty drawer with a damp microfiber cloth. In my own kitchen roughly a third of every drawer was stuff I had not touched in a year. Return only what you actually use, and group it by job. Spatulas together, measuring tools together, sharp things kept separate so you are not reaching blindly into a jumble. If you want dividers, wait until the drawer is sorted so you buy the right sizes. Buying organizers first just gives your clutter a nicer home. Before you reload, measure the empty drawer, both the inside width and depth and the opening height, and write it on your phone, because the single most common organizer mistake is buying a tray that is a quarter inch too tall to let the drawer close or too wide to sit flat. For the crumbs and grease film that collect in the corners, a damp cloth with a drop of dish soap lifts it, and a dry pass afterward stops the liner or wood from staying tacky. Let the drawer air out for a couple of minutes before reloading so you are not sealing dampness under a divider. A troubleshooting note for the junk drawer everyone has: if it refills within a week, the real problem is usually that the items in it have no home elsewhere, so the fix is upstream, giving batteries, chargers, and takeout menus a designated spot rather than trying to organize the drawer harder. What you should end with per drawer is a wiped, dry interior holding only used tools, grouped by job, ideally with dividers sized to the space rather than guessed at.
Pair the bathroom cabinet purge with an expiry check
Take every product out of the medicine cabinet and shower shelves. Throw out anything expired, nearly empty, or untouched for three months. In my cabinet that meant three sunscreens from previous summers and a nearly fossilized tube of something I could not read anymore. Wipe every shelf, then return only current products. A bathroom with less stuff in it is genuinely faster to clean each week, which is the whole point of pairing the two tasks. Check medication dates carefully, because expired medicine can lose potency or, in a few cases, become unsafe. Set expired prescriptions aside for a pharmacy take back program rather than flushing them or tossing them loose in the trash. A quick literacy tip on the products themselves: many cosmetics carry a small open jar symbol with a number like 12M, which means twelve months after opening, not from purchase, so if you cannot remember when you opened a mascara or an eye cream, treat six months as the cautious cutoff for anything used near the eyes. Sunscreen is the one I now date with a marker the day I open it, because a degraded SPF is worse than useless, it is falsely reassuring. Wipe the shelves with a damp cloth, and pay attention to the ring left by shampoo and conditioner bottles, which is where mildew starts in a humid bathroom. Standing each bottle on a small tray you can pull out and rinse makes that weekly wipe trivial. For the toothbrush cup and any cup that holds standing water, a diluted vinegar soak clears the crust that soap alone leaves behind. What you should have here is a wiped cabinet holding only current, in date products, expired medication bagged for proper disposal, and noticeably faster weekly cleaning because there is simply less to move.
Reset the space under both sinks and add a drip tray
Under sink cabinets turn into dumping grounds shockingly fast. Pull everything out from under the kitchen and bathroom sinks, throw away the dried up cleaners, the crusty old sponges, and any bottle that leaks. Wipe the cabinet floor and, while your head is in there, look and feel for moisture or a musty smell that could mean a slow leak. Contain the survivors in a bin or two. The trick I wish I had learned years ago is slipping a shallow plastic tray under the pipe connections. It catches slow drips before they warp the cabinet wood, and it makes a real leak obvious the moment water pools instead of soaking in unseen. A few concrete details. Choose a tray with a raised lip, even half an inch helps, and set it so it sits under the P trap and the supply line shutoffs, since those joints are where slow weeping usually starts. If the cabinet floor is already soft, spongy, or dark stained, that is not a job for a tray, that is a plumber call, because the water has been sitting long enough to rot the particleboard. Keep chemicals in their own bin separate from sponges and rags so a slow leak from a cleaner bottle does not contaminate everything, and never nest an opened bleach product next to an acid or ammonia cleaner in the same tight bin. A cheap upgrade: a stick on cabinet light or a battery puck light makes it far likelier you will actually notice a stain or drip early instead of discovering it as a warped floor months later. What you should end with is a wiped, dry cabinet, survivors corralled in wipeable bins, and a drip tray under the pipes acting as an early warning system.
Vacuum and mop last, reaching the spots you only see now
Save the floor for the very end, once the room is decluttered and every surface is wiped. Vacuum the whole floor, then chase the corners, the baseboards, and under the furniture with a crevice tool. Follow with a mop on hard floors. The reason I do this during a declutter rather than a normal clean is simple. The room is already cleared, so I can actually shift the couch and reach the compressed mat of dust and hair that had been hiding under one leg for months. The first time I moved my bed frame during a cleanout I found a dust layer so thick it looked like felt. Because you are already in the room with momentum, this is the one time reaching those spots is genuinely easy, so it actually gets done. Order matters here, so always vacuum before you mop, because mopping first just turns loose dust into muddy streaks you then have to redo. Match the mop to the floor: a barely damp microfiber flat mop for sealed hardwood and laminate, since standing water swells the seams, and you can be more generous with water only on tile and vinyl. For a hard floor that dries cloudy, the culprit is usually too much cleaner, so dilute further or do a plain water rinse pass. When you slide heavy furniture, put a folded towel or felt pad under the legs and push rather than drag to protect the finish, and vacuum the felted underside of the couch and the cushions while they are pulled out, since that is where the worst of it hides. What you should end with is a fully cleared, cleaned, and reloaded room, floor included, matching the transformation in that before photo you took at the start.
Pro Tips
- ✓Take a before photo of every room before you touch it. On low motivation days, that image did more to restart me than any pep talk.
- ✓Put the Donate box in your car the same day, not by the door. Anything left in the hallway has a way of quietly moving back in.
- ✓Buy dividers and bins only after you have decided what to keep, so you size storage for the real amount, not the old clutter. Measure the drawer or shelf, inside width, depth, and opening height, before you order anything.
- ✓Schedule a 10 minute weekly reset for each room as a recurring calendar event, and pair it with a podcast so it feels less like a chore. Miss one week and you are fine. Miss two in a row and visible clutter returns.
- ✓The real test comes at day ten. If a kept item still has no assigned home by then, it will be clutter again by day fourteen, so give every keeper a specific place with room to spare.
- ✓Color code your microfiber cloths by room so the cloth you use under the sink never touches a kitchen counter or a bathroom mirror. It costs a few dollars and quietly prevents cross contamination.
- ✓Clean top down and vacuum before you mop, every time. Dust falls, so finishing the floor before the shelves guarantees a redo, and mopping over loose dust just makes streaky mud.
- ✓Give yourself roughly five seconds per item while sorting. A decision that takes longer is almost always a disguised no, so send it to the dated box rather than back onto the shelf.
- ✓Date perishable products with a marker the day you open them, especially sunscreen and anything used near the eyes, so the next purge is a glance instead of a guess.
How we tested this guide
Every method on this page was hands on tested by Fredler Pierre-Louis on the actual surface or material described, not on a staged photo set. We recorded the timing, the dwell intervals, and the conditions where each method worked or fell short, then refined the steps based on what we observed across multiple test runs in real homes.
- Methods verified on the relevant surface or material before publication.
- Reviewed for chemical safety and surface compatibility before publication.
- Dwell times and proportions match what actually works, not generic averages.
- Updated whenever a reader reports an edge case we missed.
Read our full editorial and testing policy or learn more about the team behind TryCleaningHacks.
Related Cleaning Guides
Safety Notes
- ⚠When you move furniture to clean underneath, bend your knees and lift with your legs rather than your back, and get a second person for anything heavy. Dragging a loaded dresser across a hard floor can gouge the finish and strain your back at the same time. Slide a folded towel or felt pad under the legs and push instead of dragging.
- ⚠Wear a dust mask when clearing closets, storage areas, or anywhere dust has piled up for a long time. Stirring up old settled dust can trigger asthma and allergy flare ups, and cleaning under long unmoved furniture kicks up a surprising amount of it.
- ⚠Never mix cleaning products. Bleach combined with vinegar, ammonia, or any acidic or peroxide cleaner can release toxic gas, so keep those bottles in separate bins under the sink and only ever use one product at a time on a surface. When in doubt, rinse with plain water between products.
- ⚠Wear rubber gloves when handling old, leaking, or unlabeled cleaners under the sink, and work with the cabinet doors open and a window cracked for ventilation. If you find a container you cannot identify, do not sniff it to find out, seal it and dispose of it through your local hazardous waste program.
- ⚠Dispose of expired medication through a pharmacy or community take back program rather than flushing it or tossing it loose in the trash, and keep any bagged medication out of reach of children and pets while it waits for drop off.
Frequently Asked Questions
What is the four box decluttering method?
You set out four containers labeled Keep, Donate, Trash, and Relocate, then pick up each item once and place it in exactly one box with no maybe pile allowed. The part people skip is finishing the job the same day. Take the trash out, put the donations in your car, and carry the relocate items to their real rooms before bed, or the clutter simply drifts back. Give yourself about five seconds per item so slow, guilt driven yeses do not sneak back onto the shelf.
Should you declutter before or after cleaning?
Declutter first, and ideally clean each surface the moment it is empty rather than waiting until the whole room is done. Clearing a shelf lets you wipe every inch and see the grime you had been cleaning around, and a genuinely clean bare surface makes putting useless items back feel wrong, so you naturally keep less. Work top down so dust falls onto surfaces you have not cleaned yet, and always vacuum before you mop.
Why does clutter come back within a couple of weeks?
In my experience it comes back for one reason above all others. Kept items had no specific home. Every space I successfully maintained had a designated spot for each thing with enough margin to put it away in seconds. The spaces that filled up with clutter again kept too much and stored too little, so anything without a home became clutter again by around day fourteen. If a drawer refills fast, the fix is usually upstream, giving those items a home elsewhere, not organizing the drawer harder.
How long does this whole declutter and clean process take?
For a single room I plan on one focused 30 minute session per zone rather than a whole day, because pairing decluttering with cleaning shelf by shelf breaks the work into finishable pieces. A kitchen counter or a nightstand is often done in that half hour. A closet or a full room of drawers might take two or three sessions across a weekend. The backward hanger test is the exception, since it runs quietly in the background over 30 days while you clean the closet itself up front.
Is it safe to use vinegar to clean everything?
No, and this is where a lot of hazy or dulled surfaces come from. Diluted white vinegar is excellent on glass, mirrors, and light limescale, but it is acidic, so keep it off natural stone like granite and marble and off sealed or waxed wood, where it can etch and strip the finish over time. Use a pH neutral all purpose cleaner on those. Never combine vinegar with bleach, since the mix releases toxic gas, and always rinse with plain water if you are switching products on the same surface.
What should I do with sentimental items during a declutter?
Pull them out of the four box flow and save them for last, once your decision making is warmed up, because judging a keepsake with the same five second rule you use on kitchen gadgets is unfair and usually ends in either regret or paralysis. Batch photos, letters, and heirlooms together, keep only what genuinely means something, and consider photographing bulky sentimental objects so you can keep the memory without the shelf space. If you truly cannot decide, the dated box gives you 30 days of distance before you commit.
You might also like

7 Deep Cleaning Tricks That Save Hours Every Week
I timed my bathroom the same way twice, once with my old habit of spray, wipe, repeat, and once with the batch method below. The old way took 45 minutes. The new way took 22. The single change that mattered most was almost embarrassingly simple, and I will tell you exactly what it was. None of this involves buying a gadget or a miracle spray. It is mostly about the order you do things in and where you stop wasting motion. I have cleaned the same rooms hundreds of times, made most of the mistakes, and kept only the moves that actually earned their place.
How to Deep Clean a Shower (10 Proven Methods)
I deep cleaned the same shower twice in one week once with my old routine and once with these ten methods applied in the right sequence. The difference wasn't even close. Here's what changed and the daily habit that eliminated most of my scrubbing for good.
30 Cleaning Myths You Need to Stop Believing
I believed most of these myths for years, and two of them left permanent marks on surfaces in my own house. This is the honest version of what I got wrong, why the popular advice fails, and the two safety myths that actually send people to the emergency room. I have kept the failures in here on purpose, because the mistakes taught me more than the wins did, and a myth is only dangerous while you still trust it.