
How to Clean a Coffee Maker (Drip and Keurig Descaling)
My coffee started tasting sour and thin, and the culprit was a coffee maker I had never actually cleaned. Here is how I descale drip machines and Keurigs with white vinegar, when a commercial descaler is worth it, and how I keep the reservoir from growing anything unpleasant.
Jump to a section
- What you'll need
- Step-by-step
- Figure out why your coffee suddenly tastes off
- Gather the right supplies and set your expectations
- Empty, disassemble, and preclean the removable parts
- Run the white vinegar descaling cycle on a drip machine
- Rinse the drip machine until the vinegar smell is gone
- Descale a Keurig using descale mode or a manual cycle
- Pro tips
- FAQ
What You'll Need
Step-by-Step Instructions
Figure out why your coffee suddenly tastes off
Before I touched any vinegar, I wanted to understand what I was actually fighting, because coffee going sour or flat is almost never the beans. Three things build up inside a machine at the same time. First is mineral scale, the chalky white crust that hard water leaves behind on the heating element and inside the tubing. That scale drops the water temperature the machine can reach, and underbrewed coffee at a low temperature tastes sour and weak. Second is oily coffee residue, called coffee oils or rancid lipids, that coats the carafe, the basket, and the shower head. Those oils go rancid over a week or two and add a bitter, stale edge that no rinse of the mug fixes. Third, and this is the one people miss, is mold and bacteria in the reservoir. The water tank stays damp and dark, and on a Keurig the reservoir almost never fully drains, so it is a small standing pond. If you have ever seen pink or black slime near the tank seam, that is biofilm. When I finally pulled my reservoir out and looked at the corners with a flashlight, I understood why my morning cup tasted like a locker room. Troubleshooting note: if your coffee tastes sour but the machine is clean and fairly new, check the water itself and the grind, but nine times out of ten with an older machine it is scale plus rancid oil. Honest observation: descaling fixes temperature and flow, but it does almost nothing for rancid oils, so you need both an acid step and a soap step. Most single method guides only do one.
Gather the right supplies and set your expectations
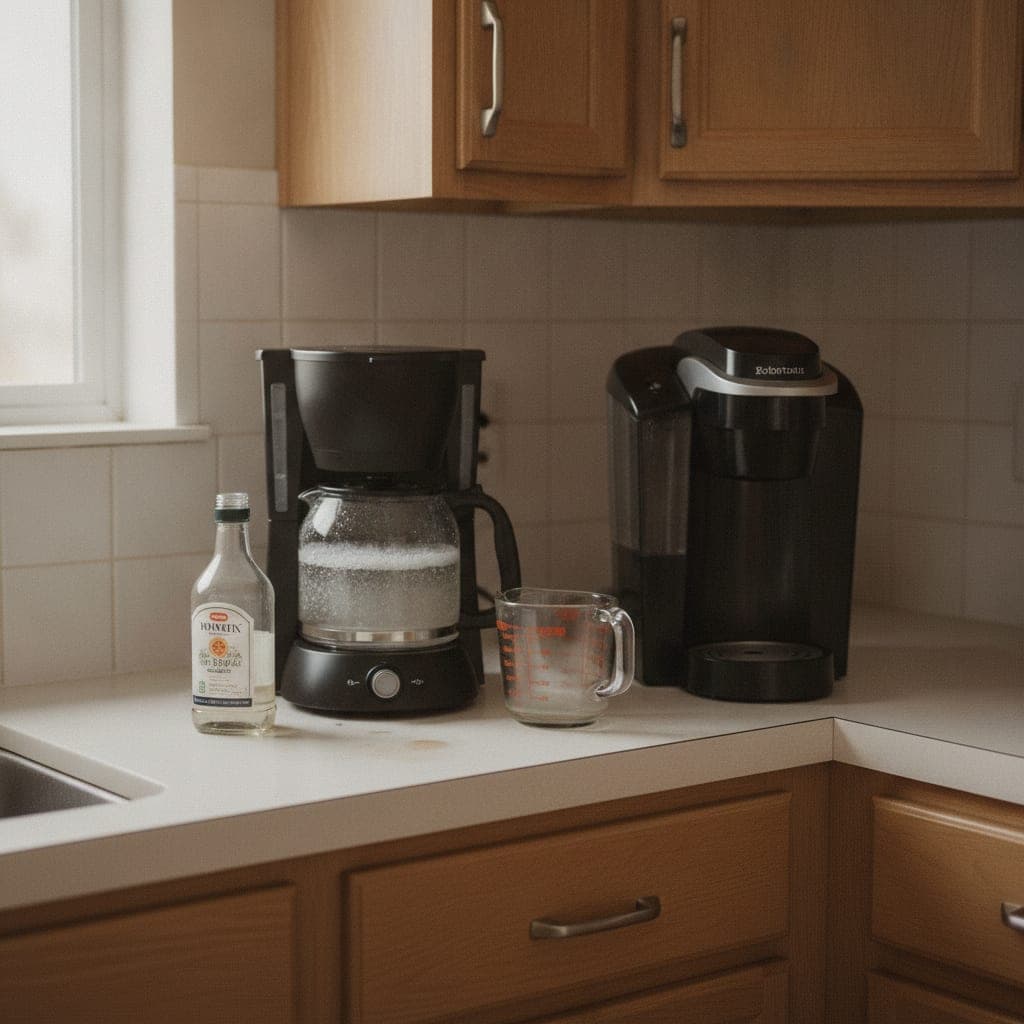
I keep this simple. For a drip machine you mostly need plain distilled white vinegar at 5% acidity, a lot of fresh water for rinsing, mild dish soap, and a soft brush. For a Keurig I add a paperclip or the little cleaning needle tool, because the entrance and exit needles clog with grounds and that is a separate job from descaling. I also keep a bottle of commercial descaler on hand for machines with aluminum boilers, which I will explain later. Set your expectations on time. A full drip descale with proper rinse cycles takes about an hour of mostly waiting, and a Keurig descale runs around 45 minutes including the rinse. You are not scrubbing the whole time, you are running cycles and letting solution sit. At heart this is an acid dissolving a mineral crust, exactly the same descaling idea that clears limescale from a kettle, so if you have done that job the logic will feel familiar. Troubleshooting note: buy distilled white vinegar, not cleaning vinegar at higher acidity and not cider vinegar, which leaves its own residue and smell. Honest observation: vinegar works and it is cheap, but it stinks and it can take three or four rinse cycles to fully clear the smell. If a lingering odor drives you up the wall, a commercial descaler rinses out faster and is worth the money. I go back and forth depending on how much time I have.
Empty, disassemble, and preclean the removable parts
I always start with the parts I can take out, because dumping them straight into the sink knocks out most of the rancid oil problem before I run any cycle. On a drip machine that means the carafe, the lid, the reusable filter basket or the plastic filter holder, and the water reservoir lid if it lifts off. On a Keurig I remove the water reservoir, the reservoir lid, the drip tray and its cover, and the K cup holder assembly, which pops out with a firm push from underneath. Wash all of it in warm water with a few drops of mild dish soap. Use a soft bottle brush on the carafe and a toothbrush on the basket ridges where the oils collect. Rinse until the water runs clear and there is no slick feel on the plastic, because a slick feel means oil is still there. Let everything air dry on a towel while you do the descaling step, or dry with a microfiber cloth. Troubleshooting note: do not put the Keurig K cup holder or the drip tray in the dishwasher unless the manual specifically says it is dishwasher safe, since the high heat can warp the funnel and ruin the seal. Hand washing is safer and takes two minutes. Honest observation: this is the step people skip, and it is the one that actually kills the stale taste. You can descale a machine perfectly and still get bitter coffee if the basket and carafe are coated in old oil, so do not treat this as optional.
Run the white vinegar descaling cycle on a drip machine
Here is the core drip descale. Fill the empty reservoir with a mix of equal parts distilled white vinegar and fresh water, so a 12 cup machine takes roughly 6 cups of vinegar to 6 cups of water. Put the empty carafe on the warming plate and place a paper filter in the basket with no coffee, because the filter catches loosened scale flakes so they do not clog the machine. Start a normal brew cycle. When it is about halfway through, turn the machine off and let the hot vinegar solution sit in the reservoir and tubing for 30 to 60 minutes. This dwell time is where the acid actually dissolves the crust, and skipping it is the most common mistake. After the soak, turn the machine back on and finish the brew. Dump the carafe. Troubleshooting note: if you have very heavy scale and the machine brews slowly or sputters, run the vinegar mix through a second time before you rinse. Honest observation: half strength vinegar, one part vinegar to three parts water, barely touches heavy scale, so I use the stronger equal parts mix for a machine that has never been descaled, then drop to a weaker mix for maintenance. If you want to understand exactly why acid beats mineral crust and where else it shines, this is one of the places where plain white vinegar genuinely earns its place in the kitchen rather than being used on everything by habit.
Rinse the drip machine until the vinegar smell is gone
Rinsing is not one and done, and this is where people give up too early and end up with vinegar flavored coffee for a week. Empty the reservoir completely and refill it with fresh cool water only. Put a clean paper filter in the basket, set the empty carafe in place, and run a full brew cycle with plain water. Dump the water and repeat. I run at least three full water cycles, and often four, letting the machine cool for a couple of minutes between them so I am not stressing the heating element with back to back runs. The way I check is simple. After the third cycle I smell the water in the carafe and I taste a spoonful once it has cooled. If there is any sharp vinegar note at all, I run another cycle. Troubleshooting note: if the smell just will not leave after four or five cycles, the vinegar has probably soaked into the plastic reservoir a little, and running one cycle with a couple of tablespoons of baking soda in the water, followed by two plain rinses, usually neutralizes it. Do not leave baking soda residue behind, so always finish with plain water. Honest observation: this rinse marathon is the single biggest reason I sometimes reach for a commercial descaler instead. Descaler formulas are designed to rinse clean in one or two cycles, while vinegar clings. On a lazy Sunday I do not mind the extra rinses, but on a weeknight the smell is genuinely annoying.
Descale a Keurig using descale mode or a manual cycle
Keurigs need the same acid step but the process is a little different. Empty and replace the water reservoir, then fill it to the max line with either a bottle of Keurig descaling solution mixed per its label, or equal parts distilled white vinegar and water if you are going the vinegar route. Do not put a K cup in. Place a large mug on the drip tray to catch the output. If your model has a descale mode, hold the button combination in the manual to enter it, usually a set of buttons for 3 to 5 seconds until a descale light glows, then start the cycle. If there is no descale mode, just run the largest brew size repeatedly, emptying the mug each time, until the reservoir is nearly empty. Then let the machine sit powered on with the remaining solution inside for 30 minutes so the acid can work on the internal tank. Troubleshooting note: if your Keurig flashes descale and refuses to brew even after you finish, it usually needs the full descale cycle completed and then the light reset, which on many models means holding the descale or 8 ounce button for about 5 seconds. Honest observation: Keurig officially recommends their descaler and warns against vinegar, partly because some internal parts do not love acid over years of use. Vinegar works fine occasionally, but if your machine is under warranty or has an aluminum boiler, use the branded descaler to stay safe.
Clean the Keurig needles and pod holder
This step has nothing to do with scale and everything to do with weak, half brewed cups, so do not skip it even if you just descaled. The Keurig has an entrance needle in the top of the brew head and an exit needle in the bottom of the K cup holder, and both punch through the pod. Grounds and dried coffee cake up in them and block flow. Unplug the machine first. Lift the handle and look at the underside of the lid for the entrance needle, then take a straightened paperclip or the official needle cleaning tool and gently work it into the needle holes to dislodge debris, wiggling rather than forcing. Pop out the K cup holder, separate the funnel from it, and clean the exit needle at the bottom the same way. Rinse both parts under warm water and let them dry. Troubleshooting note: if coffee sprays sideways or the machine only fills the mug halfway, a clogged exit needle is almost always the cause, and this two minute cleaning fixes it more reliably than any descale. Honest observation: I clean the needles every couple of weeks because I brew daily, and the difference in a full, properly sized cup is obvious. The needles are sharp, so move slowly and keep your fingertips clear of the points. This is genuinely the most underrated maintenance job on a Keurig, far more impactful day to day than descaling.
Deep clean the carafe, basket, and shower head
Back to the drip machine, or the shared parts on any brewer. The glass or stainless carafe usually has brown staining and a faint oily film that plain dish soap does not fully lift. I make a paste of baking soda and a little warm water, spread it around the inside of the carafe, and let it sit for 10 to 15 minutes before scrubbing with the bottle brush and rinsing. For a stainless carafe that is stained inside, filling it with hot water and a tablespoon of baking soda, letting it sit for 30 minutes, then scrubbing works well without scratching. The filter basket gets a soft toothbrush along every ridge where oils hide. Do not forget the shower head, the perforated disc under the lid that sprays water over the grounds. Wipe it with a damp cloth and use the toothbrush to clear any clogged holes, since a partly blocked shower head brews unevenly and weakly. Troubleshooting note: avoid steel wool or abrasive scouring pads on any carafe, especially glass, because the scratches they leave trap oils and stains even faster and can weaken glass to the point of cracking on the hot plate. Honest observation: baking soda handles the stains that vinegar leaves behind, so the two steps complement each other. Vinegar dissolves mineral scale, baking soda lifts baked on brown residue, and neither one does the other job well. Together with the soap wash they cover everything.
Set a realistic cleaning schedule and pick your descaler
Consistency beats intensity here. I rinse the removable parts of my Keurig or drip basket after basically every use, or at least daily, because thirty seconds of rinsing stops the oil and biofilm from ever taking hold. I empty and refill the reservoir with fresh water daily rather than topping it off, since old standing water is exactly what grows mold. Then I do a full descale on a schedule tied to my water. With hard water I descale every month, and with soft or filtered water every two to three months is plenty. If the machine brews slowly, sputters, or the coffee cools fast, that is scale telling you it is overdue regardless of the calendar. Troubleshooting note: if you use filtered or distilled water in the reservoir, scale builds far slower and you can stretch descaling intervals, but you still need the soap and biofilm cleaning on the normal schedule because oils and mold do not care about water hardness. Honest observation on the vinegar versus commercial descaler question, since this is what everyone asks. Vinegar is cheap, food safe, and it genuinely dissolves scale, but it smells strong and needs several rinses, and some manufacturers advise against it for aluminum or certain internal parts. Commercial descaler costs more and is a purchased product for one job, but it rinses clean fast, is formulated to be gentle on machine internals, and is what I use on a warranty machine or an espresso maker with an aluminum boiler. For a basic drip machine I own outright, vinegar wins on cost. For anything I want to protect, I buy the descaler.
Pro Tips
- ✓Keep two vinegar strengths in mind. Use equal parts vinegar and water for a first ever or heavily scaled descale, then drop to one part vinegar to four parts water for monthly maintenance so you spend less time rinsing.
- ✓Smell and taste the rinse water rather than counting cycles blindly. Machines vary, and one machine might clear in two rinses while another needs five, so let your nose make the call.
- ✓Run a plain water cycle to preheat and rinse the machine right before you brew coffee in the morning. It warms the boiler and flushes any dust or overnight staleness out of the tubing.
- ✓Store your machine with the reservoir empty and the lid open when you are away for more than a day or two. A dry tank cannot grow mold, and this single habit prevents the pink slime almost entirely.
- ✓Label a small squeeze bottle with your maintenance vinegar mix so you are not measuring every time. I keep one on the shelf next to the machine, and having it ready is the difference between actually descaling monthly and forgetting for a year.
How we tested this guide
Every method on this page was hands on tested by Fredler Pierre-Louis on the actual surface or material described, not on a staged photo set. We recorded the timing, the dwell intervals, and the conditions where each method worked or fell short, then refined the steps based on what we observed across multiple test runs in real homes.
- Methods verified on the relevant surface or material before publication.
- Reviewed for chemical safety and surface compatibility before publication.
- Dwell times and proportions match what actually works, not generic averages.
- Updated whenever a reader reports an edge case we missed.
Read our full editorial and testing policy or learn more about the team behind TryCleaningHacks.
Related Cleaning Guides
Safety Notes
- ⚠Never mix vinegar with bleach, ammonia, or any other cleaner in the reservoir or the sink. Vinegar with bleach releases toxic chlorine gas. Use vinegar on its own with water, and keep it far away from any chlorine based product.
- ⚠Unplug the machine before you clean the Keurig needles or reach into the brew head. The needles are genuinely sharp, so move the paperclip slowly and keep your fingertips clear of the points.
- ⚠Let the machine and the carafe cool before handling after a brew cycle. The hot plate, the boiler water, and a glass carafe can all cause burns, and a hot glass carafe can crack if it hits cold water or a wet counter.
- ⚠If your machine has an aluminum boiler or is under warranty, check the manual before using vinegar. Some manufacturers void coverage or warn that acid can pit aluminum over time, in which case a commercial descaler is the safer choice.
Frequently Asked Questions
How often should I actually descale my coffee maker?
It depends on your water and how much you brew. With hard tap water and daily use I descale every month. With soft, filtered, or distilled water you can stretch it to every two or three months. Ignore the strict calendar if the machine tells you sooner. Slow brewing, sputtering, longer cycle times, or coffee that cools unusually fast are all signs scale has built up on the heating element and it is time regardless of the date.
Is white vinegar or a commercial descaler better?
Both dissolve mineral scale effectively. Vinegar is cheap, food safe, and always in the pantry, but it smells strong and needs three to five rinse cycles to fully clear, and some manufacturers advise against it for aluminum boilers or certain internal parts. Commercial descaler costs more but rinses clean in one or two cycles and is formulated to be gentle on machine internals. I use vinegar on a basic drip machine I own outright and a commercial descaler on anything under warranty or with an aluminum boiler.
Why does my coffee taste sour even after cleaning?
Sour usually means the water is not getting hot enough, and the most common cause is scale still coating the heating element, so you may need a stronger vinegar mix or a second descaling pass. If the machine is genuinely clean and fairly new, look at the coffee itself. Underextraction from too coarse a grind or too short a brew tastes sour too. But with an older machine, bet on residual scale first and run another descale before you blame the beans.
Can I put coffee maker parts in the dishwasher?
Only the parts the manual specifically lists as dishwasher safe, and usually just the carafe and lid on many drip models. I hand wash the Keurig K cup holder, funnel, and drip tray because dishwasher heat can warp the thin plastic and ruin the seal that keeps the pod from leaking. Hand washing with warm water and a drop of mild dish soap takes two minutes and is gentler on every removable part.
How do I stop mold and pink slime in the reservoir?
That pink or black film is biofilm, and it grows because the tank stays damp, dark, and full of standing water. Empty and refill the reservoir with fresh water daily instead of topping it off, and when you are away for more than a day, dump the tank and leave the lid open so it dries out completely. Wash the reservoir with mild dish soap and a soft brush weekly, paying attention to the corners and the seam where slime hides. A dry, regularly washed tank simply cannot grow it.
My Keurig brews only half a cup or sprays sideways. What is wrong?
That is almost always a clogged exit needle or entrance needle, not a scale problem. Grounds cake up in the needles that puncture the pod and block flow. Unplug the machine, lift the handle, and gently clear both the entrance needle in the brew head and the exit needle in the bottom of the K cup holder with a straightened paperclip or the cleaning tool. This two minute fix restores a full cup more reliably than descaling does, and I do it every couple of weeks.
You might also like

How to Clean Your Laundry Room in Under 30 Minutes
My laundry room was the last room I ever cleaned, which meant the machines doing all my cleaning were themselves never cleaned. One afternoon changed that. Here's what I found inside my filter, what was creating the musty smell, and the 30-minute routine that prevents it all.

How to Get Rid of Kitchen Sink Odor (10 Easy Fixes)
My kitchen sink smelled no matter how often I cleaned it until I figured out what I was actually missing. The fix wasn't a new product; it was addressing three different sources at once. Here's what finally worked and the one mistake that kept the smell coming back.

How to Clean a Microwave Inside and Out (12 Methods)
I once cleaned a shared microwave at work that hadn't been touched in 18 months. Every method on this list either worked or didn't under genuinely difficult conditions. Here's the honest ranking and the one daily habit that makes the entire list mostly unnecessary.