
15 Bathroom Cleaning Tips for a Hotel-Level Finish
I spent a few months trying to figure out why my bathroom could pass a white glove test and still not feel like a hotel bathroom. It turned out the shine is only half of it. The other half is odor control and a handful of edges nobody thinks to wipe. Here are the 15 things that actually got me there, including the one step that fixes most bathroom smell.

Jump to a section
- What you'll need
- Step-by-step
- Clear every surface completely before you spray anything
- Dust high before anything gets wet
- Apply toilet cleaner first and walk away
- Scrub tile and grout with a baking soda paste
- Deep clean the vanity, sink, and the parts you never look at
- Clean mirrors edge to edge, and never spray the glass
- Pro tips
- FAQ
What You'll Need
Step-by-Step Instructions
Clear every surface completely before you spray anything
The first time I timed myself, I lost almost ten minutes just moving bottles around mid clean, and the counter still looked busy when I finished. Now I clear the whole room first. Every bottle, the toothbrush holder, the soap dish, the little tray of things by the sink, the shampoo lineup on the shower ledge, all of it comes out and lands on a folded towel in the hallway. This does two things. You expose the rings and stains that have been hiding under those objects, and you stop yourself from cleaning around clutter, which is really just cleaning half the surface. While everything is out in the light, wipe the bottoms of the bottles. Shampoo and lotion bottles grow a sticky brown ring on the base, and setting that ring back down on a counter you just scrubbed undoes the work. This is also the moment to toss expired products and the near empty bottles you keep meaning to use up. Expect to find that a third of what lives on your counter does not need to be there. When I did this honestly the first time, I put six items back instead of fourteen, and the room felt calmer before I had cleaned a single surface. Do not skip the shower ledge. Those bottles hide the exact corner where mildew starts, and you cannot treat it if you cannot see it.
Dust high before anything gets wet
Bathroom dust behaves differently from dust anywhere else in the house because it mixes with humidity and turns into a gray film that clings instead of floating. If you spray liquid before you dust, that film smears into streaks that are genuinely hard to remove. So I go dry and high first. A dry microfiber cloth over the exhaust fan cover, the top of the medicine cabinet, the light fixture, the top edge of the door, and any shelf above eye level. Work high to low so whatever falls lands on the floor you will mop at the end anyway. Pay real attention to the exhaust fan. A fan choked with dust moves far less air, and moving air out is what keeps your grout and ceiling from growing mold. Once a season, kill the fan at the switch, pull the cover (most just pinch off or come loose with one screw), and vacuum the blades and housing. The first time I opened mine I found a solid mat of lint over the motor. After I cleaned it the mirror stopped fogging for as long after showers, which told me the thing was finally pulling moisture the way it should. A clean fan is quiet, invisible work that pays off in every other step.
Apply toilet cleaner first and walk away
This is the single habit that made my cleans faster. The moment I walk in for a deep clean, before I touch anything else, I squirt toilet bowl cleaner under the rim all the way around and spray the outside of the bowl, the seat, the lid, the base, and the awkward area behind the tank. Then I leave it completely alone and go clean something else. Dwell time is doing the work while my hands are busy elsewhere, so nothing is sitting at the end waiting on a slow product. Most cleaners will tell you 5 to 10 minutes is where the product actually breaks down stains, and squirting it first buys you that time for free. Read your bottle, because some gel cleaners want a full 10 minutes to touch waterline rings. While it sits, glance at the caulk where the base meets the floor. If it is discolored or peeling, cleaner will not fix it, because the smell is coming from moisture trapped under old caulk. That is a separate small job (scrape it out, dry it, re bead it) but noticing it now saves you from scrubbing a spot that will never come clean. One warning that matters: bowl cleaners are usually acidic, so never add a bleach spray on top of them. More on that in the safety notes.
Scrub tile and grout with a baking soda paste
Grout is porous, which is a polite way of saying it drinks in whatever touches it and holds onto mildew from the inside. A spray alone rarely reaches that. What works for me is a paste of baking soda and just enough water to make it spreadable, worked into the grout lines with a stiff brush, left for a few minutes, then scrubbed. On the wall tile I spray all purpose cleaner and work top to bottom so dirty runoff never crosses tile I already did. Give the bottom row and the corners the most attention, because that is where mildew always starts, low and in the angles where water pools. Scrub, rinse with clean water, and actually look at your work in good light before deciding you are done. Here is the honest part: if grout stays dark after a real scrub, scrubbing harder will not save it. That gray is often mildew that has grown into the grout, and the fix is either an oxygen bleach paste left longer or, past that, resealing. A grout sealer pen costs a few dollars and, once the line is clean and fully dry, it stops moisture from soaking back in. I resealed my shower floor grout after one deep clean and it stayed light for months instead of graying again within two weeks. Do not seal damp grout, or you trap the moisture you are trying to keep out.
Deep clean the vanity, sink, and the parts you never look at
Spray the counter, the basin, and the faucet, then let it sit while you grab your sponge. Scrub the basin with a non scratch sponge and switch to an old toothbrush for the faucet base and the drain ring, because those are the two spots a sponge glides right over. Wipe the counter in straight strokes rather than circles so you can see what you have covered. Now the part almost everyone misses: the front outer edge of the sink, the underside lip where the basin meets the counter, and the front and sides of the vanity itself. Toothpaste sprays there every single day in a fine mist you never notice, and it dries into a film you can genuinely smell when you first walk in even when the room looks spotless. Wipe all of it. Then check the drain stopper. Pop it up or unscrew it and look at the underside. On mine it was coated in a black slimy layer while the top looked perfectly clean, and that hidden gunk was a real part of the stale smell. It is one of the most reliably filthy surfaces in any bathroom. While the cabinet is open, glance under the sink for damp spots or a slow drip. Catching a small leak here is a lot cheaper than catching it after the particleboard swells.
Clean mirrors edge to edge, and never spray the glass
A spotless mirror does more for the perceived cleanliness of a bathroom than almost anything else, because it is the first big surface your eye lands on. The mistake I made for years was spraying glass cleaner straight onto the mirror. It works fine on the face, but the liquid runs down and wicks in behind the edges, and over time it eats the silver backing so you get those dark cloudy blotches creeping in from the corners. Once that happens it is permanent. So now I spray the cloth, never the glass, and wipe in a top to bottom S pattern with a dry microfiber. Go all the way to the edges and give the bottom edge extra passes, because that is where toothpaste flecks and water splashes collect in a hazy band. If you get streaks, it is almost always too much product or a cloth that is already damp with cleaner, so switch to a dry side of the cloth and buff. A properly buffed mirror has no film at any angle. Tilt your head and check it against the light before you move on. That angle check catches the faint smears a straight on look misses every time, and those smears are exactly what make a mirror read as dirty to a guest.
Scrub the toilet inside and out, then wipe it bone dry
By now the cleaner you applied first has had plenty of dwell time, so the bowl should scrub easily. Work the brush under the rim first, all the way around, because that lip is where stains and bacteria concentrate and where waterline rings hide. Then the sides and down into the trap. For the outside, and this matters, use a cloth or paper towel you will not use anywhere else. Hit the seat, both hinges (they trap a shocking amount of grime), the flush handle you touch with dirty hands, the base, and the seam where porcelain meets floor. Flush, then wipe every outer surface completely dry. A truly clean toilet has no film and no smell from any angle, and the drying step is what removes the last of both. Two maintenance notes I learned the slow way. Replace the toilet brush roughly every six months, because the bristles splay out and the head itself becomes a bacteria reservoir that you are then smearing around the bowl. And store the brush with the lid of its holder cracked open so the head can actually dry, instead of sitting in a sealed cup of dirty water growing its own colony. That trapped water was a smell source in my old setup and I never suspected it.
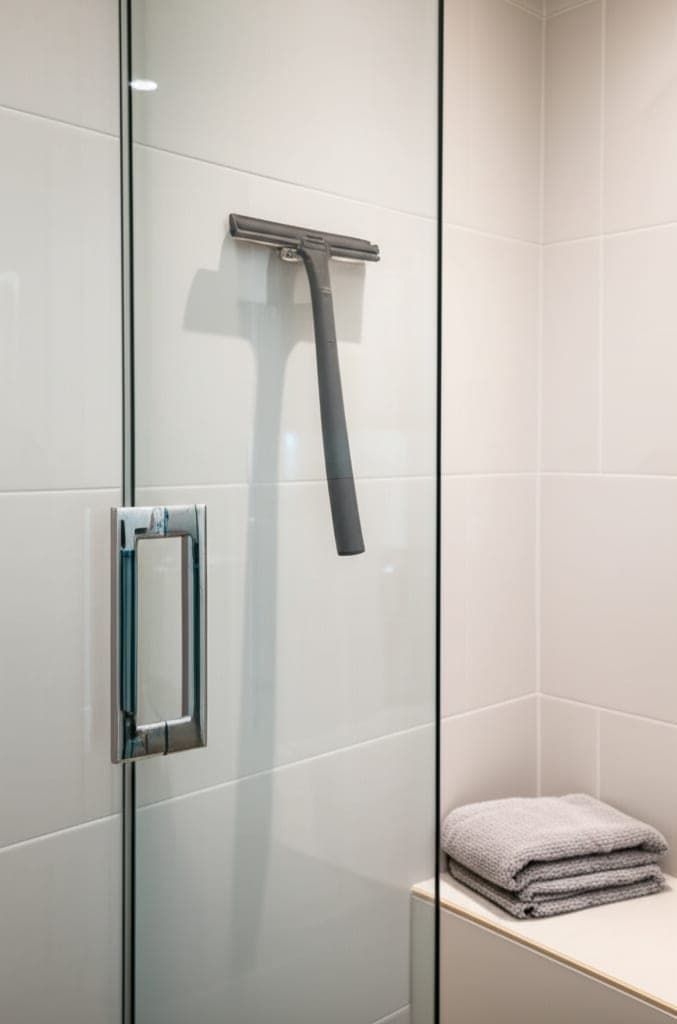
Clean the shower door or curtain and fight the hard water
Glass shower doors get a cloudy scale that regular spray will not touch, because that haze is mineral deposit, not dirt. What finally worked for me is a warm mix of white vinegar and a squirt of Dawn in a spray bottle, coated on thick, left for a solid 10 minutes so the acid can loosen the minerals, then squeegeed off and buffed dry. Vinegar is acidic, so keep it off natural stone thresholds and do not let it linger on chrome or brushed nickel finishes, where extended contact can dull the coating. On badly scaled glass you may need a second pass. Fabric or plastic curtains and liners go straight in the washer on a gentle cycle with a scoop of baking soda and a couple of old towels for scrubbing action, then hang them back up damp to dry flat instead of tossing them in the dryer where liners melt. The real trick is not the deep clean, it is the daily one. A quick squeegee of the glass after each shower, thirty seconds, means minerals never get the chance to harden into scale in the first place. Since I started doing it, my monthly glass clean went from a genuine fight to a quick wipe. Scale that never forms is scale you never have to scrub.
Mop the floor last and dry the wet zone by the tub
Floors come last, always, so you are not tracking dirty water across finished areas or dripping onto a mirror you already buffed. Sweep or vacuum first to lift hair and dust, because mopping over loose hair just pushes it into gray ropes. Then mop with warm water and cleaner, working from the far wall back toward the door so you retreat out of the room instead of stepping on wet floor. Get behind the toilet, around the vanity base, and along the baseboards, which are the exact spots that hoard hair and dust. Keep a mop head or cloth that only ever touches the bathroom floor and never migrates to the kitchen, because the bacteria load here is different and you do not want to trade it around. Wash or swap that head after each deep clean. One zone deserves special care: the strip of floor right in front of the tub or shower where the bath mat sits. That patch stays damp far longer than the rest of the floor because the mat traps moisture against the grout, and it is the single most common place bathroom floor mold begins, showing up as gray or black staining in the grout right where the mat lives. Dry that strip with a cloth after you mop, and ideally after every shower. Breaking that constant damp cycle is what stops the mold before it starts.
Descale the showerhead so the water actually sprays right
This is one of the 15 that people skip entirely, and it is a shame because it is nearly effortless and the payoff is immediate. If your showerhead sprays in weird crossing jets, dribbles from some holes, or has crusty white buildup around the nozzles, that is mineral scale clogging the openings. The fix is boring and it works. Fill a sturdy plastic bag with white vinegar, slip it over the showerhead so the nozzles are submerged, and secure it with a rubber band or a hair tie. Leave it a couple of hours, or overnight for heavy buildup, then remove it and run hot water through for a minute to flush the loosened deposits. Wipe the face and, if any nozzles are still blocked, roll a toothbrush or your thumb over the rubber jets to pop the softened scale free. One caution I wish I had known sooner: some finishes, especially certain matte black, oil rubbed bronze, and specialty coatings, do not love a long vinegar soak, so check the manufacturer note or test a short soak first before committing to overnight. When I did mine after ignoring it for a year, the spray pressure came back so strongly I actually turned the water down. A clean showerhead also stops flinging the fine mineral spray that spots your glass all over again.
Wash the trash can, the toothbrush cup, and the soap dish
Here is a distinct step that gets forgotten because these items are not surfaces, they are objects, and objects fall out of the top to bottom mental map. The bathroom trash can grows a film and a smell in the bottom from damp tissues and cotton pads, and no amount of scrubbing the counter fixes a room if the can itself is the source. Empty it, then wash the inside and the lid with hot soapy water, dry it, and drop a used dryer sheet or a spoon of baking soda in the bottom to keep it fresh. The toothbrush holder is worse than the trash can and nobody wants to hear it. Toothpaste slurry and water pool in the bottom and grow a slimy layer, sometimes with pink or orange staining, which is a common airborne bacteria that thrives on the soap film. Run the holder through the dishwasher or scrub it out with the bottle brush and hot water. Same for the soap dish, which collects a soft sludge of dissolved soap that traps grime. I ignored my toothbrush cup for months once and the smell I had blamed on the drain was coming from a cup two feet from my face the whole time. These take five minutes together and remove a smell source that surface cleaning never reaches.
Wipe down doors, switch plates, and the handles you touch daily
Vertical surfaces and the small things hands touch are their own step because they are invisible until you shine a light across them, and then you cannot unsee the grime. Start with the door, both sides, paying attention to the area around the handle and the push zone at hand height where oils build into a faint darkened halo. Then the light switch plate and the switches themselves, which are among the most touched and least cleaned things in the room. A cloth barely damp with all purpose cleaner does it, but keep liquid away from the switch openings, so spray the cloth and never the plate. Do the door handle, the towel bar, the toilet paper holder, and the edge of the vanity drawer pulls, all the little hardware your fingers hit constantly. I add the window sill and any trim if the bathroom has a window, because condensation collects dust into a grimy line there. This step is the difference between a bathroom that is clean and one that feels clean when you actually use it, because the surfaces you contact are the ones your body registers. The first time I ran a light across my door at an angle I found handprints I had walked past for a year. Two minutes of wiping and the whole door looked new.
Freshen the drains and check the overflow hole
A bathroom can be spotless and still smell faintly sour, and the culprit is usually a drain rather than any surface. Hair, soap, and skin oil build into a soft biofilm just inside the sink and tub drains, and that film smells even when nothing is clogged. My routine, done during a deep clean, is to pour a few tablespoons of baking soda into the drain, follow it with about half a cup of white vinegar, let it foam and sit for around 10 minutes, then flush it with a kettle of hot (not boiling, which can crack porcelain or older pipes) water. It will not clear a real blockage, but it lifts the light film and knocks back the smell. Do not chase the vinegar with bleach or a bleach drain product, because the mix is unsafe. Then find the overflow hole, the little opening near the top of the sink basin, and understand that it grows its own hidden slime because water rarely moves through it. Wrap a thin cloth around a bottle brush or a bent pipe cleaner, dampen it with cleaner, and work it into that hole. The gunk that comes out is genuinely unpleasant and genuinely the source of a smell people blame on everything else. I traced a stubborn sink odor to exactly this hole once. Cleaning it took ninety seconds and the smell was simply gone.
Launder or refresh the fabrics you stopped noticing
Cloth in a bathroom absorbs humidity and holds onto smell, and because it is soft and familiar your nose stops registering it, which is why this is its own step. The bath mat is the main offender. It sits damp against the floor after every shower and, unwashed, it develops a musty smell and can grow mildew on the rubber backing you never flip over to check. Wash it on a warm cycle, and if the backing is cracking or the mat stays smelly after washing, it is done, replace it. Do the hand towels and any towels that have been hanging a while, because a towel that does not fully dry between uses starts to smell sour within days, that heavy gym locker note that no air freshener covers. Wash bath towels in hot water and, if they already smell, run them once with a cup of white vinegar and no detergent, then a normal wash, which strips the built up detergent and mildew that traps odor in the fibers. Skip fabric softener on towels, because it coats the fibers and, over time, makes them both less absorbent and quicker to hold smell. Since I started washing my bath mat weekly with the towels instead of forgetting it for a month, the low background mustiness I could never locate simply stopped. Fresh fabric is a huge part of why a hotel bathroom smells the way it does.
Restyle the room, then chase the last of the odor
Everything is clean, so the final step is making it look intentional and confirming it smells like nothing. Put back only the items that earn a spot on the counter, three or four at most, and store the rest in the cabinet, because a counter with three items is both easier to wipe daily and reads as calm and expensive in a way a crowded one never will. Fold the towels the hotel way, in neat thirds so the edges line up, hang them evenly, straighten the shower curtain along its rings, and close the toilet lid, which instantly tidies the whole room in a single move. These styling touches take two minutes and they are most of what people mean when they say a bathroom feels like a hotel, because your eye reads symmetry and empty space as professionally cleaned. Then do the final odor sweep, which after months of this I found comes down to a few high value spots people skip: the vanity mirror edge and the faucet base where toothpaste smell lingers, the toilet base at floor level where most true bathroom odor actually originates, and the seams and grout you dried out earlier. For scent, skip the heavy sprays that just sit on top of odor. A small dish of baking soda in the cabinet, or a reed diffuser, adds a clean note without masking. Walk out, wait a minute, walk back in, and judge it with a fresh nose. That reset is the real test.
Pro Tips
- ✓Apply your slowest products first (toilet cleaner, grout paste, glass descaler) and let them dwell while you work elsewhere, so nothing sits waiting at the end. This one sequencing change cut my clean time noticeably.
- ✓Keep a squeegee in the shower and use it for thirty seconds after each shower. Scale that never forms is scale you never scrub, and it makes every future deep clean easier.
- ✓Assign cloths by color so the toilet cloth is never confused with the sink cloth. I use one specific color for the toilet only and it removed all guesswork.
- ✓Do a light angled test at the end, tilting your head so raking light hits mirrors, glass, and the door. It reveals the smears and handprints a straight on look misses every time.
- ✓Dry the strip of floor in front of the tub after every shower. That bath mat zone stays wet longest and is where floor mold reliably starts.
How we tested this guide
Every method on this page was hands on tested by Fredler Pierre-Louis on the actual surface or material described, not on a staged photo set. We recorded the timing, the dwell intervals, and the conditions where each method worked or fell short, then refined the steps based on what we observed across multiple test runs in real homes.
- Methods verified on the relevant surface or material before publication.
- Reviewed for chemical safety and surface compatibility before publication.
- Dwell times and proportions match what actually works, not generic averages.
- Updated whenever a reader reports an edge case we missed.
Read our full editorial and testing policy or learn more about the team behind TryCleaningHacks.
Related Cleaning Guides
Safety Notes
- ⚠Never mix toilet bowl cleaner or vinegar (both acidic) with any bleach based product. The reaction releases chlorine gas, which builds up fast in a small closed bathroom and is genuinely dangerous. Pick one product, rinse fully, and ventilate before switching.
- ⚠Do not combine bleach with ammonia (found in some glass cleaners) or with hydrogen peroxide either. When in doubt, use one cleaner at a time and rinse the surface with plain water in between.
- ⚠Open a window or run the exhaust fan the entire time you clean, especially when using any strong product in an enclosed space. Bathrooms are small and fumes concentrate quickly.
- ⚠Kneel on a folded towel or knee pad for floor, tub, and toilet base scrubbing. Prolonged kneeling on hard tile can inflame the knee and cause lasting joint pain.
- ⚠Flush drains with hot rather than boiling water. Boiling water can crack porcelain fixtures and stress older or PVC pipe joints.
Frequently Asked Questions
What is the correct order to clean a bathroom?
Clear all items off surfaces first, then dust from high to low while everything is still dry. Apply toilet cleaner early and let it dwell while you clean elsewhere. Then work top to bottom: mirrors, then vanity and sink, then shower and tub, then the toilet itself, and mop the floor dead last. Use separate cloths for the toilet and the sink so you never move bacteria from one to the other, and finish by drying glass and chrome so water spots do not re form.
How do you make a bathroom actually smell like a hotel and not just look clean?
Most lingering bathroom odor comes from four hidden spots rather than the open surfaces: the base of the toilet at floor level, the sink and tub drains plus the overflow hole, damp grout and the strip of floor under the bath mat, and unwashed fabric like the bath mat and towels. Clean those, dry the wet zones, and launder the fabrics. Then add a light scent (baking soda in the cabinet or a reed diffuser) rather than a heavy spray that just masks. A closed toilet lid and a clear counter finish the effect.
How often should I deep clean my bathroom versus doing quick upkeep?
A full deep clean of the kind described here works well once a week for a main bathroom, or every two weeks for a lightly used guest bath. Daily upkeep is what keeps it easy: wipe the sink after brushing teeth, squeegee the shower glass, and dry the floor by the tub. Save the seasonal jobs, like vacuuming the exhaust fan, descaling the showerhead, and resealing grout, for roughly once every one to three months depending on how hard your water is.
Why does my grout stay dark even after I scrub it hard?
Grout is porous and absorbs mildew from the inside, so surface scrubbing cannot reach it once it has grown in. Try an oxygen bleach paste (not chlorine bleach mixed with anything) left on the lines for 10 to 15 minutes before scrubbing. If it still stays gray, the grout likely needs resealing or, in bad cases, regrouting. Once the line is fully clean and completely dry, a grout sealer pen stops moisture from soaking back in and keeps it from graying again within weeks.
Is vinegar safe to use on everything in the bathroom?
No. Vinegar is acidic, which makes it great on glass scale, showerheads, and general grime, but it can etch and dull natural stone (marble, granite, travertine) and, with prolonged contact, harm the coating on some chrome, brushed nickel, matte black, and bronze finishes. Keep it off stone entirely, wipe it off metal finishes promptly, and never combine it with bleach. On coated or specialty finishes, test a short application before committing to a long soak.
How do I get rid of the cloudy film on my glass shower doors?
That haze is mineral scale from hard water, not soap dirt, so a normal spray will not cut it. Coat the glass with warm white vinegar mixed with a little dish soap, let it sit about 10 minutes so the acid loosens the minerals, then squeegee and buff dry. Heavy buildup may need a second pass. Once it is clear, squeegee the glass after every shower and the scale simply stops coming back.
You might also like

7 Deep Cleaning Tricks That Save Hours Every Week
I timed my bathroom the same way twice, once with my old habit of spray, wipe, repeat, and once with the batch method below. The old way took 45 minutes. The new way took 22. The single change that mattered most was almost embarrassingly simple, and I will tell you exactly what it was. None of this involves buying a gadget or a miracle spray. It is mostly about the order you do things in and where you stop wasting motion. I have cleaned the same rooms hundreds of times, made most of the mistakes, and kept only the moves that actually earned their place.
How to Deep Clean a Shower (10 Proven Methods)
I deep cleaned the same shower twice in one week once with my old routine and once with these ten methods applied in the right sequence. The difference wasn't even close. Here's what changed and the daily habit that eliminated most of my scrubbing for good.
30 Cleaning Myths You Need to Stop Believing
I believed most of these myths for years, and two of them left permanent marks on surfaces in my own house. This is the honest version of what I got wrong, why the popular advice fails, and the two safety myths that actually send people to the emergency room. I have kept the failures in here on purpose, because the mistakes taught me more than the wins did, and a myth is only dangerous while you still trust it.