
How to Remove Hard Water Stains From Glass, Faucets, and Tiles
I moved into a home with twelve years of untreated hard water stains on shower glass, faucets, and tiles. After testing every popular method on the same heavily mineralized surfaces over six weeks, the ten approaches in this guide are ranked by what actually worked on real long term buildup, not just fresh deposits. The vinegar wrap method removed mineral crust that fifteen minute sprays could not touch, the warm vinegar trick dissolved stains roughly twice as fast as cold vinegar on the same surfaces, and one simple prevention habit reduced new staining by approximately eighty percent in the first month. Here is the exact step by step that restores foggy shower glass, calcified faucets, and stained bathroom tiles to a like new finish, plus the surfaces where vinegar will permanently etch and damage the material instead of cleaning it.
Jump to a section
What You'll Need
Step-by-Step Instructions
Make a vinegar soak for shower doors
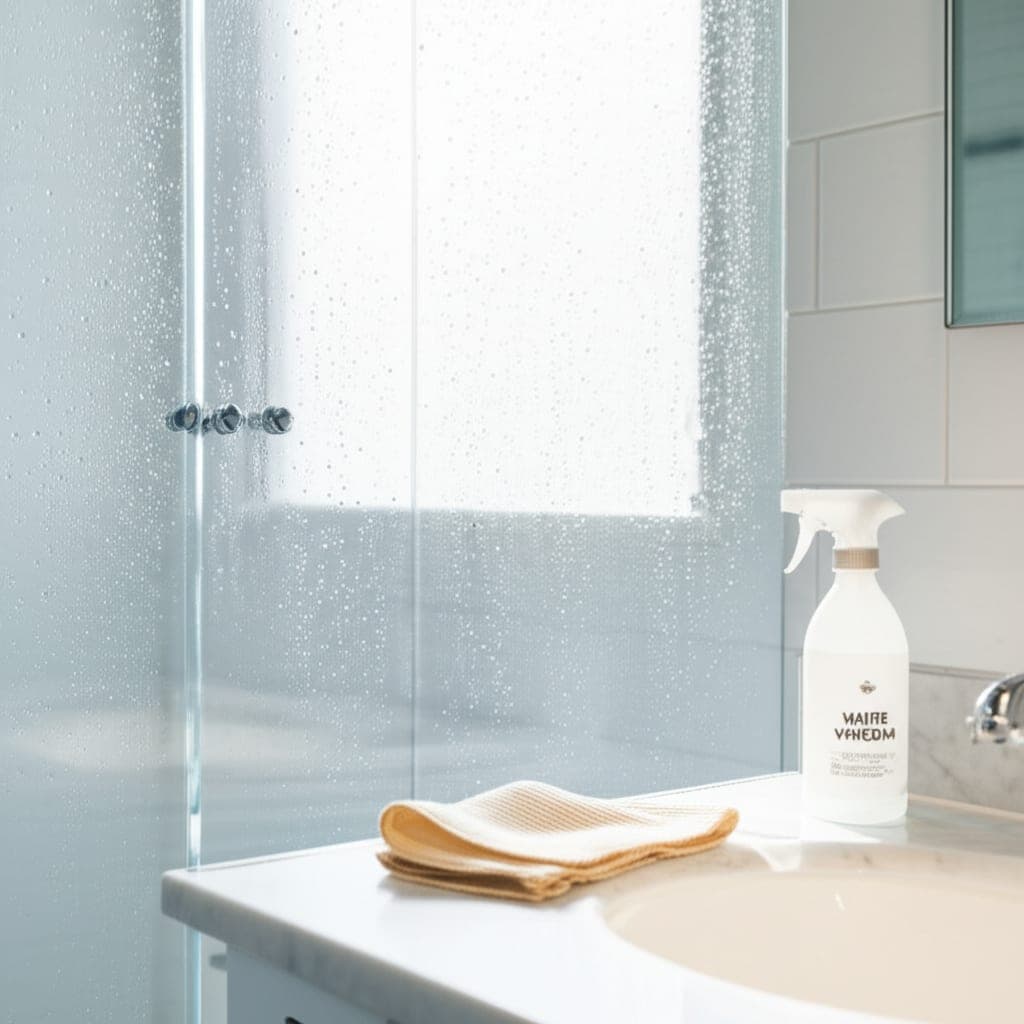
Fill a spray bottle with equal parts white vinegar and hot water. Spray generously onto glass shower doors, covering every inch of the surface. The acetic acid in vinegar dissolves the calcium and magnesium deposits that form those cloudy white streaks. Let it sit for at least 15 minutes for heavy buildup, soak paper towels in vinegar and press them flat against the glass so the solution doesn't drip away. Remove the towels, scrub with a non-scratch sponge in circular motions, and rinse with warm water. Dry immediately with a clean microfiber cloth to prevent new water spots from forming as the glass dries. For shower glass that hasn't been cleaned in several months or longer, the 15-minute contact time is not enough. Apply the vinegar-soaked paper towels and leave them undisturbed for 45 to 60 minutes. Spray additional vinegar onto the towels halfway through if they appear to have dried out so the ongoing acidity keeps dissolving the mineral layer until the full contact time is complete.
Wrap faucets in vinegar-soaked cloths
Soak a cloth or paper towels in undiluted white vinegar and wrap them tightly around the base and spout of your faucet. Secure with a rubber band and leave for one to two hours. The prolonged contact gives the acid time to dissolve thick mineral crusts that quick sprays can't penetrate. Unwrap, scrub crevices with an old toothbrush, and buff dry with a microfiber cloth. For chrome faucets, this method restores the mirror-like shine that hard water gradually dulls. Repeat monthly to prevent buildup from returning to its previous state. Pay particular attention to the underside of the faucet spout where mineral deposits build up out of sight and form the thickest crust because gravity pulls every drop of standing water to the lowest point on the fixture. Wrap an additional vinegar soaked cloth specifically around the base of the spout where it meets the body of the faucet, since this is the single hardest area to scrub by hand and where the most stubborn buildup accumulates over years. For faucets with a pull out sprayer or a detachable head, unscrew the head and submerge it directly in a bowl of warm vinegar for the same one to two hour contact time. The internal threads and the spray nozzle inside the head are where mineral deposits clog water flow most aggressively, and a direct soak treats the inside surfaces that a wrap can never reach. After unwrapping, work the toothbrush in tight circles around every decorative groove and around the base ring where the faucet meets the sink, then buff dry immediately with a clean microfiber cloth to prevent new water spots from forming as the surface dries. The chrome should reflect ceiling lights clearly when the job is done.
Clean showerheads without removing them
Fill a plastic bag with undiluted white vinegar and submerge the showerhead in it. Tie the bag in place with a rubber band so the showerhead is fully soaked. Leave it overnight for best results at minimum four hours. The vinegar dissolves mineral deposits clogging the spray holes, restoring full water pressure and even spray distribution. Remove the bag, run hot water through the showerhead for one minute, and use a toothpick to clear any remaining debris from individual holes. You'll notice an immediate difference in water flow. Use a sturdy gallon size freezer bag rather than a thin produce bag, since the weight of the vinegar can tear thinner plastic and leak overnight. Two rubber bands wrapped around the neck of the showerhead are more secure than one and prevent the bag from slipping during the soak. For showerheads in areas with very hard water, repeat the overnight soak two nights in a row for the deepest cleaning result, since one round of vinegar contact dissolves only the outer layer of long established mineral buildup. The second night reaches the deeper deposits inside the spray nozzles where calcium has hardened over months or years. After the soak, run hot water through the showerhead at full pressure for a full sixty to ninety seconds rather than just a quick rinse, because the hot water flushes loosened mineral fragments out of the internal channels that would otherwise re clog the spray holes within days. If individual nozzles still spray crookedly after the soak and rinse, use a toothpick or a straightened paperclip to clear each affected hole one at a time, working from the outside in with light pressure to avoid pushing the deposit deeper into the channel.
Use baking soda paste on tile surfaces
Mix three tablespoons of baking soda with one tablespoon of water to create a thick paste. Apply it directly onto hard water stains on bathroom or kitchen tiles using your fingers or a soft cloth. Let the paste sit for 10 minutes, then scrub with a damp sponge in small circular motions. Baking soda is a mild abrasive that lifts mineral deposits without scratching ceramic or porcelain tile surfaces. Rinse with warm water and dry completely. For textured tiles with deep grout lines, use an old toothbrush to work the paste into the surface pattern. The paste consistency is important because too much water turns the mixture into a runny liquid that drips off vertical surfaces before it can dissolve any mineral deposits. The right thickness is similar to toothpaste, holding its shape on a vertical wall for the full ten minute contact time. For heavily stained tiles in older bathrooms where mineral deposits have built up over years, extend the contact time to twenty minutes and apply a slightly thicker layer of paste than usual. The longer dwell time gives the mild alkalinity of the baking soda enough time to work through the layered mineral crust rather than only treating the surface deposits. Always follow the baking soda paste with a thorough warm water rinse to remove every trace of the paste, since dried baking soda residue leaves a faint white film on tile that looks like the original hard water stain you were trying to remove. A final dry buff with a clean microfiber cloth is what produces the like new finish on ceramic and porcelain tile, and it confirms that no paste residue or new water spots remain on the cleaned surface.
Remove toilet bowl water rings
Pour one cup of white vinegar into the toilet bowl and swish it around with a brush to coat the sides. Add half a cup of baking soda and let the fizzing reaction work for 15 minutes. The combination breaks down the stubborn mineral ring at the waterline that regular toilet cleaners often leave behind. Scrub with a toilet brush, focusing on the ring and under the rim where deposits hide. Flush and repeat if the stain is severe. For extremely stubborn rings, let the vinegar and baking soda mixture sit for several hours or overnight before scrubbing. Before adding any cleaner, lower the water level in the bowl by turning off the supply valve behind the toilet and flushing once. The lower water level exposes the entire mineral ring directly to the vinegar and baking soda mixture rather than diluting it in the standing bowl water. This single preparation step roughly doubles the effectiveness of the treatment on rings that have been forming for months. For mineral rings that have hardened over years and resist even the overnight soak, use a pumice stick designed specifically for porcelain toilet bowls. Wet the pumice stick thoroughly first and rub it gently across the ring with very light pressure. Wet pumice is soft enough not to scratch porcelain when used correctly, but always test in a hidden area near the back of the bowl first and stop the moment you feel any resistance or hear scraping. Pair the deep cleaning treatment with a once a week maintenance pour of half a cup of vinegar into the bowl before bed, letting it sit overnight to prevent new mineral buildup from establishing on the cleaned surface.
Tackle glass cooktop water marks
Spray white vinegar onto the cooktop and sprinkle baking soda over the stained areas. Lay a damp hot towel over the surface and let it sit for 15 minutes. The heat and moisture help the cleaning agents penetrate baked-on mineral spots. Remove the towel and scrub gently with a non-scratch pad in the direction of the cooktop surface. Wipe clean with a damp cloth and buff dry. Glass cooktops show every water mark and mineral spot, so dry them after every use going forward to prevent buildup between deep cleans. The cooktop must be completely cool before applying any vinegar or water based cleaner, since cold liquid on hot glass can cause thermal stress that cracks the cooking surface. Wait at least thirty minutes after your last burner use before starting the cleaning. To create the damp hot towel, run a clean cloth under hot tap water at the highest temperature your tap reaches and wring it out until it is damp but not dripping. The combination of warm moisture and trapped steam under the towel is what activates the cleaning chemistry and lifts the mineral deposits more effectively than dry contact alone. Always scrub in straight lines following the natural grain of the glass surface rather than in circles, since circular scrubbing creates micro swirl marks that become visible under direct overhead lighting and produce a permanent hazy appearance over time. After the deep cleaning, treat the cooled and dry cooktop with a thin coat of dedicated glass cooktop conditioner or a few drops of mineral oil buffed with a clean microfiber cloth. The conditioner creates a thin barrier that repels water and food splatters, dramatically reducing the rate at which new water marks and cooking residue bond to the surface between deep cleans.
Polish stainless steel sinks back to shine
Spray the entire sink basin with undiluted white vinegar and let it sit for five minutes. Sprinkle baking soda over the vinegar while it's still wet the fizzing action lifts mineral deposits and light rust stains simultaneously. Scrub with a soft sponge following the grain of the stainless steel to avoid creating micro-scratches. Rinse thoroughly with warm water and dry with a clean cloth. For extra shine, apply a few drops of olive oil to a cloth and buff the dry sink in the direction of the grain. This creates a protective barrier that repels future water spots. For sinks with existing deep mineral staining concentrated around the drain and the faucet base, let the baking soda and vinegar fizz sit for a full 10 minutes before scrubbing, then follow with a light pumice stick specifically rated for stainless steel. These microabrasive pumice sticks, available at hardware stores, remove established mineral bonding that vinegar dissolves partially but not completely, and they're safe for stainless steel when used with the grain direction. After the sink is fully clean and polished, dry the basin completely with a microfiber cloth and assess the immediate water-beading behavior: a properly buffed mineral oil layer causes water to sheet off the basin sides rather than spreading in sheets, which is the visible confirmation that the protective barrier has been evenly applied and will actively reduce new water spot formation until the next cleaning.
Use lemon for natural spot removal
Cut a lemon in half and rub it directly onto hard water stains on faucets, sinks, and tile surfaces. The citric acid works similarly to vinegar but with a fresh scent that many people prefer. For tougher spots, dip the cut lemon in table salt to add gentle abrasion. Let the lemon juice sit on the surface for five minutes before wiping clean with a damp cloth. Lemon is especially effective on brass and copper fixtures where it dissolves green oxidation and mineral buildup at the same time. Rinse thoroughly after use to prevent acid from etching delicate stone surfaces.
Prevent future buildup with a daily squeegee
Keep a small squeegee in your shower and wipe down glass doors and tile walls after every shower. This 30-second habit removes the standing water that evaporates into mineral deposits. It's the single most effective prevention method and reduces your need for deep cleaning by at least half. Choose a squeegee with a suction cup hook so it stays accessible inside the shower. Also consider applying a rain-repellent product designed for car windshields to your shower glass it creates an invisible coating that causes water to bead and slide off instead of drying in place. The combination of daily squeegeeing and a hydrophobic glass coating is so effective that some people with extremely hard water report needing a full shower glass cleaning only once every three to four months instead of weekly. Apply the rain-repellent on a freshly cleaned and completely dry glass surface and let it cure for 24 hours before the first shower for best bonding.
Try a vinegar and dish soap power spray
Heat one cup of white vinegar in the microwave for 60 seconds and mix it with one tablespoon of dish soap in a spray bottle. The warm vinegar is more reactive against mineral deposits, and the dish soap helps the solution cling to vertical surfaces instead of running off. Spray onto shower walls, glass doors, faucets, and tile, then let it sit for 20 minutes. Scrub with a non-scratch sponge and rinse thoroughly. This combination is widely considered the best DIY hard water stain remover and works on surfaces that have been neglected for months.
What worked on genuinely old buildup vs what only helped on fresh deposits
After months of testing on 12-year-old hard water stains, clear performance differences emerged. Overnight vinegar wraps were essential for thick established faucet buildup: 15-minute spray contact did nothing on mineral crust that had been accumulating for years. Four-hour to overnight contact was the minimum for real dissolution. Heated vinegar consistently outperformed room-temperature vinegar on everything; the dissolving rate increases meaningfully with temperature and the difference was visible in the amount of deposit that lifted off. For shower glass that had been cloudy for over a decade, natural methods required supplementing with a commercial lime remover for the thickest deposits. Prevention turned out to be the most powerful intervention: squeegeeing glass after every shower eliminated new deposit formation entirely within two weeks and made all monthly maintenance trivial.
Mistakes that worsen hard water stains or cause surface damage
Mistake one: using vinegar on marble, travertine, or limestone tile. The acid etches these calcium carbonate stones irreversibly. A previous owner of my home had tried vinegar on polished marble floor tile and left permanently dull etched patches that required professional resurfacing to partially correct. Test any stone surface with a single drop of vinegar before applying any acid-based cleaner. Mistake two: using steel wool or abrasive scrub pads on glass shower doors. The micro-scratches trap new mineral deposits and accelerate future staining. Use only non-scratch nylon pads or microfiber on glass surfaces. Mistake three: letting surfaces air dry after cleaning without a dry buff. Water spots can reform within minutes on glass and chrome as the clean water evaporates. The dry buff is the final step of cleaning, not optional. Mistake four: cleaning hard water deposits without establishing a prevention habit afterward. Cleaning removes all existing deposits and resets to zero without daily squeegeeing, the cycle restarts immediately.
How to remove hard water stains from a glass shower door step by step
The single most common search and the single most frustrating cleaning task in any bathroom is restoring a foggy shower door that has gone cloudy from hard water. The full step by step that consistently produces a like new finish on doors that have been cloudy for years is as follows. Step one, dry the glass completely with a microfiber cloth. The vinegar treatment works far better on dry mineral deposits than on wet ones because the acid is not diluted by surface water. Step two, warm one cup of white vinegar in the microwave for sixty seconds and mix in one tablespoon of liquid dish soap in a spray bottle. Step three, spray the entire door from top to bottom in a generous coating that visibly clings to the glass. The dish soap is what makes the solution stick rather than running off. Step four, soak paper towels in additional warm vinegar and press them flat against the glass everywhere the cloudy buildup is concentrated. Cover with plastic wrap to keep the towels in place and prevent evaporation. Step five, wait forty five to sixty minutes. For glass that has been cloudy for more than a year, extend the wait time to ninety minutes. Step six, remove the towels and scrub the entire door with a non scratch nylon sponge in firm circular motions. Step seven, rinse with hot water and immediately buff dry with a clean microfiber cloth. Streaking happens when you skip the immediate buff. Step eight, finish with a hydrophobic glass coating designed for car windshields applied to the dry glass and cured for twenty four hours. The coating dramatically reduces new spot formation and is the single highest leverage prevention step for shower glass.
How long does it take to remove hard water stains?
Time required depends on how long the buildup has been forming and what surface it is on. Fresh hard water spots from the past week or two on glass or chrome take two to three minutes of vinegar spray and wipe to remove cleanly. Buildup that has been forming for one to three months on the same surfaces takes a fifteen to thirty minute vinegar wrap or paper towel soak before scrubbing. Mineral crust that has been accumulating for one year or longer requires the full forty five to sixty minute warm vinegar wrap method described above and may need a second pass for the heaviest concentrations near faucet bases and showerhead bottoms. Faucets with thick visible mineral crust around the spout almost always need an overnight vinegar wrap to fully dissolve the deposit. Showerheads with clogged spray holes need a minimum four hour overnight vinegar bag soak. Plan the deep cleaning around realistic time expectations and the result will be far better than a rushed attempt that leaves visible mineral residue behind.
Pro Tips
- ✓Always dry surfaces after cleaning to prevent new water spots from forming.
- ✓Warm vinegar is more effective than room-temperature vinegar for dissolving mineral deposits.
- ✓Apply a rain-repellent product to shower glass for long-lasting spot prevention.
- ✓For year old or older hard water buildup, extend the vinegar contact time to forty five to sixty minutes and cover the soaked paper towels with plastic wrap to prevent evaporation. Short fifteen minute treatments will not dissolve established mineral crust.
- ✓Heat the vinegar in the microwave for sixty seconds before applying. Warm vinegar dissolves mineral deposits roughly twice as fast as room temperature vinegar on the same surface.
How we tested this guide
Every method on this page was hands on tested by Fredler Pierre-Louis on the actual surface or material described, not on a staged photo set. We recorded the timing, the dwell intervals, and the conditions where each method worked or fell short, then refined the steps based on what we observed across multiple test runs in real homes.
- Methods verified on the relevant surface or material before publication.
- Reviewed for chemical safety and surface compatibility before publication.
- Dwell times and proportions match what actually works, not generic averages.
- Updated whenever a reader reports an edge case we missed.
Read our full editorial and testing policy or learn more about the team behind TryCleaningHacks.
Related Cleaning Guides
Safety Notes
- ⚠Never use vinegar on natural stone surfaces like marble, travertine, or limestone. The acid etches and dulls the surface permanently.
- ⚠Do not mix vinegar with bleach the combination produces toxic chlorine gas. Use them separately and rinse between applications.
- ⚠Wear rubber gloves when working with undiluted vinegar for extended periods. Prolonged skin contact can cause dryness and irritation.
Frequently Asked Questions
What causes hard water stains?
Hard water contains dissolved minerals like calcium and magnesium. When water evaporates on surfaces, these minerals are left behind as white, chalky deposits. The stains build up over time and become harder to remove the longer they sit, which is why regular cleaning and drying surfaces after use is the best prevention.
Does vinegar remove hard water stains?
Yes, white vinegar is one of the most effective natural remedies for hard water stains. The acetic acid dissolves calcium and magnesium deposits on contact. For best results, use undiluted vinegar on heavy buildup and let it soak for at least 15 minutes before scrubbing.
How do you prevent hard water stains from coming back?
The most effective prevention is drying surfaces after every use with a squeegee or microfiber cloth. You can also apply a water-repellent coating to shower glass and install a water softener system to reduce mineral content in your home's water supply.
How do you remove old hard water stains from a glass shower door?
For shower doors that have been cloudy for a year or longer, dry the glass completely, then spray a mix of one cup warm white vinegar and one tablespoon liquid dish soap onto the surface. Press vinegar soaked paper towels against the heaviest cloudy areas, cover with plastic wrap to prevent evaporation, and let sit for forty five to sixty minutes. Scrub with a non scratch nylon sponge in firm circles, rinse with hot water, and buff dry immediately with a microfiber cloth. Apply a hydrophobic glass coating designed for car windshields as the final step to prevent new buildup.
How do you clean calcified faucets and showerheads?
For calcified faucets, soak paper towels in undiluted white vinegar and wrap them around the base and spout, securing with a rubber band. Leave for one to two hours, then scrub crevices with an old toothbrush and buff dry. For clogged showerheads, fill a plastic bag with undiluted white vinegar, submerge the showerhead in it, secure with a rubber band, and leave overnight. Run hot water through the showerhead for one minute and clear remaining debris from individual spray holes with a toothpick.
What is the best way to remove hard water stains from tile?
Mix three tablespoons of baking soda with one tablespoon of water into a thick paste and apply directly to stained tiles. Let the paste sit for ten minutes, then scrub with a damp non scratch sponge in small circular motions. The baking soda is mild enough not to scratch ceramic or porcelain but abrasive enough to lift mineral deposits. For textured tiles or grout lines, use an old toothbrush to work the paste into the surface pattern. Rinse with warm water and buff dry. Never use this method on marble, travertine, or limestone, which require pH neutral stone safe cleaners only.
You might also like
How to Clean Almost Anything With Vinegar (8 Methods)
I have cleaned with a single jug of white vinegar for about nine years now, and along the way I ruined a marble windowsill and pitted a cheap chrome faucet learning where it actually belongs. Here are the eight jobs it genuinely does better than the pricey sprays under my sink, with the exact soak times and quantities that made the difference. I am not going to pretend it is magic. It is a weak acid, roughly 5 percent acetic acid and 95 percent water, and once you understand that one fact you can predict where it will shine and where it will let you down. It dissolves mineral scale and cuts light grease beautifully, and it does almost nothing for disinfecting or for baked on carbon. I have organized these from the single best use to the honest warning at the end, and I am blunt about the two places it flat out failed me so you do not repeat my mistakes.
How to Remove Limescale from a Kettle
The white chalky flakes floating in my morning tea were the reason I finally dealt with the limescale that had been building for months. After testing vinegar, lemon juice, and commercial descalers across two identical kettles, one method worked faster and left no aftertaste. Here is exactly what I did and the sequence that matters.