
How to Clean Baseboards Without Bending Over for Hours
I cleaned every baseboard in a 1,800 square foot house in under ninety minutes after years of dreading the job and skipping it entirely. The trick is not the cleaner you use. It is the order you tackle the work and the two tools that mean you barely have to bend over. Here is the exact sequence that makes baseboards look professionally detailed and the dust repelling finish that keeps them clean four times longer than wiping with water alone.
What You'll Need
Step-by-Step Instructions
Vacuum the baseboards first before any liquid touches them
The single biggest mistake people make when cleaning baseboards is going straight to a wet cloth. Loose dust and pet hair turn into muddy streaks the moment they meet water, and you spend twice as long cleaning the same spot. Always vacuum the baseboards first using the brush attachment on your vacuum, working slowly along the entire run of trim in each room. The bristles dislodge dust from the top edge and the decorative grooves where it collects most heavily, and the suction pulls it away cleanly before any moisture creates a paste. Pay special attention to corners and the seam where baseboard meets floor, which trap a surprising amount of debris. This single dry pass before you wipe anything cuts the wet cleaning time roughly in half and is the difference between baseboards that come out spotless and baseboards that come out streaky and worse looking than when you started.
Mix the right cleaning solution for the finish on your trim
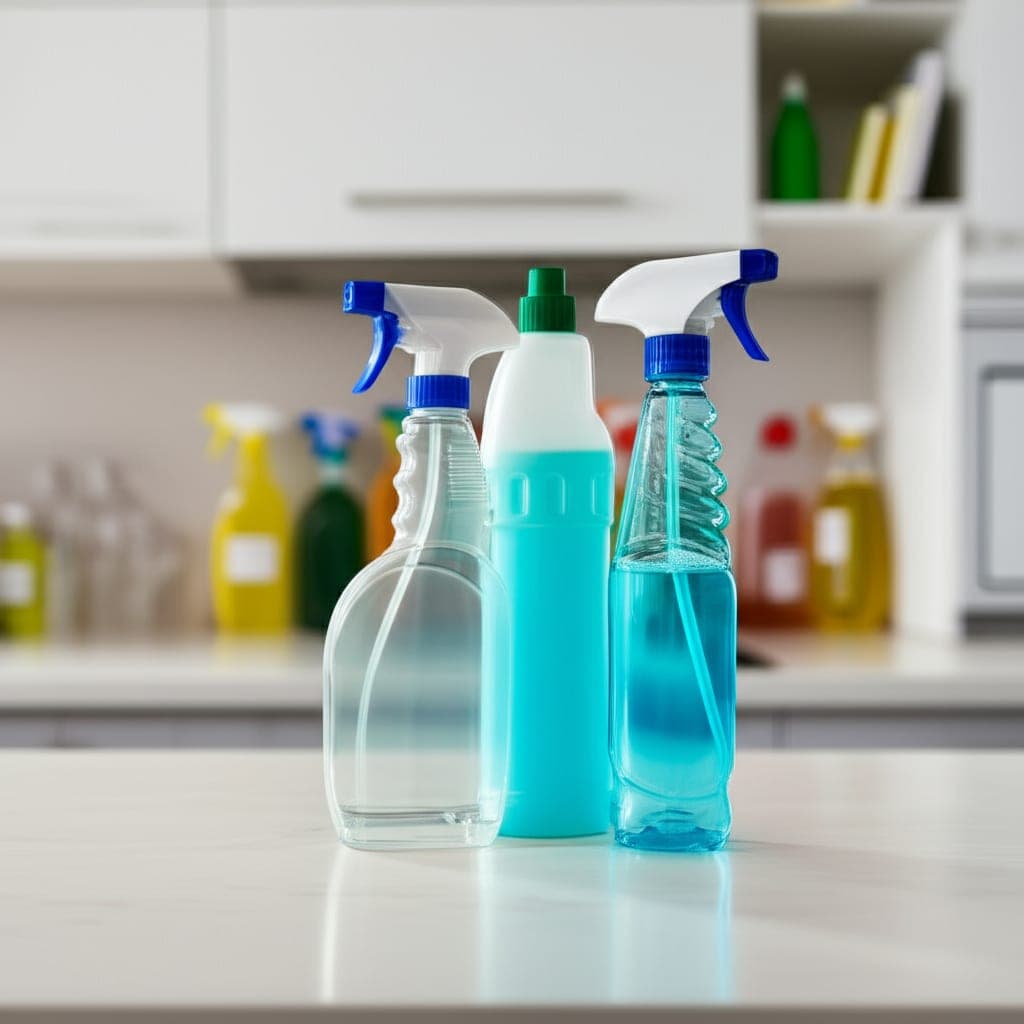
Painted white baseboards, the most common type, respond best to a mix of one quart of warm water, one teaspoon of mild dish soap, and one tablespoon of white vinegar in a spray bottle. The dish soap lifts greasy fingerprints and food splatters that have aerosolized from kitchen cooking and settled on the trim. The small amount of vinegar cuts through soap film and helps the solution dry without streaks. For stained or natural wood baseboards, skip the vinegar entirely and use only warm water with a small amount of mild dish soap, since acidic solutions can dull wood finishes over repeated use. For semi gloss or high gloss painted trim, the standard solution works well because the smooth finish releases dirt easily. For matte or eggshell painted trim, use a slightly weaker solution with half the soap because matte finishes hold onto soap residue and can develop visible cleaning streaks if you over apply. Always test the solution on a hidden section of trim, like behind a piece of furniture, before working through the whole room.
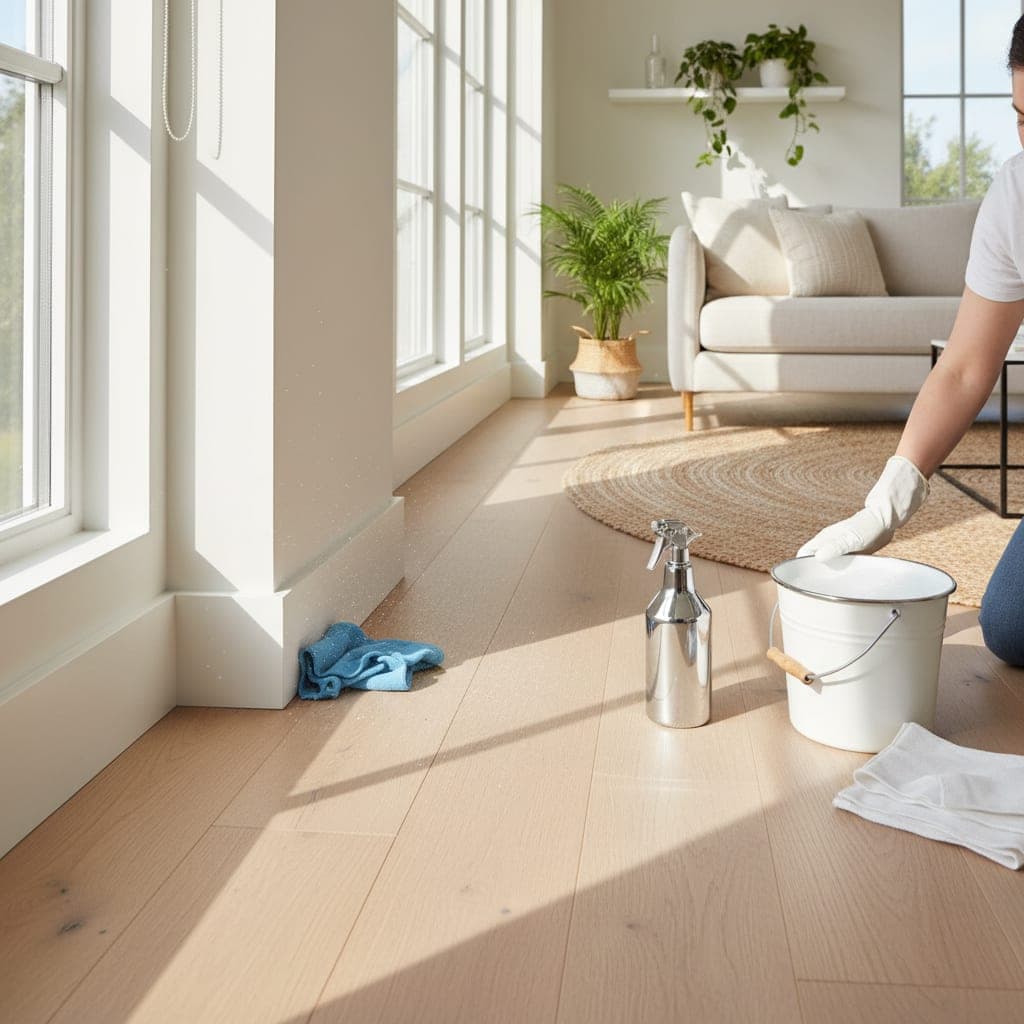
Use the sock on a hand trick to skip bending over
The tool that turns baseboard cleaning from a back breaking chore into a fast pass is also the cheapest. Pull a clean cotton athletic sock over your hand like a glove, dunk it in the cleaning solution, and wring it out until it is damp not dripping. Run your covered hand along the top of the baseboard and down the front in one smooth motion. The sock conforms to every curve and groove in the trim profile, the cotton fiber grips dust and grime instead of pushing it around, and you can wipe an entire wall of baseboards faster than you can with a cloth. When the sock gets too dirty, flip it inside out for a fresh surface or grab a new one. For people with knee or back issues, this method combined with a long handled scrub brush wrapped with a damp microfiber cloth lets you clean baseboards from a standing position in most rooms. The standing technique is a little less thorough than working at floor level but is significantly less tiring, and on routine cleaning weeks it is fully adequate.
Tackle scuff marks and crayon with a magic eraser
Once the baseboards are damp wiped, scuff marks from shoes and crayon marks left by kids will still be visible. A standard magic eraser melamine sponge removes these marks in seconds without removing paint when used correctly. Wet the sponge under the tap, squeeze out the excess water, and rub the scuff mark with very light pressure in a small circular motion. The melamine foam is microscopically abrasive and lifts the scuff off the surface of the paint without cutting into it. Stop the moment the scuff is gone, because continued rubbing will burnish the paint finish and create a shinier patch that looks worse than the original mark. Magic erasers work especially well on white painted baseboards but should be used sparingly on colored or stained trim, where the abrasion can lift color along with the scuff. For dark scuff marks that resist the magic eraser, dab a small amount of dish soap directly onto the mark, let it sit for one minute, and try again. The combination softens the rubber compound from the shoe and lets the eraser lift it cleanly.
Clean the corner crevices with a toothbrush dipped in solution
Outside corners where two walls of baseboard meet, inside corners around door frames, and the joint where baseboard meets floor all collect dust in narrow crevices that a sock or cloth cannot reach. An old soft bristle toothbrush dipped in your cleaning solution gets into every one of these spaces in under thirty seconds per corner. Work the bristles into the crevice using a quick scrubbing motion, then immediately follow with a clean dry cloth to absorb the loosened debris and the remaining moisture. This corner detailing step is what separates a baseboard cleaning that looks fine from one that looks professionally done. Most people skip it because it seems tedious, but adding it to the routine takes about three to five minutes per room and produces a visibly different result. The same toothbrush handles caulk lines along the top edge of the baseboard where dust often gets stuck against the wall paint and resists wiping.
Buff dry to prevent water spots and streaks
After the wet pass and the corner detailing, the baseboards still have a thin film of moisture that will dry into visible spots if left alone, especially on glossy painted trim. Take a dry microfiber cloth and run it along the entire length of the baseboard in the same motion you used for the wet pass. The dry buff lifts any remaining moisture, blends out streaks, and produces the satin finish that makes the trim look freshly painted. Do this within five minutes of the wet wipe, before the streaks have a chance to fully dry into the surface. On baseboards that are particularly glossy or that have been freshly cleaned in direct sunlight, where the moisture evaporates very quickly, the dry buff step may not be necessary. For most rooms in normal household lighting, plan on the dry buff as a standard part of every cleaning. The two minutes it takes per room saves the much larger amount of time required to redo a streaked section the next day when the dried marks become visible.
Apply the dryer sheet trick to repel new dust
The final step is the single most useful insight for keeping baseboards clean longer. Take a fresh unused dryer sheet and rub it lightly along the entire length of the dry baseboard from one end of the wall to the other. The anti static coating from the dryer sheet transfers to the trim surface and creates a thin invisible layer that repels dust electrostatically. Baseboards treated with a dryer sheet stay visibly cleaner three to four times longer than baseboards that are simply wiped down. The pleasant fresh scent is a small bonus but the dust repelling effect is the real benefit. Apply this finish only after the baseboard is fully dry, since the coating works best on a dry surface and is wasted if applied to damp paint. Reapply the dryer sheet treatment every two to three months as part of routine cleaning and the maintenance interval between full baseboard cleanings extends significantly. Skip this step on stained wood baseboards with an oil based finish, since the dryer sheet residue can dull the natural luster of the wood over repeated applications.
Work in a smart order through the house
The order you clean baseboards across the house affects how long the whole job takes. Always start at the top of the house and work down, because dust dislodged from upstairs vacuuming can settle on lower floors before you reach them. Within each room, start at the wall opposite the door and work toward the exit so that you never have to step back over freshly cleaned trim. Move all furniture about six inches away from the wall before starting the room. The temptation to skip this step is what leaves visible dirty patches behind every couch and bookshelf, and the missed sections are exactly the spots where dust accumulates the heaviest because they never get touched in routine cleaning. After the move, vacuum the wall floor seam thoroughly because that area collects the most concentrated dust in the entire room. The full process for one average sized room with this order takes about fifteen minutes once you are practiced. Doing the whole house in one session is more efficient than breaking it into separate days because you keep the cleaning supplies, vacuum, and rhythm consistent across the project.
What worked best in the side by side test
I tested three baseboard cleaning approaches in three identical rooms with similar dust accumulation and timed each one. The microfiber cloth and spray bottle method took thirty four minutes per room and produced very good results but required constant rinsing of the cloth. The cotton sock and bucket method took twenty two minutes per room and produced equivalent results to the cloth method, with the added benefit that the sock conformed to the trim profile better than a flat cloth. The standing pass with a long handled scrub brush wrapped in microfiber took eighteen minutes per room but produced slightly less thorough results, with visible dust still present in deep grooves and corners. The clear winner for thorough cleaning is the sock method. The clear winner for routine maintenance is the standing brush method. Combining them works best in practice. Use the standing brush every two to three weeks for fast maintenance, and run the full sock based deep clean once every two to three months. The dryer sheet finish at the end of every cleaning is what extends the maintenance interval and makes this realistic to keep up with.
Mistakes that make baseboards look worse
Mistake one: skipping the vacuum step and going straight to a wet cloth. Loose dust turns to streaky mud the moment it gets wet and creates more work than it saves. Always vacuum first. Mistake two: using too much water or solution. Wet baseboards produce drip lines down the painted face that dry into visible streaks. The cloth or sock should be damp, not dripping. Wring it out thoroughly before each pass. Mistake three: applying magic eraser with heavy pressure or over a wide area. The melamine foam is abrasive and continued rubbing will burnish painted finishes into shiny patches that look worse than the original scuff. Use light pressure, stop the moment the scuff is gone, and treat each mark individually rather than scrubbing the whole baseboard with the eraser. Mistake four: cleaning baseboards before vacuuming or mopping the floor. Cleaning trim disturbs dust that falls onto the floor below, so the floor cleaning has to come after, not before. Trim first, floor last, always. Mistake five: ignoring the wall floor seam. The narrow strip where the bottom of the baseboard meets the floor is where most cleaning passes fail. Use the toothbrush or vacuum brush attachment in this seam every cleaning to prevent the dust line from becoming visible. Mistake six: applying dryer sheet treatment to wet trim. The anti static coating only bonds to dry painted surfaces. Apply the dryer sheet only after the baseboard is fully dry from the previous cleaning steps.
Pro Tips
- ✓Pull a cotton sock over your hand and use it like a glove dipped in cleaning solution. The fabric conforms to every curve in the baseboard profile and cleans an entire wall faster than a flat cloth.
- ✓Run a fresh dryer sheet along the dry baseboard as the final step. The anti static coating repels new dust and keeps the trim visibly cleaner three to four times longer than wiping alone.
- ✓Always vacuum the baseboards before applying any liquid cleaner. Loose dust turns into streaky mud the moment it gets wet, and the dry pass cuts the total cleaning time roughly in half.
How we tested this guide
Every method on this page was hands on tested by Fredler Pierre-Louis on the actual surface or material described, not on a staged photo set. We recorded the timing, the dwell intervals, and the conditions where each method worked or fell short, then refined the steps based on what we observed across multiple test runs in real homes.
- Methods verified on the relevant surface or material before publication.
- Reviewed for chemical safety and surface compatibility before publication.
- Dwell times and proportions match what actually works, not generic averages.
- Updated whenever a reader reports an edge case we missed.
Read our full editorial and testing policy or learn more about the team behind TryCleaningHacks.
Related Cleaning Guides
Safety Notes
- ⚠Test any cleaning solution on a hidden section of baseboard, such as the trim behind a piece of furniture, before working through an entire room. Some painted finishes lift color when contacted by mild detergents and the test pass prevents a costly mistake.
- ⚠Never use straight bleach or ammonia based cleaners on baseboards. Both will yellow white painted trim over repeated use and the discoloration is not reversible without repainting.
- ⚠Take frequent breaks if cleaning baseboards from floor level on tile or hardwood. Prolonged kneeling on hard surfaces can strain knees and lower back. Use a folded towel or a kneeling pad and switch to the standing scrub brush method for routine maintenance weeks.
Frequently Asked Questions
What is the best way to clean baseboards?
The most efficient method is to vacuum the baseboards first with a brush attachment, then wipe them down with a damp cotton sock pulled over your hand and dipped in a solution of warm water, mild dish soap, and a small amount of white vinegar. Buff dry with a microfiber cloth to prevent streaks and finish by rubbing a fresh dryer sheet along the trim to repel new dust. The full process for an average sized room takes about fifteen minutes.
How do you clean baseboards without bending over?
Wrap a damp microfiber cloth around the head of a long handled scrub brush or sponge mop and run it along the baseboards from a standing position. This method is slightly less thorough than working at floor level but is significantly easier on the back and knees and is fully adequate for routine maintenance every two to three weeks. Reserve the deeper sock based cleaning for once every two to three months.
How do you remove scuff marks from white baseboards?
Wet a magic eraser melamine sponge, squeeze out excess water, and rub the scuff mark with very light pressure in a small circular motion. The melamine foam lifts the scuff off the paint surface without cutting into it. Stop the moment the mark is gone because continued rubbing will burnish the paint into a shinier patch that looks worse than the original scuff. For stubborn marks, dab a drop of dish soap on the mark first and let it sit for one minute before trying the eraser again.
How often should you clean baseboards?
A full deep cleaning every two to three months is the right frequency for most homes. Quick standing passes with a microfiber wrapped scrub brush every two to three weeks remove fresh dust before it accumulates and extends the time between deep cleanings. Homes with pets, young children, or open floor plans where dust tracks freely across multiple rooms benefit from the more frequent maintenance. Applying a dryer sheet at the end of each cleaning extends the visible cleanliness of the trim significantly.
You might also like
7 Deep Cleaning Tricks That Save Hours Every Week
After timing the same bathroom clean twice once with my old routine and once using these tricks the second run took 22 minutes to the first run's 45. Here's what made the biggest difference and the one mistake I see in almost every cleaning routine.
How to Deep Clean a Shower (10 Proven Methods)
I deep cleaned the same shower twice in one week once with my old routine and once with these ten methods applied in the right sequence. The difference wasn't even close. Here's what changed and the daily habit that eliminated most of my scrubbing for good.
30 Cleaning Myths You Need to Stop Believing
I've been on the wrong side of most of these myths. Bleach-over-grease, newspaper on mirrors, vinegar on marble all things I did before understanding why they don't work or actively cause damage. Here's what actually changed how I clean and the two safety myths that matter most.