
16 Ways to Clean and Disinfect With Hydrogen Peroxide
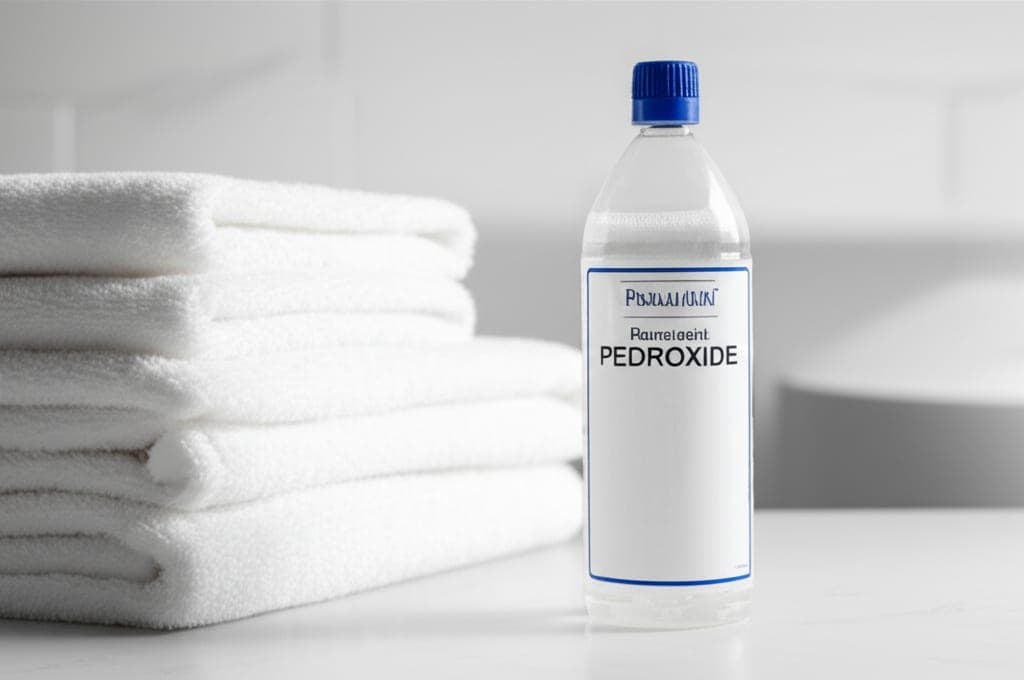
I keep a brown bottle of 3% hydrogen peroxide under the sink and reach for it more than any cleaner I own. It cost me $1.29 and it beat a $16 grout spray in my own bathroom. Below are the eight jobs where it genuinely earns its place, with the exact quantities, dwell times, and surfaces I have tested, plus the two mistakes that once ruined a shirt and a bath mat of mine. I have tried to be honest about the limits too, because peroxide is not magic and there are a couple of spots where it quietly underperforms.
Jump to a section
- What you'll need
- Step-by-step
- Whiten shower grout with a peroxide and baking soda paste
- Sanitize kitchen counters after raw meat prep
- Lift fresh blood stains from fabric before heat sets them
- Pretreat yellow underarm stains on white shirts
- Deep clean the toothbrush holder and other slimy bathroom cups
- Clear mildew from a shower curtain or liner
- Pro tips
- FAQ
What You'll Need
Step-by-Step Instructions
Whiten shower grout with a peroxide and baking soda paste
This is the job that sold me on peroxide. Stir 3% peroxide into baking soda until you get a paste roughly the thickness of toothpaste, about three tablespoons of baking soda to a tablespoon of peroxide as a starting ratio, then push it into the grout lines with an old toothbrush. Leave it 20 to 30 minutes so the oxygen has time to break down the mildew staining, then scrub in short back and forth strokes and rinse with warm water. On my shower floor, one pass took gray, blotchy grout back to near white, and a store spray I had paid $16 for barely touched the same lines. The reason it works on colored or tinted grout is that peroxide lifts stains by releasing oxygen rather than stripping pigment the way chlorine bleach does. Use the thicker paste on floor grout, which takes the worst soap scum and hard water buildup, and save a plain liquid pour for light weekly upkeep on wall tile. If the lines still look hazy after rinsing, that haze is usually undissolved baking soda, so go over it again with a damp cloth rather than reapplying peroxide. One mistake I made early on was letting the paste dry out completely on a hot day, which turns it into a crumbly crust that is harder to scrub off than the stain was. Keep it slightly damp by misting a little more peroxide over the top if it starts to cake. Expect near white grout, not perfectly new white, since old grout also absorbs stains into its pores over years.
Sanitize kitchen counters after raw meat prep
After I break down chicken thighs, I wipe the counter with soap and water first to clear the grease, then mist plain 3% peroxide over the whole zone and let it sit a full 60 seconds before wiping dry with a fresh cloth. That dwell time matters more than anything else here. A quick spray and immediate wipe does very little, but a minute of contact is what actually reduces bacteria like E. coli and Salmonella on the surface. The part I love is that peroxide breaks down into water and oxygen, so there is no film to worry about on a spot where I will chop vegetables an hour later. Keep it in a labeled opaque bottle so you never confuse it with anything else, and skip the soap step only if the counter was already clean. It is safe on sealed granite, quartz, laminate, and stainless steel, all of which I use it on regularly. Where I am cautious is unsealed natural stone and untreated wood cutting boards, because the oxygen action can very slightly lighten porous surfaces over many repeat uses, so on my wood board I dilute it by half with water and follow with a plain water wipe. If you find the counter still feels tacky after wiping, that is leftover soap residue from the first step rather than the peroxide, so a final pass with a water dampened cloth clears it. Do not seal peroxide in a tightly capped opaque bottle you rarely open, because the slow release of oxygen can build pressure.
Lift fresh blood stains from fabric before heat sets them
This is peroxide's single most reliable trick in my house. Pour it straight onto a fresh blood stain and you will see it foam, which is the reaction actively breaking down the proteins. Blot with a white cloth, and do not rub, because rubbing spreads the stain into more fibers and pushes it deeper into the weave. Rinse with cold water only. Hot water is the classic mistake here. Heat cooks the protein and locks it into the fabric permanently, so once someone runs a bloody sock under a warm tap the stain is much harder to win. On a stain that had already been through one wash and dried, I applied peroxide three separate times with blotting in between and it kept pulling color out after a name brand stain spray had quit. For a mattress or upholstery you cannot rinse, blot with a barely damp cloth until it stays clean, then let it air dry rather than soaking the padding. Two honest cautions from experience. First, always test colored fabric on a hidden seam, because peroxide is still a mild bleach and I have watched it fade a dark cotton pillowcase. Second, on delicate or older fabric, dilute the peroxide by half with cold water so the foaming is gentler on the fibers. If a faint tan shadow remains after the blood is gone, that is oxidized iron from the blood, and a second short peroxide soak usually clears it.
Pretreat yellow underarm stains on white shirts
Diluted peroxide swishing around a wash drum will not do much to a set in underarm stain. What finally worked for me was concentrating it. On a dry white t shirt, I poured a small amount of 3% peroxide directly onto the yellowed area, let it fizz for 3 to 5 minutes, then tossed the shirt straight into the wash without rinsing the pretreatment off. The yellowing, which comes from deodorant aluminum reacting with body oils and sweat, faded dramatically in one cycle. For a really stubborn stain, I make a small paste with baking soda and work it into the fabric with my fingers before the wash, which gives the peroxide something to cling to instead of running off. Stick to whites and truly colorfast items for this. Peroxide is gentler on fibers over the long run than chlorine bleach, but it is still a bleaching agent, so a colored shirt needs a hidden seam test first, which I cover in the safety notes below. Do not leave the peroxide paste sitting on the shirt in direct sunlight for an hour thinking longer is better, because I once did that and got a slightly bleached pale patch around the stain that was more noticeable than the yellowing. Three to five minutes then straight into the wash is the sweet spot. If the collar or armpit is still faintly yellow after drying, repeat before the shirt goes in the dryer, since dryer heat sets any remaining stain.
Deep clean the toothbrush holder and other slimy bathroom cups
The pink film that shows up in the bottom of a toothbrush holder is a bacteria called Serratia marcescens, and it thrives in damp bathrooms where airborne particles from soap and shampoo feed it. Instead of trying to reach the bottom with a brush, I just fill the holder with straight 3% peroxide and walk away for 10 minutes. The fizzing gets into the narrow base I could never scrub properly. Rinse it well and stand it upside down to air dry, because leaving standing water in the bottom is what invited the film in the first place. While the holder soaks, I stand the toothbrushes bristle down in a small separate cup of peroxide for about three minutes, then rinse thoroughly under running water so no peroxide taste lingers. Do this weekly and the pink film essentially stops coming back, which for me was the difference between a monthly deep scrub and a quick routine soak. The same trick works on soap dishes, the rubber seal of a travel cup, and the pump mechanism of a foaming hand soap dispenser, all of which collect the same slime. One thing to know is that the film returns fast if the bathroom stays humid, so I run the exhaust fan for ten minutes after showers, which slowed the regrowth more than any cleaner did. If the holder is a porous ceramic with a stained ring that will not soak out, a baking soda paste and the peroxide together will lift what a plain soak leaves behind.
Clear mildew from a shower curtain or liner
Lay the curtain flat in the tub and spray undiluted 3% peroxide along the bottom edge and seams, which is where mildew always starts because that hem stays wet the longest and rarely dries fully between showers. Let it sit around 30 minutes, scrub the darkened spots gently with an old toothbrush, then rinse. For a fabric curtain you can instead pour about one cup of peroxide into the machine with your normal detergent and run a warm gentle cycle. Both beat hand scrubbing with soap, which in my experience just smears the mold spots into a wider gray haze rather than removing them. Hanging the liner back up while slightly damp and spreading it out fully, instead of bunching it against the wall, is what keeps the mildew from returning within a week. One honest limit: if the mildew has grown into an old vinyl liner for months, peroxide fades it but does not always fully remove deep set black spotting, and a badly colonized $4 liner is usually cheaper and faster to replace than to save. Peroxide is best as prevention and early treatment here, not as a rescue for a liner that is already heavily spotted. If you catch it at the light gray stage, a single spray and rinse keeps a liner going for months. Do not bother trying to soak a whole vinyl liner in a tub full of diluted peroxide, because the concentration drops too low to do much and you waste half a bottle for a marginal result.
Loosen baked on residue in glass dishes without scratching
This is the lazy version of scrubbing a casserole dish, and it works because the chemistry does the labor. Cover the baked on crust with a layer of baking soda, then spray 3% peroxide over the top until it foams into a paste. Let it sit 30 minutes so the reaction can soften the carbonized food, then wipe with a non scratch sponge and rinse. Cheese, sugary fruit pie filling, and tomato sauce all bake into a glaze that feels permanent, and this loosened it on my glass pie plate with almost no elbow grease. A really stubborn ring might need a second round, and for a truly welded on crust I let the paste sit closer to an hour and it still came off without scrubbing. You avoid the scratched glass and gouged nonstick you get from attacking it with steel wool. This is safe on glass, glazed ceramic, and stainless steel pans. I would not use it on cast iron, because the oxygen action and the water can strip the seasoning you have built up, and it is not needed on nonstick since a plastic scraper handles most nonstick messes anyway. If the residue is greasy rather than carbonized, wash the grease off with dish soap first, since peroxide works on the browned food itself rather than on fat. Expect the crust to lift as a soft slurry rather than flaking off dry, so keep the sponge and a stream of warm water ready.
Test the bottle before you trust it, because peroxide dies quietly
The mistake I made for years was assuming an old bottle still worked. Peroxide slowly turns back into plain water, especially once it has been open a while or stored in light and warmth, and a dead bottle looks exactly like a fresh one. So before an important job, I drip a little onto a blood spot, a cut, or even a pinch of active dry yeast and watch for immediate bubbling. Vigorous foam means it is still active. Flat, quiet liquid means it is basically water and will not clean or disinfect anything. I now date the bottle with a permanent marker the day I open it and replace it after about six months, though an unopened bottle stored cool and dark keeps far longer. Stick with the standard 3% drugstore strength for all of this. Higher concentrations sold as food grade or industrial strength are harder to control, can burn skin on contact, and buy you nothing for ordinary household cleaning. The yeast test is the one I trust most, because catalase in the yeast reacts hard with live peroxide and gives an unmistakable head of foam within seconds, while a stain might fizz weakly even on a half dead bottle and mislead you. Keep the bottle in its original brown container until you decant a working amount into a spray bottle, since the brown plastic blocks the light that breaks peroxide down. If you buy in bulk to save money, keep the spares sealed and dark rather than filling a big clear jug that will go flat before you use it.
Pro Tips
- ✓Decant into a dark or opaque spray bottle and write the open date on it. Light is what kills peroxide fastest, and a clear bottle near a bright window can lose most of its punch in a few weeks.
- ✓Always use a white cloth when you blot a stain. You can watch the color transfer onto the cloth, and when the cloth comes away clean you know the stain is actually gone rather than just hidden.
- ✓For dried or older stains, do several short applications with blotting between each one rather than one big pour. The repeated soaks reach the color bonded deep in the fibers far better than a single flood that just runs off.
- ✓Give it time. A one second spray and instant wipe does almost nothing. Let peroxide sit at least 60 seconds to disinfect and 20 to 30 minutes to lift a set in stain.
- ✓After treating carpet or upholstery, sprinkle baking soda over the damp spot and let it dry before vacuuming. It pulls out leftover moisture and the faint odor that organic stains like pet accidents leave behind.
- ✓Keep two clearly labeled bottles going, one for the kitchen and one for the bathroom, so you never carry mildew bacteria from a shower curtain over to a food surface on the same nozzle.
- ✓Pair peroxide with baking soda whenever a stain needs staying power on a vertical or awkward surface. On its own the liquid runs off grout and shirt fabric, but the paste holds the peroxide in place long enough for the oxygen reaction to finish the job.
- ✓Buy the smallest bottle you will realistically use in six months rather than a giant jug. Peroxide is cheap enough that a fresh, fully active small bottle cleans better than a large half flat one, and you throw less away.
How we tested this guide
Every method on this page was hands on tested by Fredler Pierre-Louis on the actual surface or material described, not on a staged photo set. We recorded the timing, the dwell intervals, and the conditions where each method worked or fell short, then refined the steps based on what we observed across multiple test runs in real homes.
- Methods verified on the relevant surface or material before publication.
- Reviewed for chemical safety and surface compatibility before publication.
- Dwell times and proportions match what actually works, not generic averages.
- Updated whenever a reader reports an edge case we missed.
Read our full editorial and testing policy or learn more about the team behind TryCleaningHacks.
Related Cleaning Guides
Safety Notes
- ⚠Peroxide is a bleaching agent even at 3%. It can lift dye from fabric, wood, and dark surfaces in a single application, so spot test a hidden seam or corner and wait five minutes before treating the whole item. I faded one navy shirt learning this.
- ⚠Never mix hydrogen peroxide and vinegar together in one bottle or container. The combination forms peracetic acid, which is more corrosive than either liquid alone and irritates skin, eyes, and lungs. If you want to use both on a surface, do them separately with a plain water rinse in between.
- ⚠Never combine peroxide with chlorine bleach or with ammonia based cleaners either. Keep it as a standalone product, and if you have just used another cleaner on a surface, rinse with plain water and let it dry before you reach for the peroxide.
- ⚠Keep peroxide away from wool, silk, cashmere, and angora. Those are protein fibers, chemically close to the blood proteins peroxide is designed to break down, so the same action that lifts a blood stain will weaken and damage these fabrics over time.
- ⚠Store it in the original dark bottle, in a cool cupboard away from sun and heat, and wear gloves for long soaks. Wipe up any splashes on colored floors or rugs promptly so the bleaching action does not have time to leave a pale spot.
- ⚠Keep the bottle out of reach of children and pets and clearly labeled. At 3% it is a first aid staple, but drinking it or getting the higher food grade concentration on skin causes real harm, so never decant it into an unmarked cup or a container that once held a drink.
Frequently Asked Questions
Is 3% hydrogen peroxide safe to use around food prep areas?
Yes. The standard 3% drugstore strength breaks down into water and oxygen, so it leaves no chemical film on a counter or cutting board. Give it a full 60 seconds of contact time to reduce bacteria like E. coli and Salmonella, then wipe dry. I still wash off grease with soap and water first so the peroxide contacts the surface directly, and I keep a separate labeled bottle for the kitchen so it never crosses over from bathroom jobs.
Why does my hydrogen peroxide not fizz on stains anymore?
It has most likely lost its potency. Peroxide slowly reverts to plain water, and light plus an open bottle speeds that up, so a bottle that is old or was stored in a clear container may be nearly inert while looking identical to fresh. Test it by dripping some on a cut, a stain, or a pinch of active dry yeast and watching for immediate bubbling. No foam means it is time for a new bottle, which is why I replace mine about every six months and date it the day I open it.
Can I use hydrogen peroxide on any colored fabric or just whites?
Whites and confirmed colorfast items are the safe bet. On colored fabric, peroxide can lighten the dye, so always test a hidden seam and wait five minutes to see if any color transfers before you treat a visible area. Avoid wool, silk, cashmere, and angora entirely, since peroxide degrades those protein fibers rather than just cleaning them. When in doubt on a colored item, dilute it by half with cold water to make the bleaching action gentler.
Does hydrogen peroxide actually disinfect, or does it just clean?
It does both, but disinfecting depends entirely on contact time. A quick wipe cleans away visible grime without meaningfully reducing bacteria, while leaving 3% peroxide on a hard surface for a full minute is what lowers the bacterial load. It is effective against many common household bacteria and works best on nonporous surfaces you can leave wet for that minute. It is not a registered replacement for a hospital grade disinfectant, but for a home kitchen or bathroom it does a genuine job when you give it the time.
How should I store hydrogen peroxide so it lasts?
Keep it in its original brown bottle, tightly capped, in a cool dark cupboard rather than on a bright shelf or near the stove. Light and heat are what break it down into water. An unopened bottle can stay good for a year or more, but once you open it, oxygen exposure starts the slow decline, so I write the open date on the bottle and plan to finish it within about six months. Only decant a working amount into an opaque spray bottle at a time.
Can I mix hydrogen peroxide and baking soda ahead of time and store the paste?
No, make it fresh each time. Once you combine them the oxygen reaction begins immediately and the mixture loses strength as it sits, so a paste you jarred last week will be far weaker than one you stir up on the spot. Mix only what you need for the job in front of you. This is also why the paste works best applied right after mixing, while it is still actively foaming into the stain or grout line.