

How to Clean a Dryer Vent
A dryer that needs two cycles to finish one load is not wearing out. It is choking on lint, and the duct behind it is the part almost nobody cleans. This walks through what kind of duct you have, the warning signs worth acting on, how to brush the full run rather than just vacuuming the end you can see, and where the job stops being a weekend task and starts being a call to a technician.
Jump to a section
- What you'll need
- Step-by-step
- Work out which kind of duct you actually have first
- Read the warning signs before they turn into a problem
- Unplug, shut off the gas, and pull the dryer out
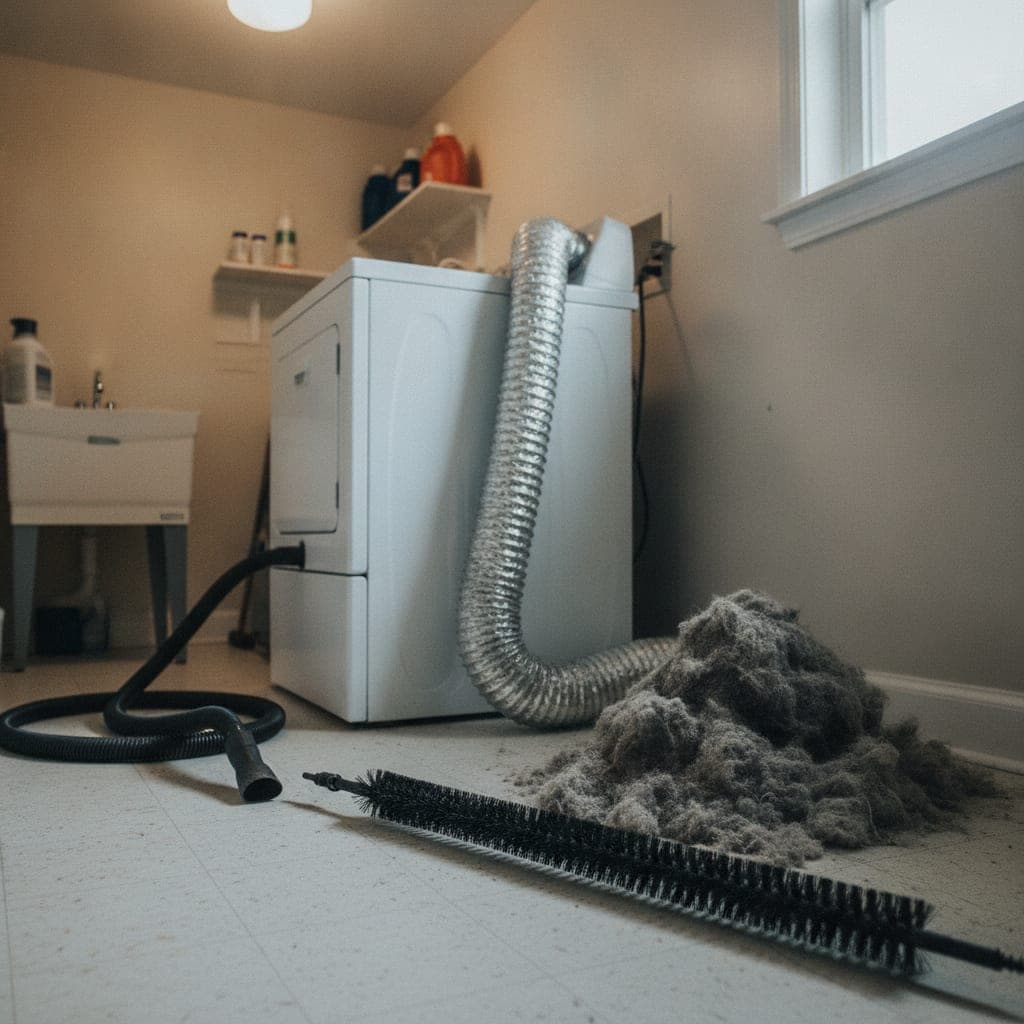
- Disconnect the duct and clean the two ends first
- Brush the full length of the duct, working from both ends
- Clear the exterior hood and check that the flap still moves
- Pro tips
- FAQ
What You'll Need
Step-by-Step Instructions
Work out which kind of duct you actually have first
Before anything else, go and look at what runs from the back of the dryer to the wall, because the answer changes how much of this job you can safely do. Rigid metal duct is smooth walled, holds its shape, and is the type professionals prefer because lint has nothing to catch on. Semi rigid metal is the flexible silver tubing that stays where you bend it. Both of those are fine. What you do not want is white vinyl or plastic foil duct, the cheap accordion kind that crushes easily and sags between the dryer and the wall. That material is no longer permitted for dryer exhaust in most residential codes because it traps lint in every ridge and it burns. If that is what you find, the cleaning is almost beside the point and the duct itself should be replaced with rigid or semi rigid metal, which is an inexpensive part and a job most people can manage with a screwdriver and foil tape. While you are back there, look at the shape of the run. A short straight duct that exits through the wall directly behind the dryer is the easy case. A long run that travels up through a ceiling, turns two or three times, and exits at the roof is the hard case, and it is also the one that clogs fastest, because every elbow is a place lint slows down and settles. Count the turns and measure roughly how far it goes. If the run is longer than about 25 feet, or has more than two elbows, you are at the point where a brush kit may not reach the whole length and a professional with a powered rotary system is the better call.
Read the warning signs before they turn into a problem
A dryer vent rarely fails suddenly. It tells you for weeks first, and the signals are easy to mistake for the appliance getting old. The clearest one is drying time. If a normal load used to finish in 45 minutes and now needs two cycles, the machine is not weak, it is choking. Moist air that cannot get out condenses and comes back, so the clothes stay damp no matter how long the drum turns. Along with that, the clothes often come out unusually hot to the touch, and the outside of the dryer and the laundry room itself get warmer than they used to. Heat that should be leaving the house through the duct is staying in the room instead. Go outside and find the exterior vent hood while a load is running. You should feel a strong steady push of warm air. A weak trickle, or a flap that barely lifts, means the airflow is restricted somewhere along the run. Look at the hood itself for lint packed around the louvers, and for a bird nest, which is more common than people expect because a warm sheltered tube is attractive real estate. Inside, a burning or musty smell during a cycle deserves immediate attention rather than a note to deal with it later. Burning means lint is sitting somewhere hot. Musty usually means moisture is condensing inside the duct, which invites mold and also tells you the air is not moving.
Unplug, shut off the gas, and pull the dryer out
Start by cutting the power. For an electric dryer that means unplugging it from the wall, not just switching it off at the control panel. For a gas dryer there is a second step: find the shutoff valve on the gas line behind the machine and turn the handle so it sits across the pipe rather than along it. If you are not confident identifying that valve, this is the reasonable place to stop and call someone, because a disturbed gas connection is a different category of risk from a dusty duct. Dryers are heavier and more awkward than they look and the flooring behind them is often the original, unprotected surface. Walk the machine out slowly, alternating corners, rather than dragging it, and if the floor is vinyl or finished wood, slide a piece of cardboard or a furniture slider underneath first. Pull it out far enough to work comfortably behind it, usually two or three feet, and watch that you do not stretch the gas line or kink the duct as it comes. Once it is clear, take a photo of how the duct connects before you take anything apart. You will be grateful for that photo when you are trying to remember which way the clamp faced.
Disconnect the duct and clean the two ends first
The duct is usually held to the dryer outlet with a spring clamp you squeeze with pliers, or a worm gear clamp you loosen with a screwdriver or nut driver, or in the worst case a wrap of duct tape somebody added years ago. Loosen it, ease the duct off the dryer collar, and do the same where it meets the wall fitting. Expect a mess at this point, because the heaviest accumulation is almost always right at these two joints where the air changes direction. Have a trash bag open and ready rather than discovering you need one with both hands full of lint. Clear the loose material out of the dryer outlet by hand and with a vacuum crevice tool, then do the same at the wall opening. What comes out of these two ends is frequently the bulk of the whole job. Take a moment to look inside the dryer outlet with a flashlight. If you can see a thick grey felt lining the walls of the collar rather than loose fluff, that is compacted lint and it needs to be scraped rather than vacuumed, which an old toothbrush or a plastic scraper will do without gouging the metal. [ADD ORIGINAL PHOTO: Show what came out of the duct connection at the dryer, ideally next to something for scale]
Brush the full length of the duct, working from both ends
This is the part a vacuum alone cannot do. A shop vacuum at the wall opening pulls out what is loose near the mouth and leaves the rest, because the lint that matters is stuck to the duct walls along the run. What moves it is mechanical contact along the whole length, which is what a long flexible dryer vent brush is built for. Most kits are a round bristle head on threaded fiberglass rods that screw together, so you add a rod at a time and feed the brush further in. Work from the wall opening inward first. Push the brush in as far as one rod reaches, twist it a few turns in the direction the rods thread together rather than against it, then add the next rod and continue. Twisting the wrong way unscrews the rods and leaves the brush head stranded inside the duct, which turns a cleaning job into a retrieval job. Pull the brush back out slowly every few rods and clear the lint off it rather than pushing an ever larger plug of material ahead of you. Then go outside and repeat the process from the exterior hood inward. Meeting in the middle from both directions is what gets the full run, and it also means neither push has to travel the whole distance. If your kit came with a vacuum attachment that lets the brush and the suction work at the same time, use it, because catching the lint as it comes loose is much tidier than chasing it afterward. [ADD TEST RESULT: Note how many rods it took to reach the far end, and roughly how much lint came out]
Clear the exterior hood and check that the flap still moves
The outside end of the run does more than let air out. The hood has a flap or a set of louvers whose job is to open under airflow and close when the dryer stops, keeping weather and animals out. Lint packs around that flap and eventually glues it partly shut, at which point the duct is restricted even when everything upstream is clean. Take the cover off if it unscrews, and clear the lint out of the housing by hand and with the vacuum. Work the flap open and closed a few times to confirm it swings freely rather than sticking. Look carefully for nesting material, which will be twigs, dry grass, or feathers rather than grey lint, and check that the screen some hoods have is intact but not clogged. One thing worth knowing: a fine mesh screen over a dryer vent is a mistake even though it looks sensible, because lint bridges across the mesh and blocks it within weeks. If yours has one and it is not required in your area, removing it usually improves things. If the hood is cracked, warped, or the flap no longer sits flush when closed, replace it. They are a low cost part and a hood that does not seal is an open invitation to birds and rodents.
Do not skip the lint trap housing, which is a separate job
Cleaning the screen after every load is not the same as cleaning the slot the screen lives in, and almost nobody does the second one. Lint gets past the screen, particularly if it is wet lint or if the screen has a film on it, and it accumulates down inside the housing where you cannot see it. Pull the screen right out and shine a flashlight into the empty slot. A dryer lint brush, which is a long skinny bristle brush made for exactly this, goes down into the slot and sweeps the sides. A vacuum crevice tool follows to take out what the brush loosened. While the screen is out, hold it under running water. If the water pools on the mesh instead of running straight through, there is an invisible film on it, usually from dryer sheets or fabric softener building up over time. That film restricts airflow just as effectively as lint does. Scrub it with a little dish soap and a soft brush, rinse it properly, and let it dry completely before it goes back. Doing this every six months keeps the screen actually permeable rather than just looking clean.
Vacuum out the dryer's own interior, carefully
Lint does not only live in the duct. It collects inside the cabinet of the dryer, around the drum and near the heating element, and that is the lint sitting closest to the heat source. On many models the back panel comes off with a nut driver and a handful of screws, which gives access to the blower housing and the area around the element. If you are comfortable doing that, vacuum gently with a brush attachment and do not poke at wiring, sensors, or the moisture strips inside the drum. If opening the cabinet is beyond where you want to go, you can still reach a useful amount through the lint trap slot with a narrow crevice tool and through the vent outlet at the back, and that is better than nothing. Be honest with yourself about the line here. Anything involving disconnecting wires, removing the drum, or working on a gas burner assembly belongs with an appliance technician, and the cost of a service call is small next to the cost of getting it wrong. For most people the sensible split is: duct, hood, lint housing, and a light vacuum of what is reachable, then a professional every few years for the deeper internals.
Reconnect properly, and never use duct tape on a duct
Put the run back together in the order you took it apart, using that photo you took. The duct should slide fully onto both collars, not just perch on the lip, and the clamp should sit over the overlap and be tightened enough that the duct cannot be pulled off by hand. Seal the joints with foil tape, the metal backed kind sold for HVAC work, not cloth duct tape. This trips people up because of the name, but ordinary duct tape dries out in the heat of a dryer duct, the adhesive fails, and the joint comes loose, sometimes within a year. Foil tape is rated for the temperature and stays put. When you push the dryer back, the enemy is the duct getting crushed or kinked behind it. A dryer shoved flat against the wall with a flexible duct folded double behind it has a restriction you just created while trying to fix one. Leave four to six inches of clearance, or fit a periscope style duct, which is a flattened rigid fitting designed to let the machine sit close to the wall without pinching anything. The duct should take the shortest, straightest path it can, with as few turns and as little sag as possible. Restore the power, and for a gas dryer turn the valve back so the handle runs along the pipe.
Confirm it worked before you call it done
Run the dryer on a normal heat cycle with a small damp load and then go outside to the hood. You want a strong, steady stream of warm air that clearly pushes the flap open, noticeably better than whatever you felt before you started. Put your hand near the joints you reconnected and feel for air escaping, which would mean a clamp is loose or the tape did not seal. For a gas dryer, this is also the moment to check the gas connection. Brush a little soapy water onto the fitting you turned and watch for bubbles. Bubbles mean a leak, and the correct response is to shut the valve off again and call the gas company or a technician rather than tightening it yourself and hoping. Back inside, time a normal load. The honest measure of whether this worked is whether a load that needed two cycles now finishes in one. If drying time has not improved at all, the restriction is somewhere you did not reach, which usually means a long run with turns that the brush did not fully clear, a crushed section inside a wall or ceiling, or a problem inside the machine itself. That is the point to bring in someone with a powered rotary brush and a camera rather than repeating the same pass. Worth saving the lint you pulled out, at least the first time. Spread it on newspaper and look at it. Loose grey fluff means you caught the duct early. Dense compacted mats, the kind that hold their shape when you pick them up, mean it had been building for years and the interval you were working to was too long. Pet hair woven through it tells you the same thing, and so does anything damp, which means moisture was condensing in the run and the duct may sag somewhere along its length. [ADD TEST RESULT: Record drying time for the same load before and after, so the difference is measured rather than estimated]
If your dryer has no vent at all
Heat pump and condenser dryers are increasingly common, particularly in apartments and in Europe, and none of the above applies to them because there is no duct. That does not mean there is nothing to clean. It means the lint goes somewhere else. These machines have a lint screen like any other dryer, but they also have a second finer filter, usually behind a flap at the bottom of the door opening or behind a small access panel below the drum. That secondary filter catches what the main screen misses and it clogs far faster than most owners realise, often within a couple of weeks of regular use. Behind it sits a condenser or heat exchanger, a block of tightly spaced metal fins that the warm moist air passes through. Fine lint packs into those fins, and because the gaps are narrow, it does not take much to choke the airflow. On many models the condenser block lifts out after releasing two catches, and it can be rinsed under a tap until the water runs clear through it, then left to drain fully before it goes back. On sealed heat pump models the exchanger is not removable and the maintenance is limited to the filters, which makes keeping those filters clean the whole job. There is also a water reservoir, since the moisture has to go somewhere, and it either needs emptying after every few loads or draining through a hose to a standpipe. The symptoms of neglect look the same as a blocked duct: drying times climb, the machine runs hot, and some models throw an error or simply stop collecting water. Filters after every load, the secondary filter weekly, and the condenser monthly is a reasonable rhythm for a machine in regular use.
How often this actually needs doing
The standard advice is once a year, and for a lot of households that is about right, but the interval really depends on how much the dryer runs and what shape the duct is in. A single person doing two loads a week through a short straight metal duct can comfortably stretch to eighteen months or two years. A household of five doing daily laundry through a long run with two elbows should be looking at every six months, and will probably find enough lint each time to justify it. Three things shorten the interval regardless of household size. A long or twisty duct traps more, because every turn is a settling point. Pets shed hair that goes through the wash and into the dryer, and pet hair packs into lint far more densely than fabric fibers alone. And heavy use of dryer sheets leaves the film on the lint screen that pushes more material past it into the housing and the duct. Rather than working to a calendar, the better habit is to notice drying time. The moment a familiar load starts needing more than one cycle, that is the duct telling you it is time, and it is a more reliable signal than any interval somebody else picked for you.
Pro Tips
- ✓Take a photo of the duct connection before you disconnect anything. Reassembly is much easier when you can see how the clamp was oriented.
- ✓Twist the brush rods in the direction they thread together as you push. Twisting the other way unscrews them and leaves the head stranded in the duct.
- ✓Foil tape on duct joints, never cloth duct tape. The adhesive on ordinary duct tape fails in the heat and the joint quietly comes apart.
- ✓If the water pools on your lint screen instead of running through, there is a fabric softener film on it. Wash it with dish soap and a soft brush.
- ✓Leave four to six inches behind the dryer, or fit a periscope duct. Shoving the machine flat against the wall crushes the duct you just cleaned.
Frequently Asked Questions
Can I just use a leaf blower or a shop vacuum instead of a brush?
A shop vacuum at the wall opening pulls out what is already loose near the mouth, which is useful but incomplete, because the lint that restricts airflow is stuck to the duct walls further along. A leaf blower is a popular shortcut and it does shift material, but it blows the lint deeper if you use it from the wrong end, and it can blow lint out of the joints into the room. The reliable version is mechanical contact along the length with a brush, with a vacuum catching what comes loose.
How much does it cost to have this done professionally?
Prices vary a lot by region and by how difficult the run is, so it is worth getting two quotes rather than trusting a single number. A short straightforward duct is at the cheap end, and a long roof terminated run costs more because it takes longer and may need roof access. [ADD TEST RESULT: If you get quotes, note the range in your area so readers have a real figure rather than a guess.]
My dryer is in an apartment and I cannot get behind it. What can I do?
Clean what you can reach, which is the lint screen, the housing slot below it, and the exterior hood if you have access to it. Then tell the building manager, because in most rentals the duct inside the wall is the landlord's responsibility and it very likely serves other units too. A dryer that takes two cycles in an apartment is worth reporting in writing rather than living with, since the duct is shared infrastructure.
Is a longer drying time always the duct?
No, though it is the most common cause and the cheapest to rule out. A failing heating element, a worn thermostat, or a moisture sensor coated in fabric softener residue all produce similar symptoms. The useful test is the one at the exterior hood: if the airflow outside is strong and drying is still slow, the restriction is not the duct and the problem is inside the machine.
Do dryer balls or skipping fabric softener actually help?
Skipping liquid fabric softener and dryer sheets does reduce the film that builds up on the lint screen, and a permeable screen lets less material past it into the housing and duct. Wool dryer balls are a common substitute and they do not leave that residue. Whether they shorten drying time meaningfully is less clear cut and depends on load size, so treat the airflow benefit as the real reason rather than the speed claim.
How this guide was made
This laundry kitchen guide was researched, written, edited, and published by Fredler Pierre-Louis. The 12 steps below are built around A flexible dryer vent brush kit with screw together rods, A shop vacuum, or a household vacuum with a crevice tool and A narrow lint trap brush, and the quantities and dwell times come from published cleaning-chemistry and manufacturer guidance for those materials, not from a controlled trial we ran ourselves. Where a popular version of this hack does not work, or is risky on a particular surface, this 17 min guide says so.
- Checked against manufacturer and materials guidance for the surfaces named.
- Reviewed by a person for chemical safety and surface compatibility before publication.
- Written to explain why a method works, not just to list steps.
- Corrected whenever a reader reports an error or an edge case we missed.
Read our full editorial policy or learn more about the team behind TryCleaningHacks.
Safety Notes
- ⚠Unplug an electric dryer at the wall before working behind it. For a gas dryer, also close the shutoff valve on the gas line.
- ⚠If you are not confident identifying the gas shutoff, stop and call a technician. A disturbed gas connection is a different order of risk from a dusty duct.
- ⚠After reconnecting a gas dryer, brush soapy water on the fitting and watch for bubbles. If any appear, close the valve and call the gas company.
- ⚠White vinyl or plastic foil ducting is not permitted for dryer exhaust in most residential codes because it traps lint and burns. Replace it with rigid or semi rigid metal rather than cleaning it.
- ⚠Do not fit a fine mesh screen over a dryer vent hood. Lint bridges the mesh and blocks it within weeks, which is the opposite of what it is meant to do.
- ⚠Anything involving removing the drum, disconnecting wiring, or working on a gas burner assembly belongs with an appliance technician.
You might also like

How to Get Rid of Kitchen Sink Odor (10 Easy Fixes)
My kitchen sink smelled no matter how often I cleaned it until I figured out what I was actually missing. The fix wasn't a new product; it was addressing three different sources at once. Here's what finally worked and the one mistake that kept the smell coming back.

How to Clean Stainless Steel Appliances Without Streaks (9 Methods)
Stainless steel appliances streak for one reason that almost every cleaning attempt gets wrong, and it has nothing to do with which product you buy. Stainless has a directional grain, and wiping across it drags residue into the grooves instead of out of them. Here are nine methods ranked for built-up fingerprints and kitchen grease, and the technique that decides whether any of them work.
How to Clean and Deodorize a Garbage Disposal (10 Easy Methods)
A garbage disposal that smells despite regular rinsing is almost never smelling from the grinding chamber, which is why citrus peels and vinegar never fix it. The odor comes from the underside of the rubber splash guard, a surface most people have never lifted or looked at, where a food film builds up out of reach of the water. Here is how to clean it properly and the routine that keeps it odor-neutral.